This document outlines the steps to configure the flow for transferring calls to an external agent using a custom phone number in both XO 10 and XO 11 (UXO) platforms.
Configuration in XO 10:
There are two methods in which you can configure the flow:
- Directly configuring in UI:
- Open SmartAssist.
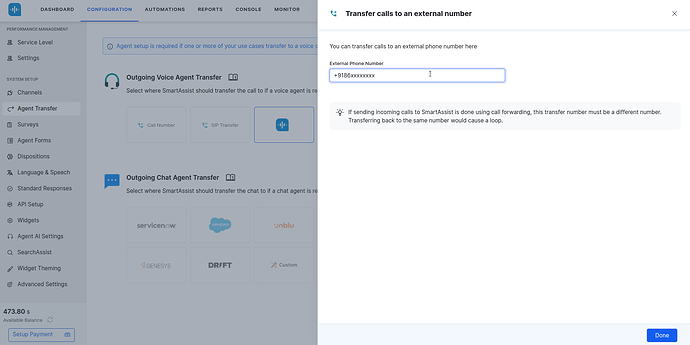
- Navigate to Configuration → System Setup (on the left nav) → Agent Transfer → under Outgoing Voice Agent Transfer.
- Click on Call Number.
- In External Phone Number field → Add the phone number in
+(country-code)(9xxxxxxxxx).
- Click on Done.
- Using a voice utils script:
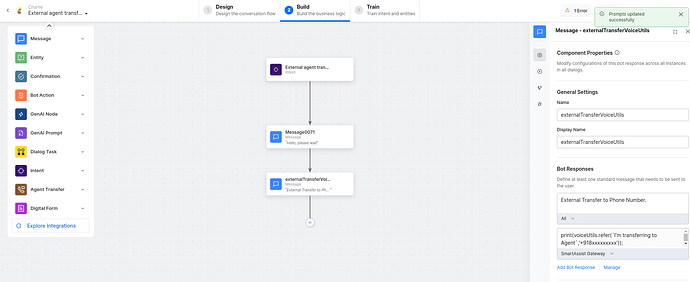
- Create a dialog / open a dialog for agent transfer.
- Add a message node → Under bot responses → Add a prompt → Select SmartAssist Gateway channel.
- Change mode to Custom Javascript and add the below script.
print(voiceUtils.refer('<Add_Your_Message_Here>', '<+(country-code)(xxxxxxxxxx)>'));
Configuration in XO 11:
There are two methods in which you can configure the flow:
1. Directly configuring in UI:
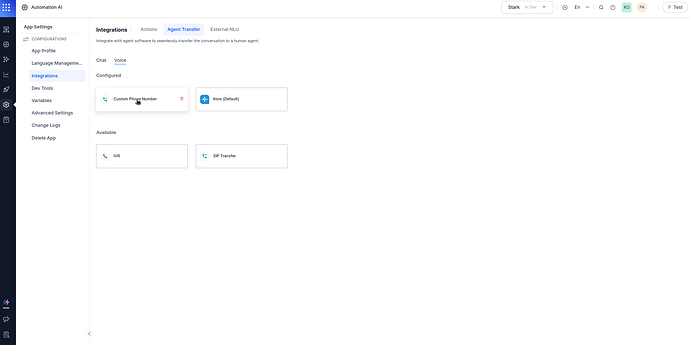
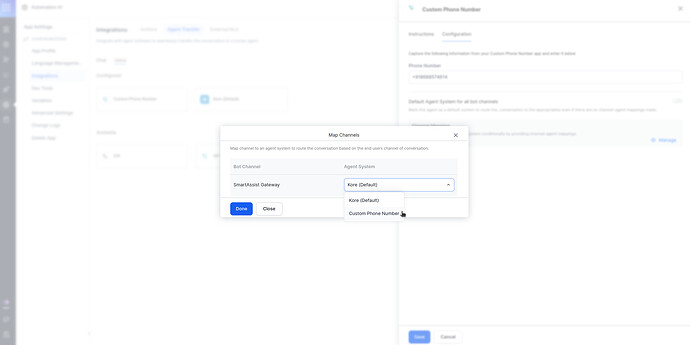
- Navigate to App → App Settings → Integrations → Agent Transfer → Voice.
- Click on Custom Phone Number.
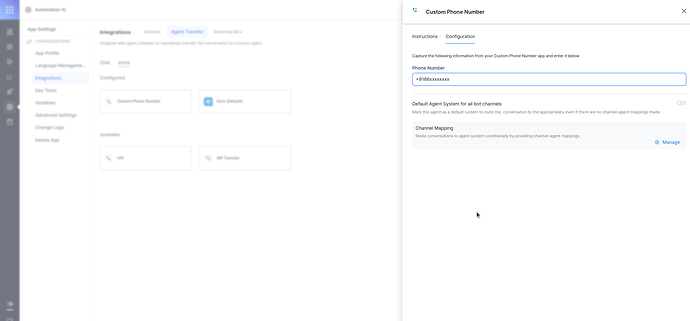
- Configurations → Add the phone number in
+(country-code)(9xxxxxxxxx).
- On Channel Mapping and click on Manage from the dropdown of Agent System of SmartAssist Gateway select Custom Phone Number and click on Done.
2. Using a voice utils script:
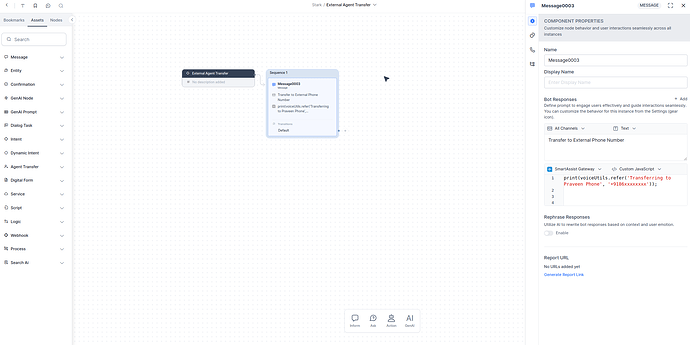
- Create a dialog / open a dialog for agent transfer.
- Add a message node → Under bot responses → Add a prompt → Select SmartAssist Gateway channel.
- Change mode to Custom Javascript and add the below script.
print(voiceUtils.refer('<Add_Your_Message_Here>', '<+(country-code)(xxxxxxxxxx)>'));
Using these methods in XO 10 or XO 11 (UXO), we can configure the external agent transfer to a custom phone number.
