One of the best features of chatbots is the capability of recognizing and translating voice-based commands. It is about the simplicity of speech-to-text (STT) and text-to-speech (TTS)based communications.
Kore.ai’s Bots Platform includes an automatic speech recognition (ASR) engine to enable voice-driven interactions between bots and users. It also allows your chatbot to communicate outside of traditional text interfaces or messaging applications
This extends your chatbot’s capability to understand voice commands in channels like a website or mobile app, where speech-to-text functionality isn’t typica.
It is one’s option to either use Kore.ai’s ASR engine or Google speech engine. In order to use Google speech engine one needs a valid Google speech API key. (Place it in ‘web-kore-sdk/libs/speech/key.js’)
allowGoogleSpeech will use Google cloud service api. Google speech key is required for all browsers except chrome.

Here are the implementation steps on how to enable TTS and STT in Web-sdk
Step 1: Download the lastest web-kore-sdk from Github GitHub - Koredotcom/web-kore-sdk: web client sdk code and please refer to https://developer.kore.ai/docs/bots/sdks/kore-ai-web-sdk-tutorial/
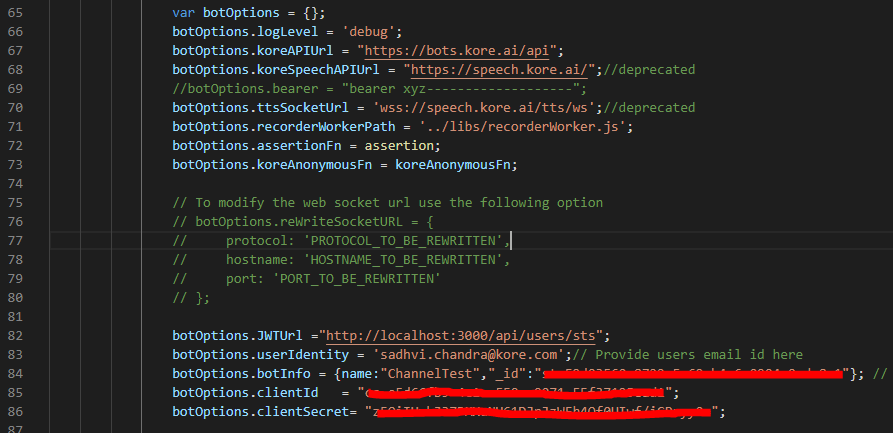
Step 2: Under the file web-kore-sdk-master > UI > index.html
a. Uncomment the lines for Google Speech.

b. Check the botoptions speech url and tts socket url as defined in the screenshot
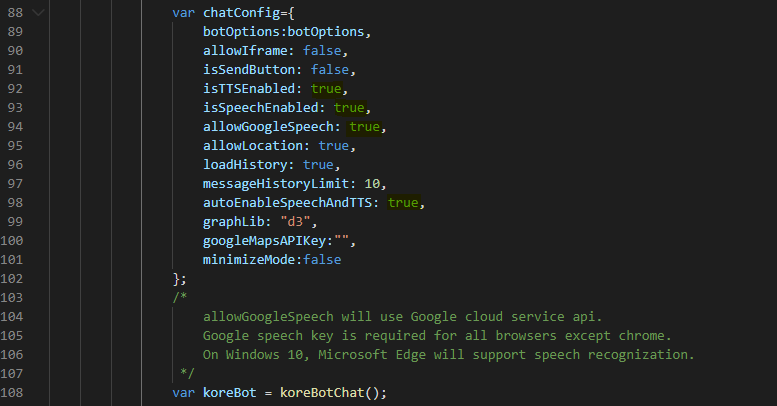
c. check the chatconfig options to be true for isTTSEnabled, isSpeechEnabled, allowGoogleSpeech and autoEnableSpeechAndTTS to be true.
Step 3: Add the generated Google Speech API key in the web-kore-sdk/libs/speech/key.js
For generation of the Google Speech API key please follow Quickstart: Create audio from text by using the command line | Cloud Text-to-Speech API | Google Cloud and クイックスタート: API を使用して音声を文字に変換する | Cloud Speech-to-Text Documentation | Google Cloud

Step 4: Under the file web-kore-sdk-master > UI-JAVASCRIPT > index.html
a. Check the url’s present under the botoptions to be the same as the one’s present in the screenshot.
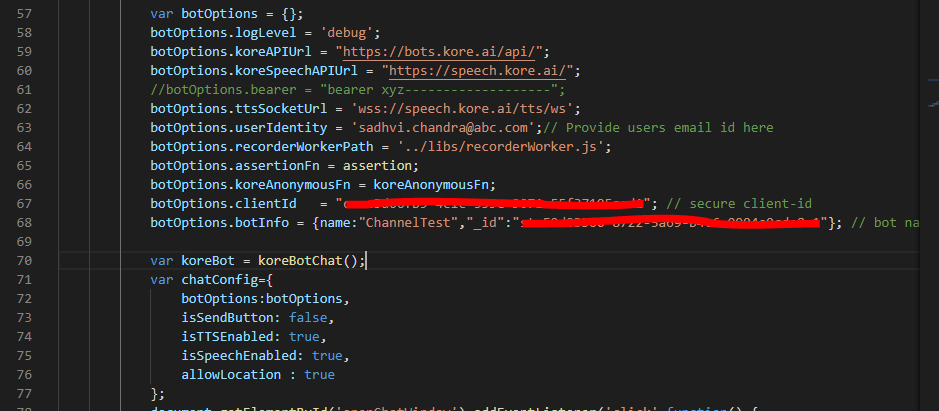
b. Check the isTTSEnabled and isSpeechEnabled under the chatconfig to be true
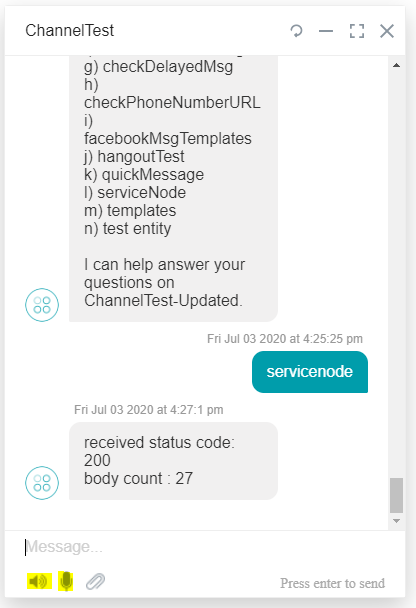
Step 5: Save all the files and open the index.js on any browser. You will be able to see the microphone (Speech to Text) and speaker (Text to Speech) option underneath of the chatbot.
On clicking on the microphone option, it will take the input from the speech given by the user.
Text to Speech will work when the speaker button highlighted in the screenshot is unmuted. It will take upto 30 seconds of time for the bot to start reading out the message.
To change the kore chatbot voice option (male to female), please refer to Change of voice(male to female) for chatbot
For Third party integration, refer to Can we integrate third party speech to text API