Hi,
Is there any way I can show list of values to user and then user can select multiple items from it?
Thanks,
Neha Sheikh
Hi,
Is there any way I can show list of values to user and then user can select multiple items from it?
Thanks,
Neha Sheikh
@nehamsheikh Yes, please configure the entity prompt to present the list of values using any template.
I have checked the message templates.
Message templates allow us to show list of items… But how to allow user to select multiple items from that list?
If you could provide sample it would help.
Thanks,
Neha Sheikh
Please try creating custom templates at the webSDK.
Refer to the below topic for more details:
It would be great if you could share sample.
In debugging through existing template implementation and then modifying it as per my requirement; I may miss out on something.
Can you please share sample template for allowing multiple item selection?
Thanks,
Neha Sheikh
Hi @nehamsheikh,
We are working on the sample.
We will provide you with the sample implementation shortly.
Regards,
Yoga Ramya.
Sure. Waiting for your reply.
Thanks,
Neha Sheikh
Any update on this?
Thanks,
Neha Sheikh
Were you able to check this?
Thanks,
Neha Sheikh
Hi,
Any update on this one?
Thanks,
Neha Sheikh
Hi Neha,
As mentioned to you, we will update the steps shortly.
We appreciate your patience.
Regards,
Yoga Ramya.
Still waiting. 
Thanks,
Neha Sheikh
I am still waiting 
Anything on this?
I have been waiting since a long time for this.
Expecting early help on this.
Thanks,
neha Sheikh
Hi @nehamsheikh,
We apologize for the delay and appreciate your patience.
Please find the below implementation steps to create a custom template:
We are giving an example of creating a copy of the existing button template as a custom template.
1- Create a task with a message node.
2- Add a web/mobile client response to the message node, navigate to the javascript tab in the response and add the following code:
var info = ["Custom Button1", "Custom Button2", "Custom Button3"];
var message = {
“type”: “template”,
“payload”: {
“template_type”: “customButton”,
“text”: “Custom Button Template (getDetails task))”,
“subText”: “Button Template Description”,
“buttons”: []
}
};
for (i = 0; i < info.length; i++) {
// if the button is to send back text to platform
var button = {
“type”: “postback”,
“title”: info[i],
“payload”: “payload”+(i+1)
};
/* Uncomment this if the button is to redirect to url
 var button = {
 "type":"web_url", // type can be "postback" if
 "url":"URL_TO_REDIRECT",
 "title":buttons[i]
 };
 */

message.payload.buttons.push(button);
}
print(JSON.stringify(message));
This is the same javascript which would be generated when you select the button template from the templates drop-down.
We will need to change the “template_type” name to customButton.
2- In the SDKApp folder, open the customTemplate.js file available in SDKApp/sdk/UI/custom/customTemplate.js
3- You can observe the sample code commented in the file. Uncomment the function customTemplate.prototype.renderMessage = function (msgData).
4- In function: customTemplate.prototype.renderMessage = function (msgData)
ensure that the template type name is changed to “customButton”
msgData.message[0].component.payload.template_type == “customButton”
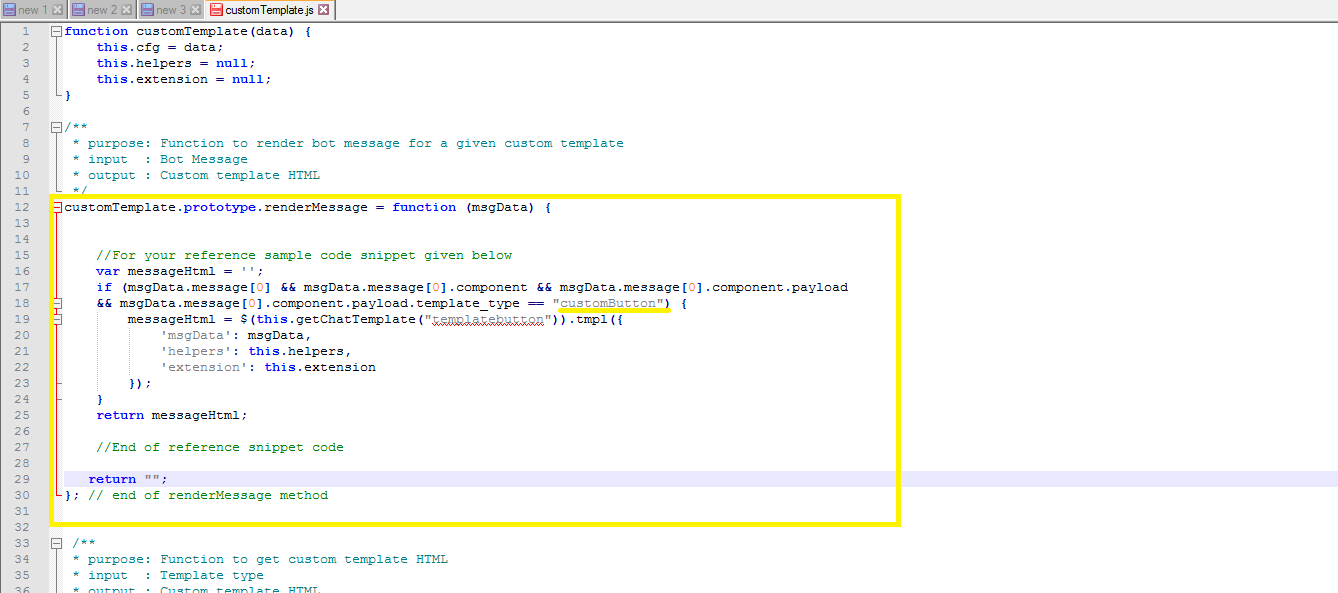
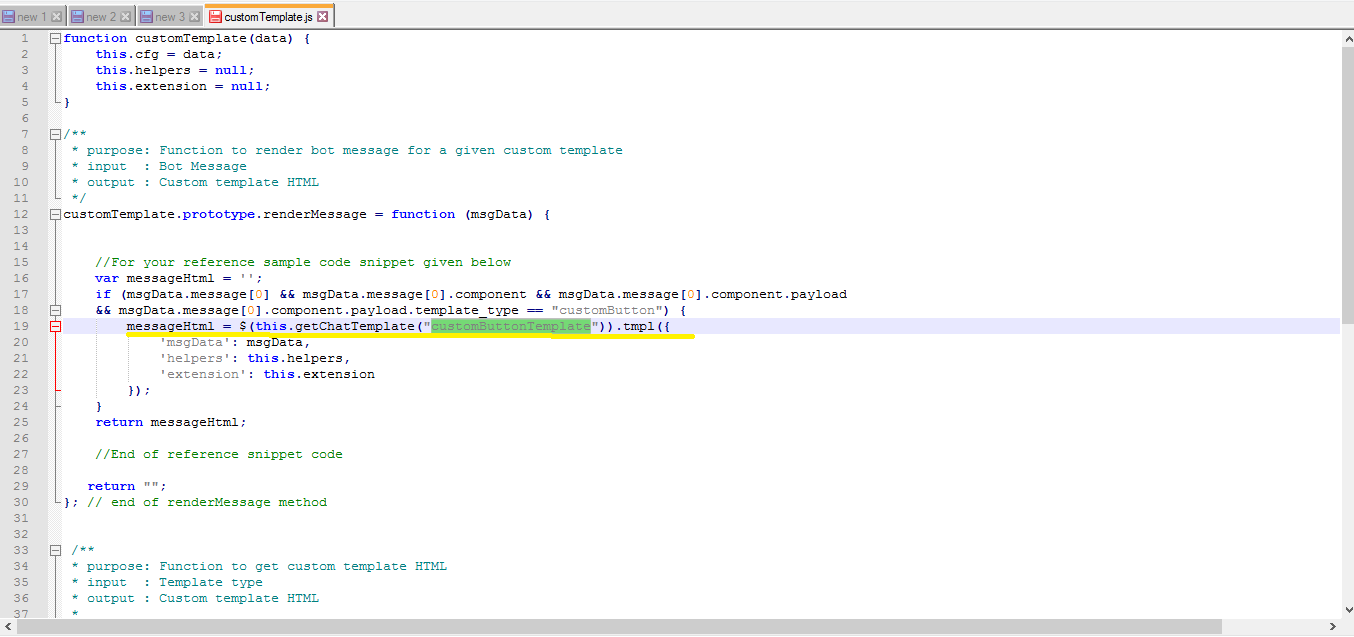
5- This function internally calls
this.getChatTemplate(“customButtonTemplate”) which actually returns the custom template. (Replace “templatebutton” with “customButtonTemplate” here.
6- Uncomment the function customTemplate.prototype.getChatTemplate = function(tempType) .
7- This function has the template definition in the variable customButtonTemplate. The template definition here is the jquery code in this case which creates the template structure. (If you are writing your custom template then, the structural code goes here).
8- Replace the var templateButton with the customButtonTemplate. Make the changes as per the image.
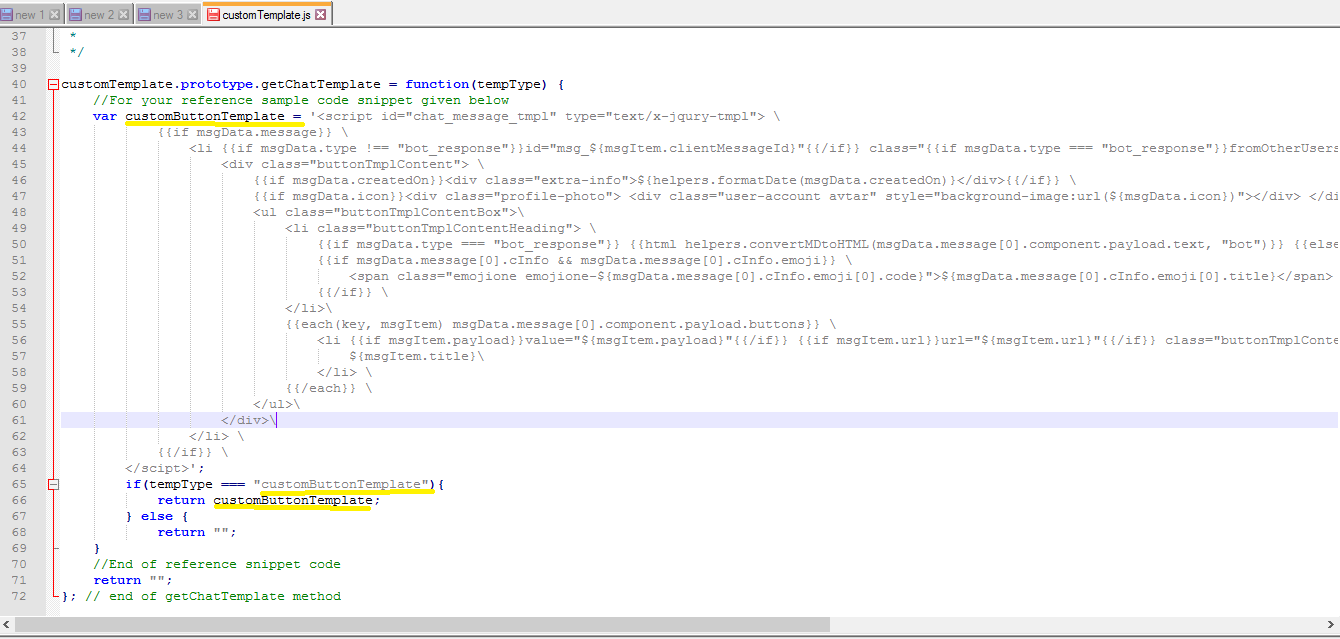
This would return the variable that has the template.
So, implementing as above would invoke the customButtonTemplate when the message node is executed.
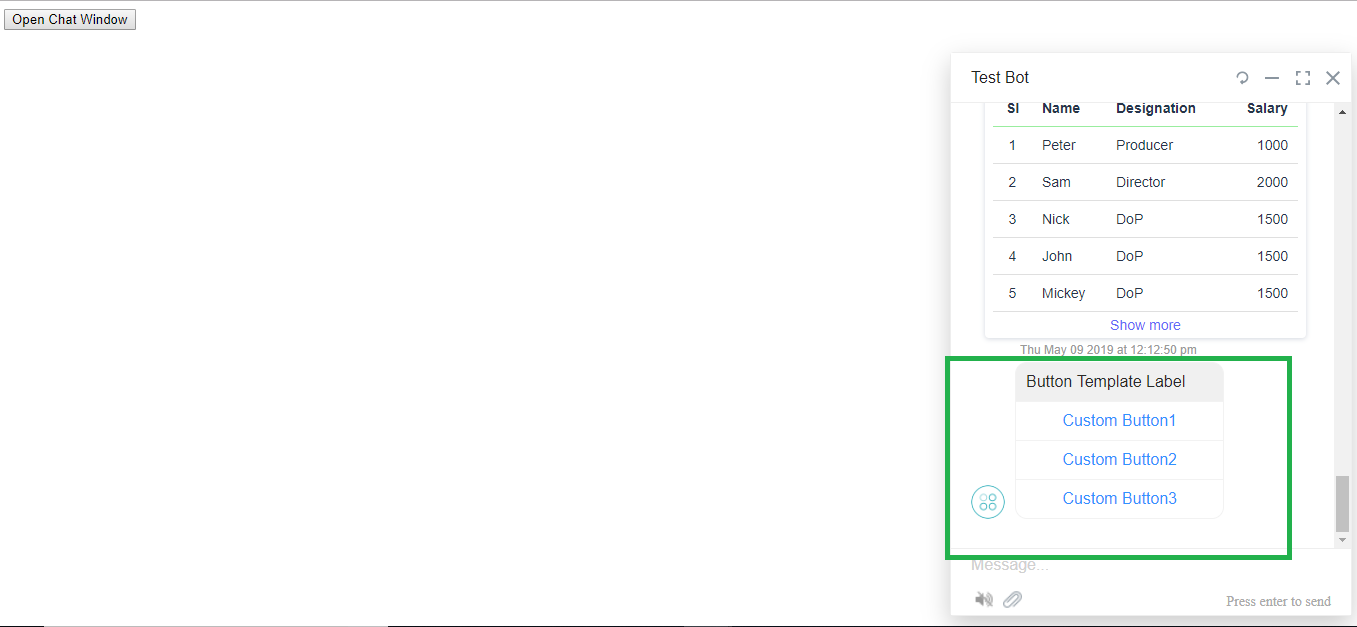
Summarizing the above, to create a custom template:
Hope this helps!!
Please accept our humble apologies for the delay. We were just trying to get a better work.
Regards,
Yoga Ramya.
Hi @yogaramya.mendu,
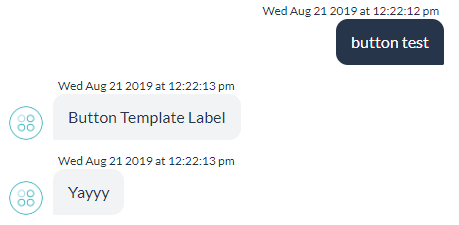
I have followed the steps listed in the URL link you provided, download the web client SDK, and published my bot. Unfortunately, I am unable to see the buttons under the button label, as shown below. I am getting the following error: “The bot is disabled via Web/Mobile Client. You can still talk to the bot via Web/Mobile Client.” What is this message referring to and how do I troubleshoot my button issue. Thanks for your response.

Hi @tacarey,
Please let us know if the button template is working as expected in the bot builder chat window.
Also, this error occurs when there is any issue in the button template script.
We request you to kindly check the script and let us know.
Regards,
Yoga Ramya.
Hi @yogaramya.mendu,
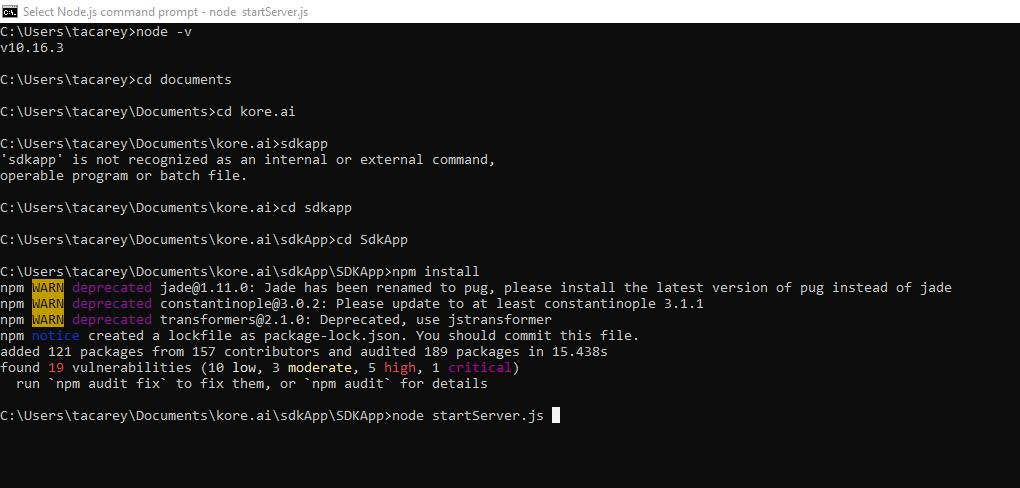
I have published the bot and tried to configure a web client SDK to see the multiple selection button. I am getting the below error. I used the steps aligned here: https://developer.kore.ai/docs/bots/sdks/kore-ai-web-sdk-tutorial/
Thank you for your thoughts.
Hi @tacarey,
After executing the command node startServer.js, please open localhost:3000 in the web browser >> new tab as mentioned in the documentation.
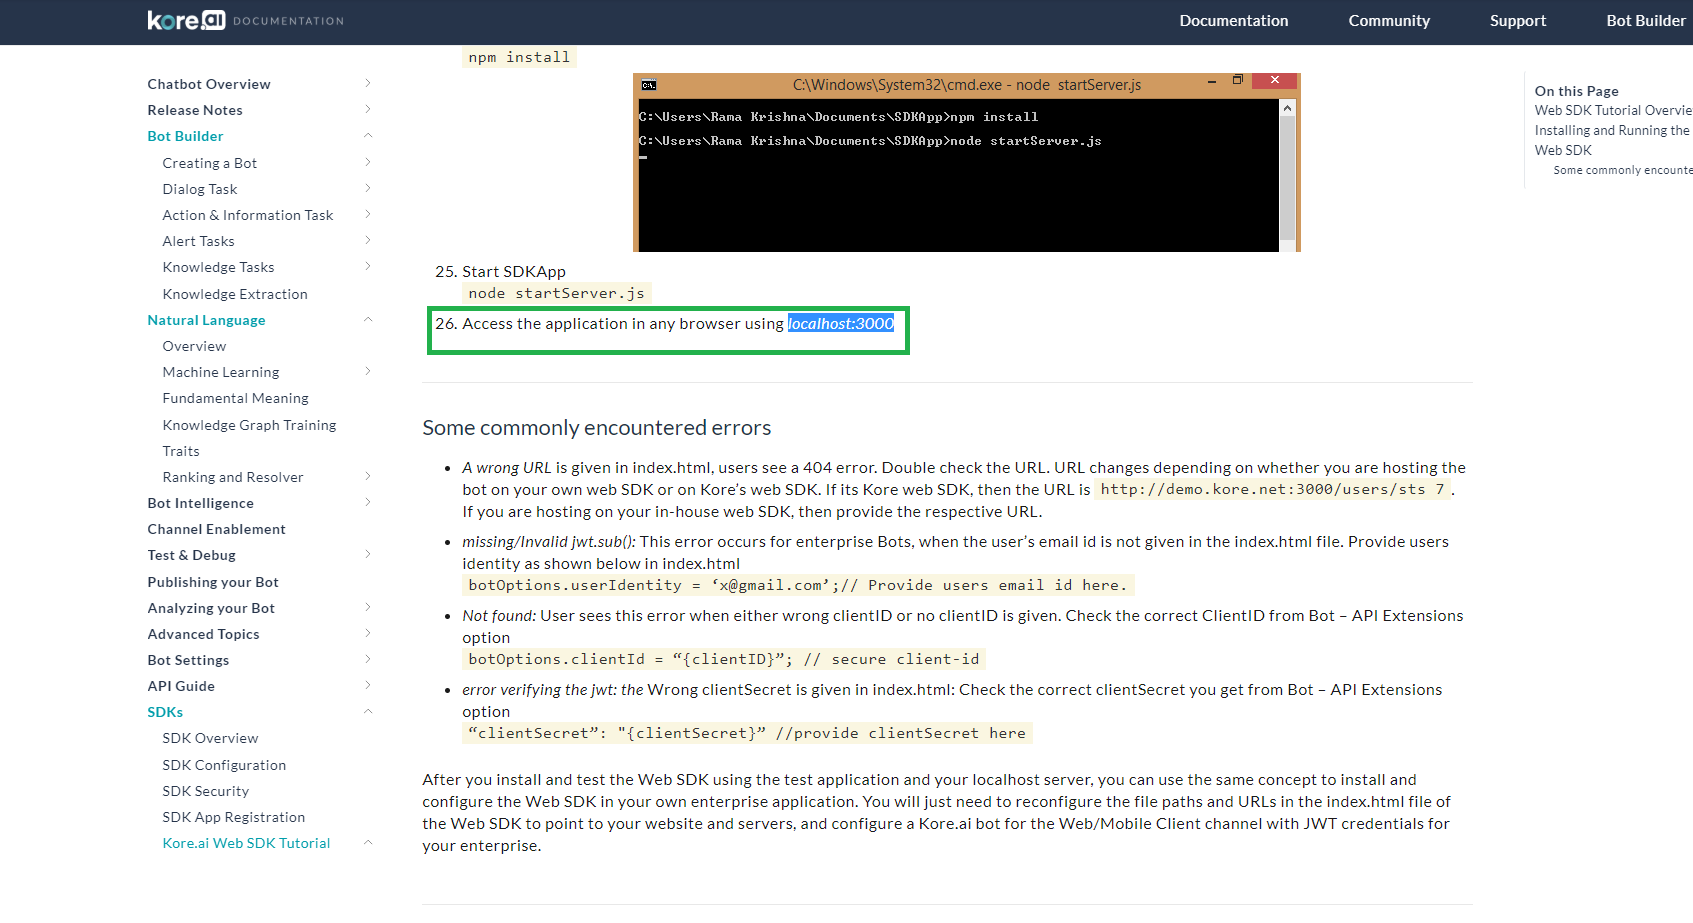
In the web browser, if you are not observing the chat window in localhost:3000/UI, then let us know.
Also, kindly let us know if you need any further clarification on the above.
Regards,
Yoga Ramya.