This article provides a step-by-step guide on how to grant Kore Support access to your Kore.ai V11 application for troubleshooting purposes.
Granting Access
-
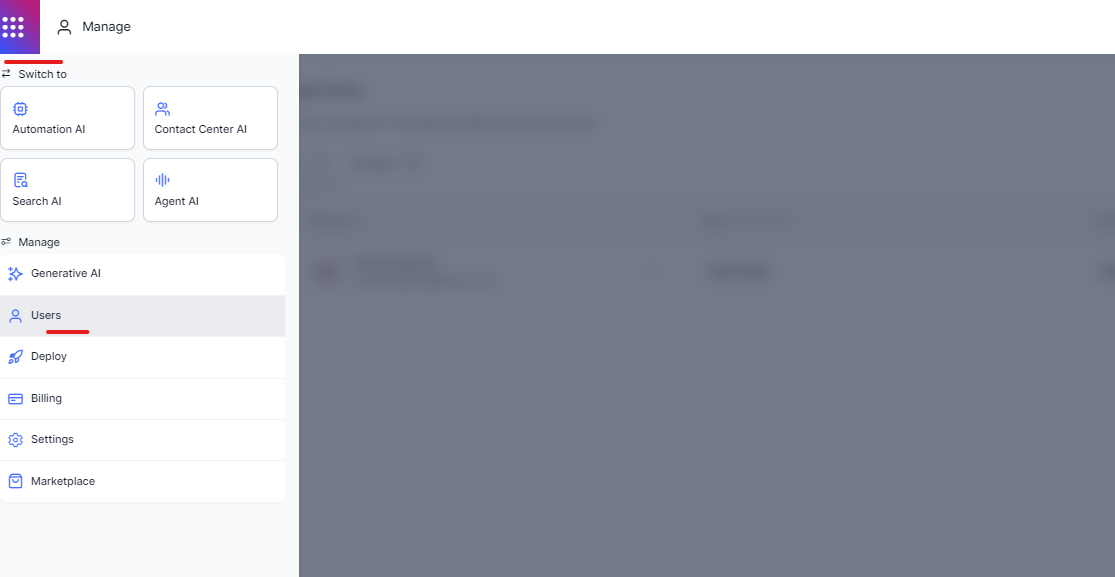
Navigate to the Product Switcher and under Manage tab of your Kore.ai application.
-
From the left-hand menu, select Users.
-
Click on the Invite Users blue button.
-
A pop-up window will appear. Enter the following information:
- Email: Enter the email address of the Kore Support team member you want to grant access to (koresupport@kore.com).
- First Name: Enter the first name of the Kore Support team member.
- Last Name: Enter the last name of the Kore Support team member (Optional).
- Assign a Role: From the dropdown menu, select the appropriate role for the Kore Support team member.
- App Developer
- App Tester
- Agent
- Supervisor
- Once you have entered all of the required information, click the Invite button.
Verification
An invitation will be sent to the email address you provided. Once the Kore Support team member accepts the invitation, they will have the specified level of access to your application.
Additional Notes
- It is recommended to grant Kore Support the least amount of access necessary to troubleshoot the issue.
- You can revoke access to your application at any time by navigating to the Users section and removing the user.
I hope this article is helpful! If you have any questions, please don’t hesitate to contact Kore Support.