Step 1 : Creating a App
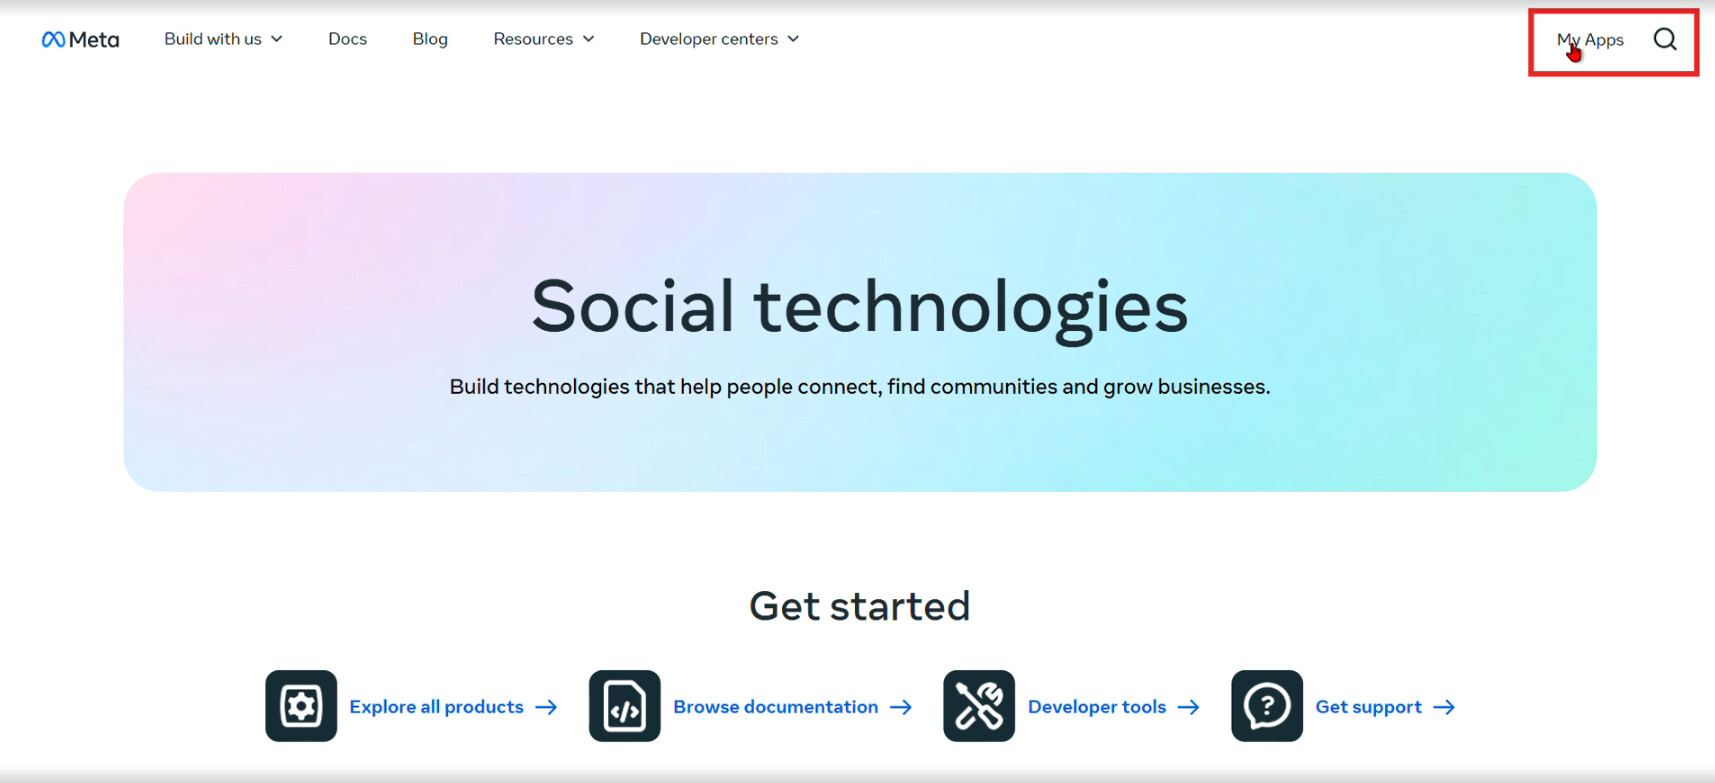
Open Meta Developer Portal and go to My Apps after logging in.
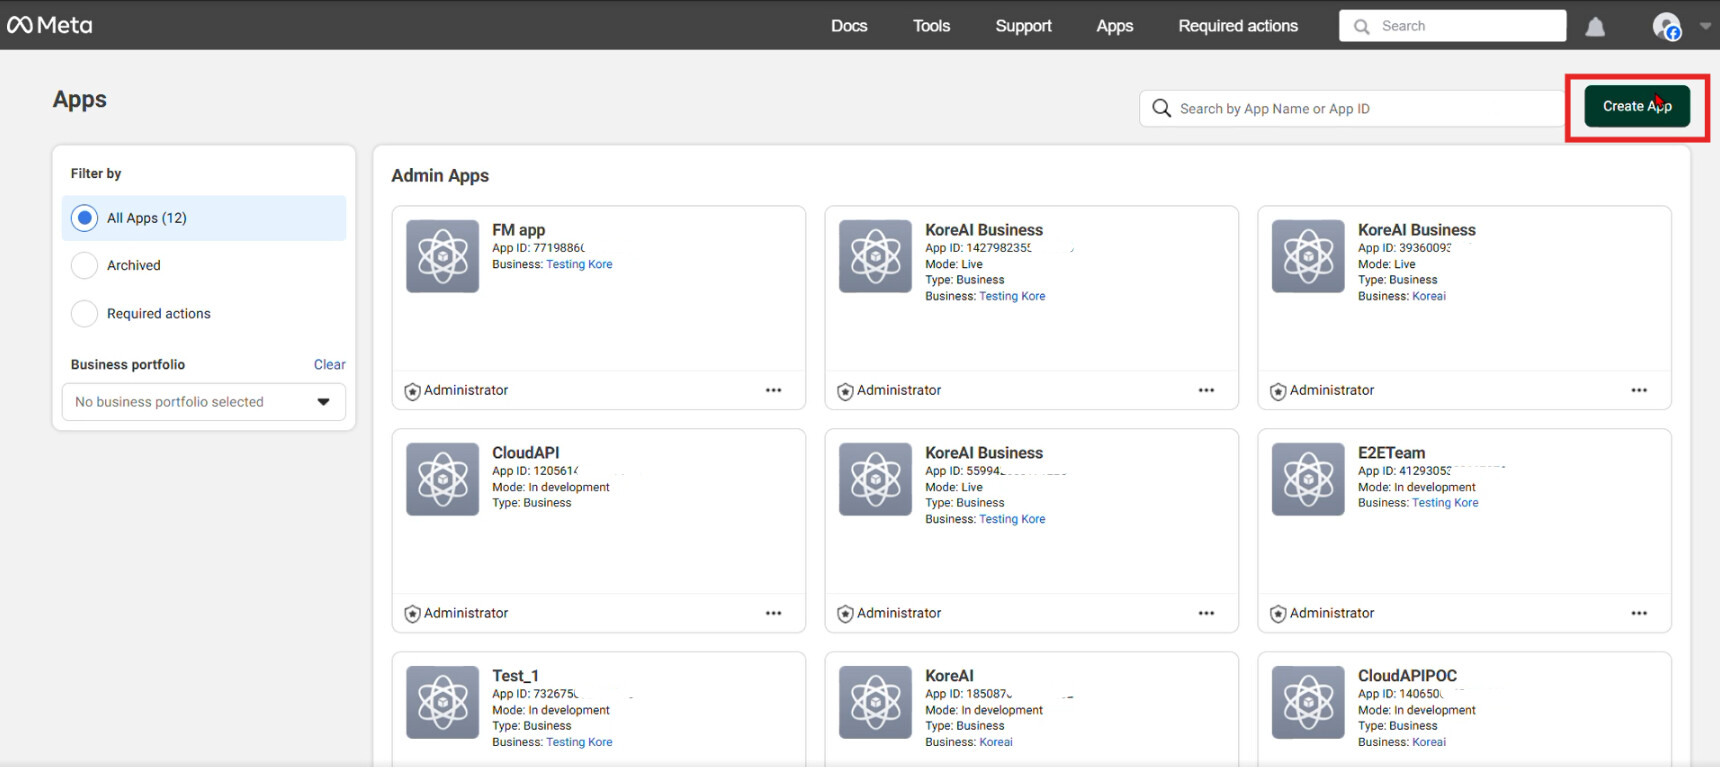
Click Create App.
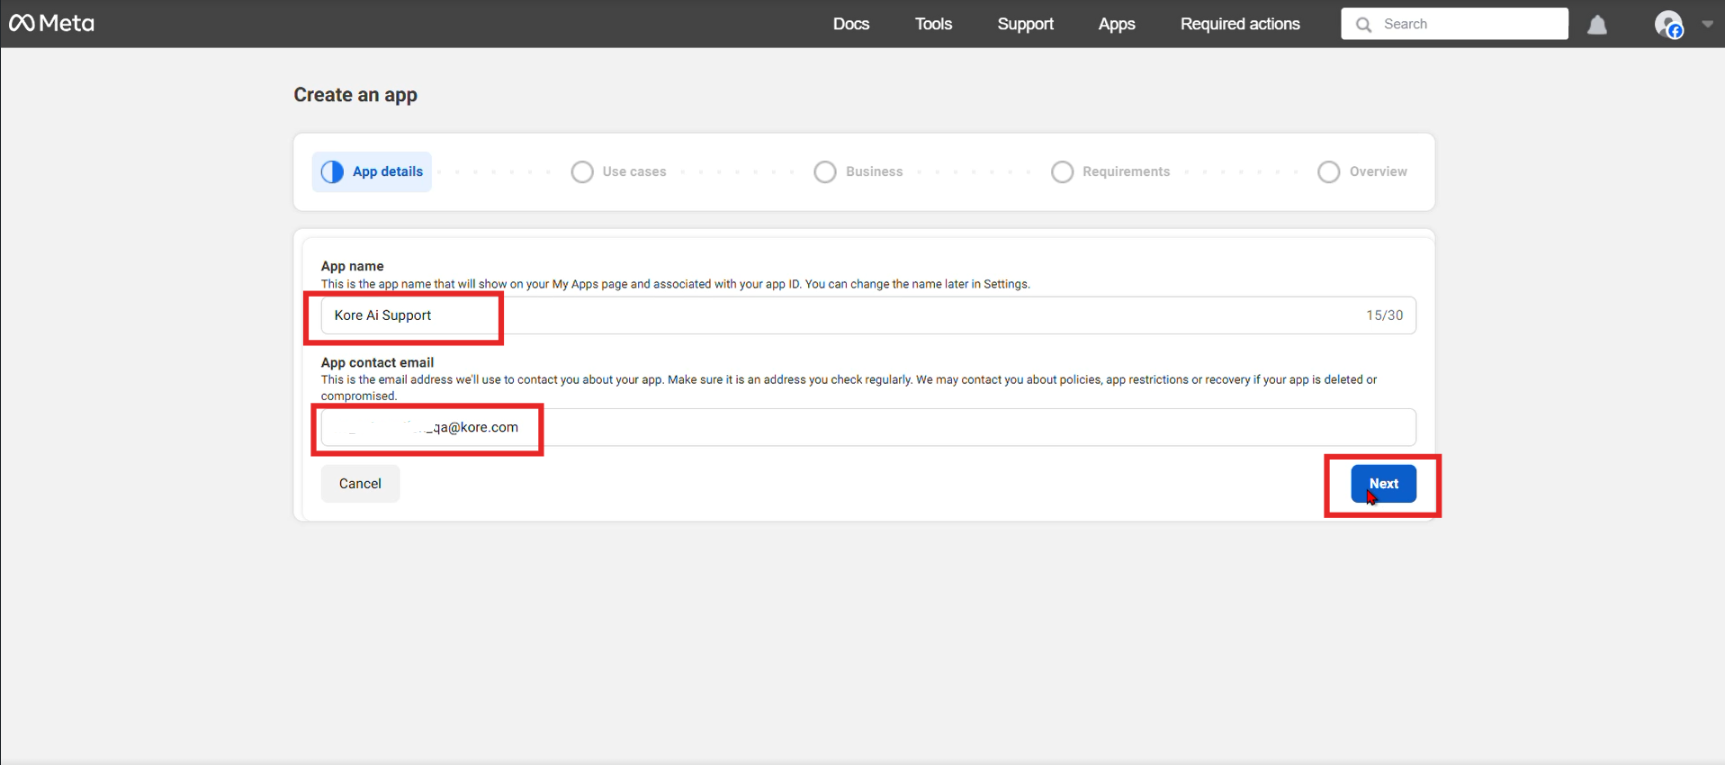
Enter App Name and App Contact Email and proceed.
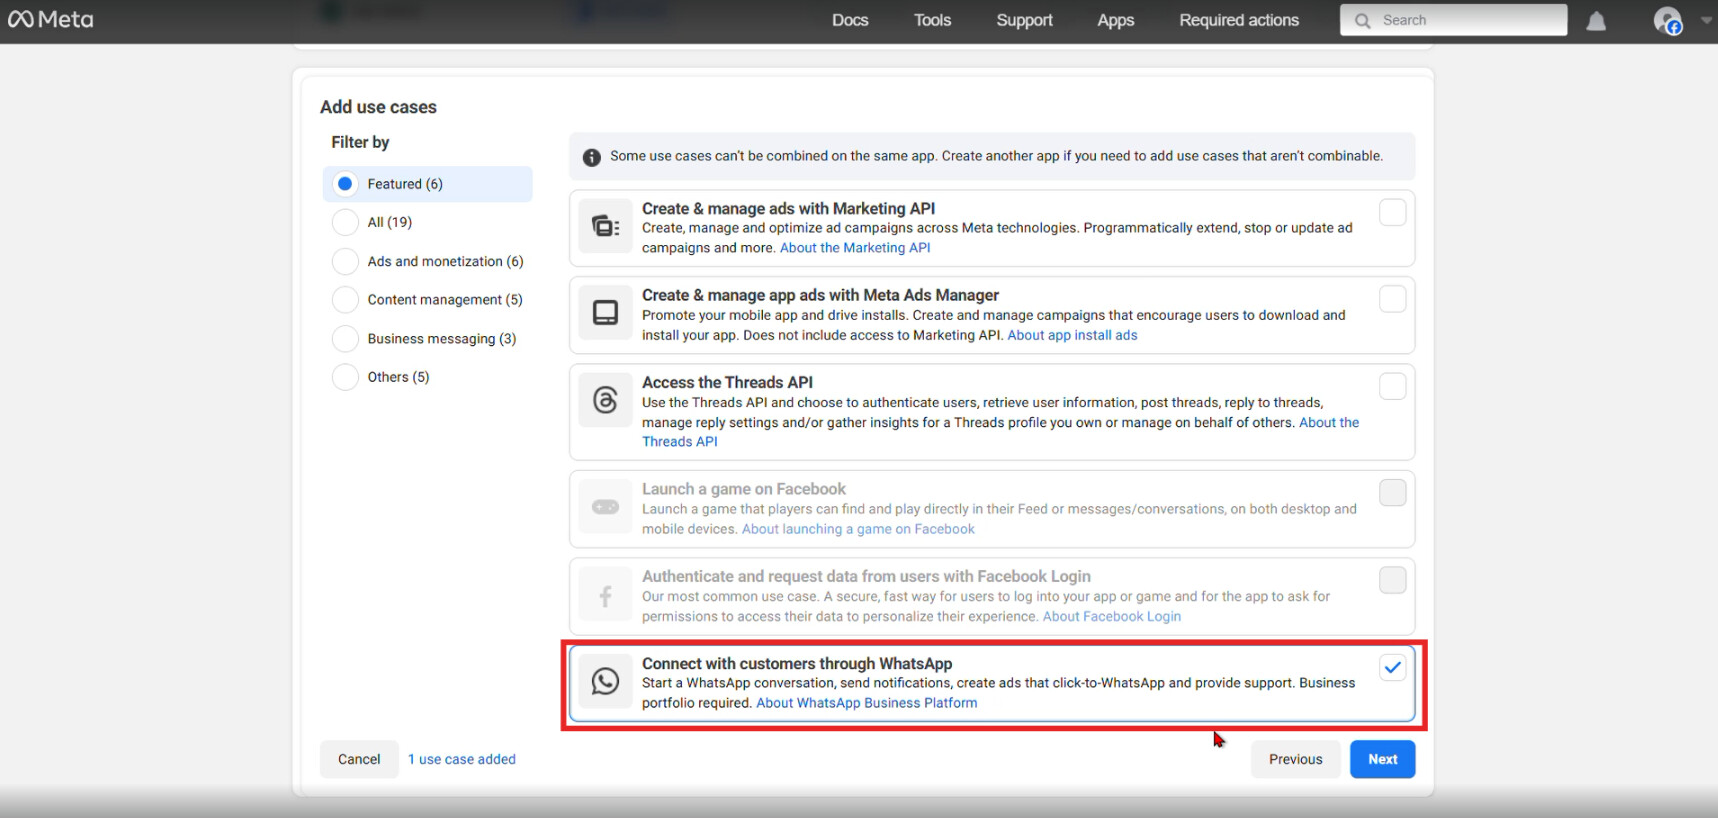
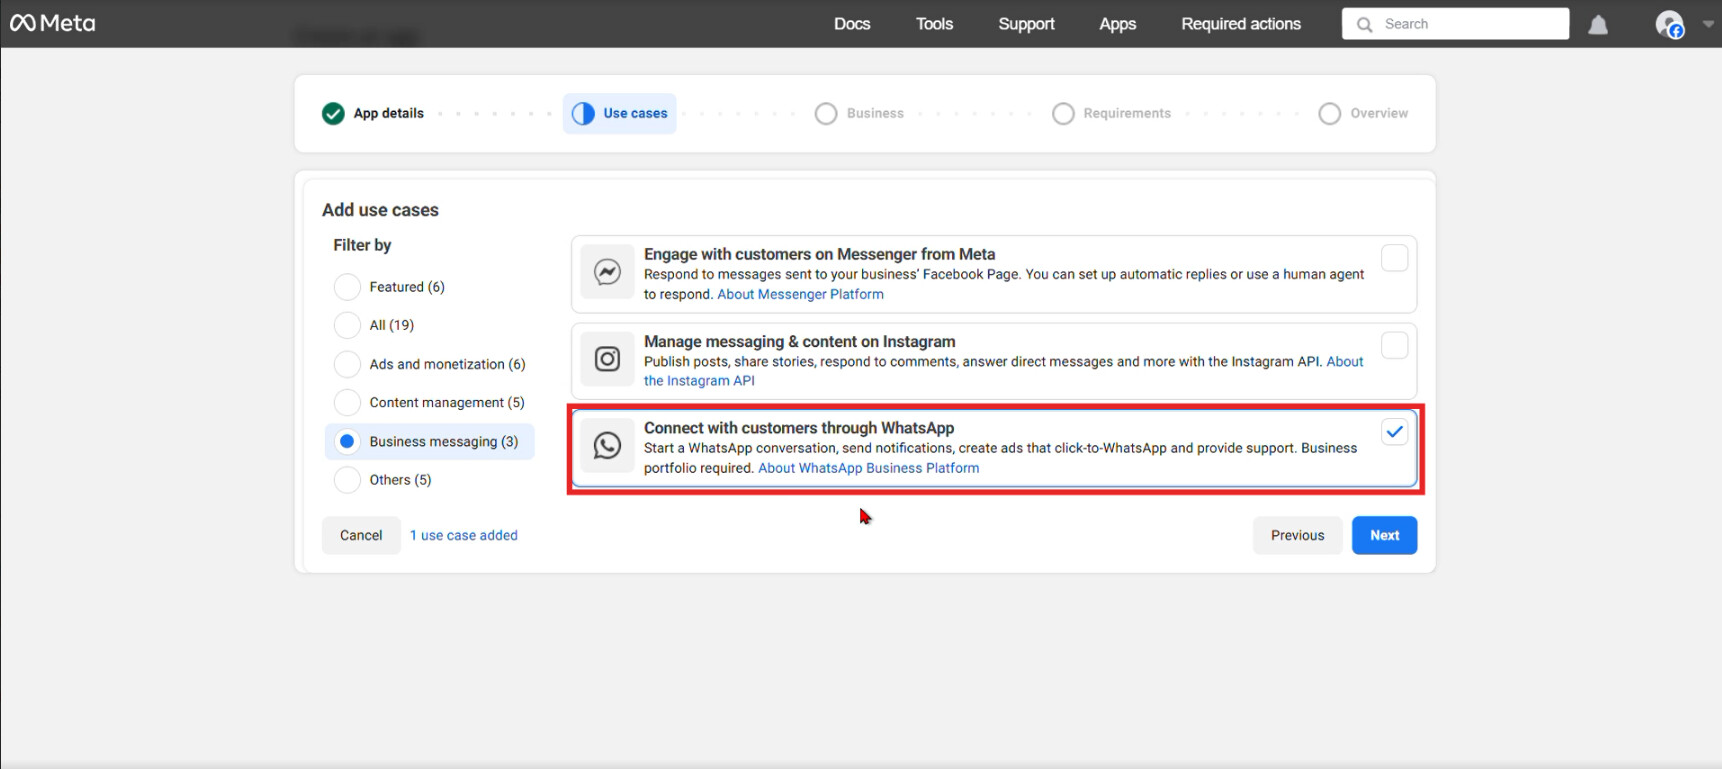
In the next step, under Business Messaging, select Connect with customers using WhatsApp, and click Next.
You will see two portfolios:
- One for Testing Purpose
- One for Business Account (Production use)
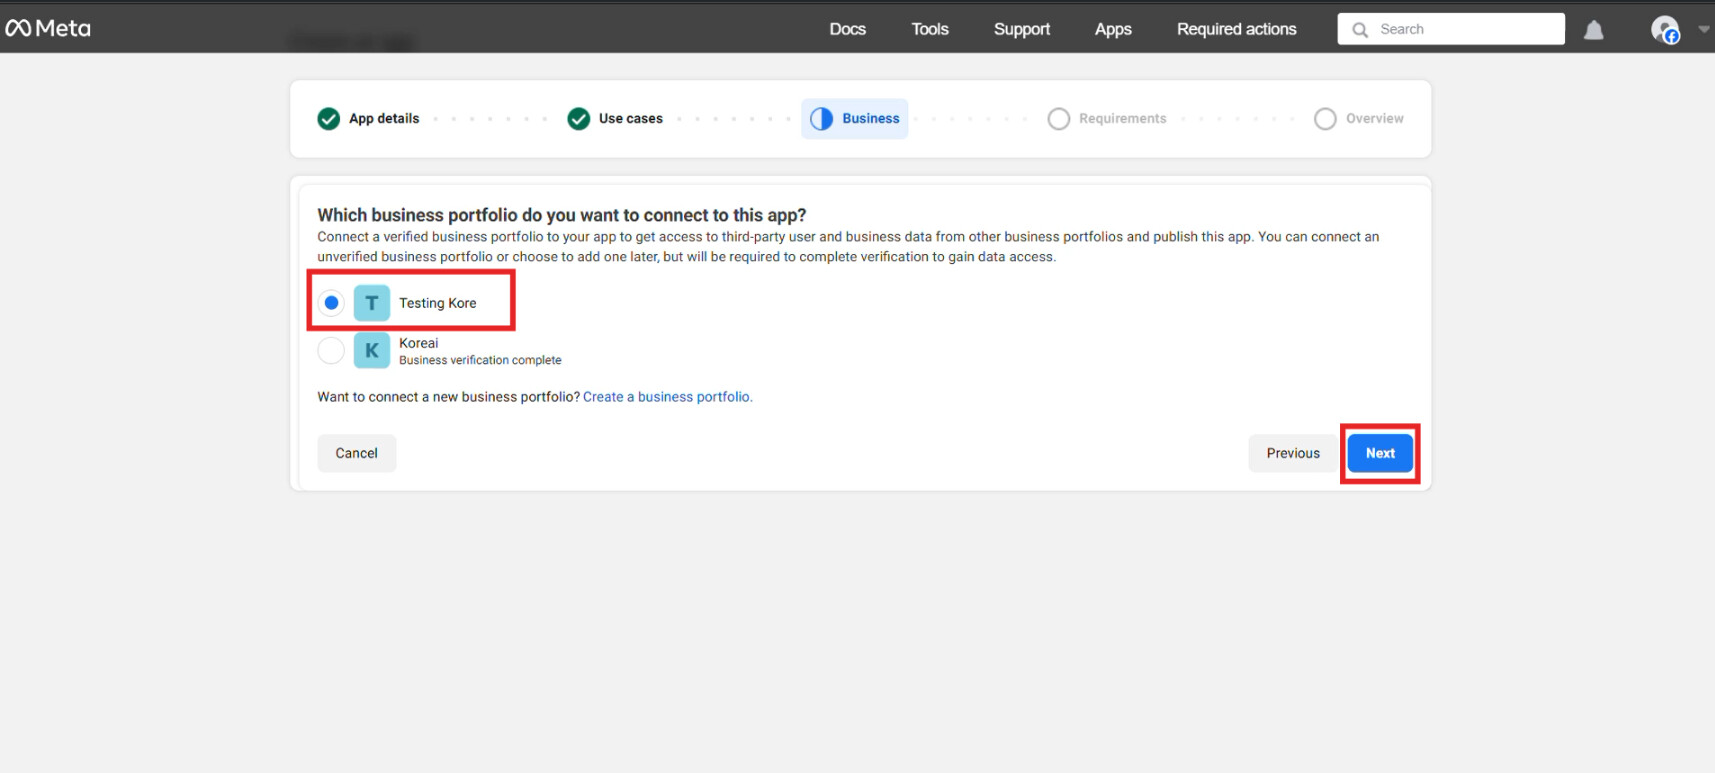
Select based on your requirement. If not required, you may skip this step.
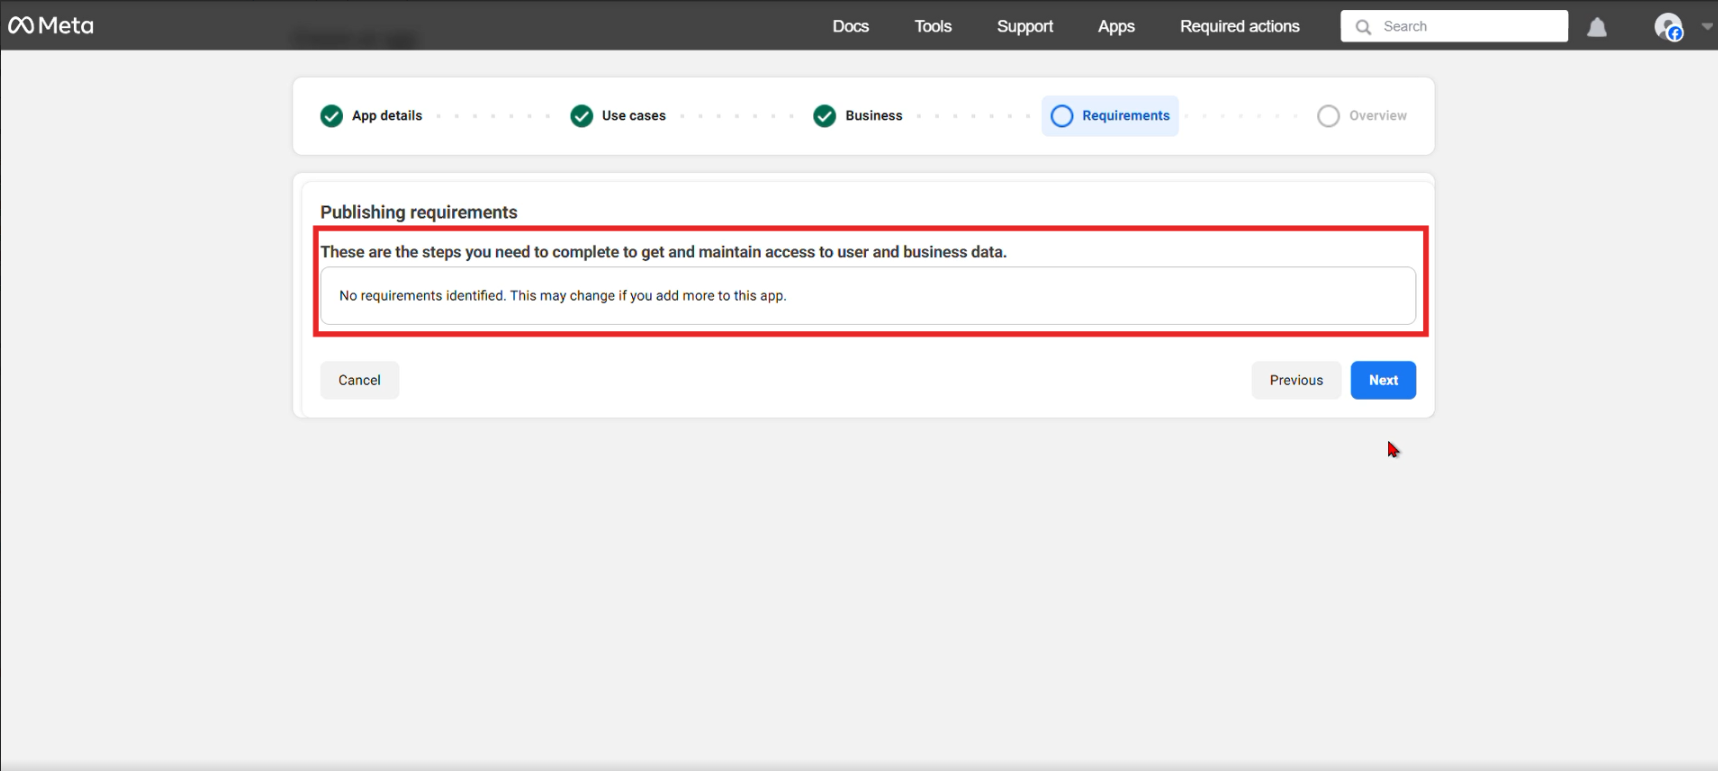
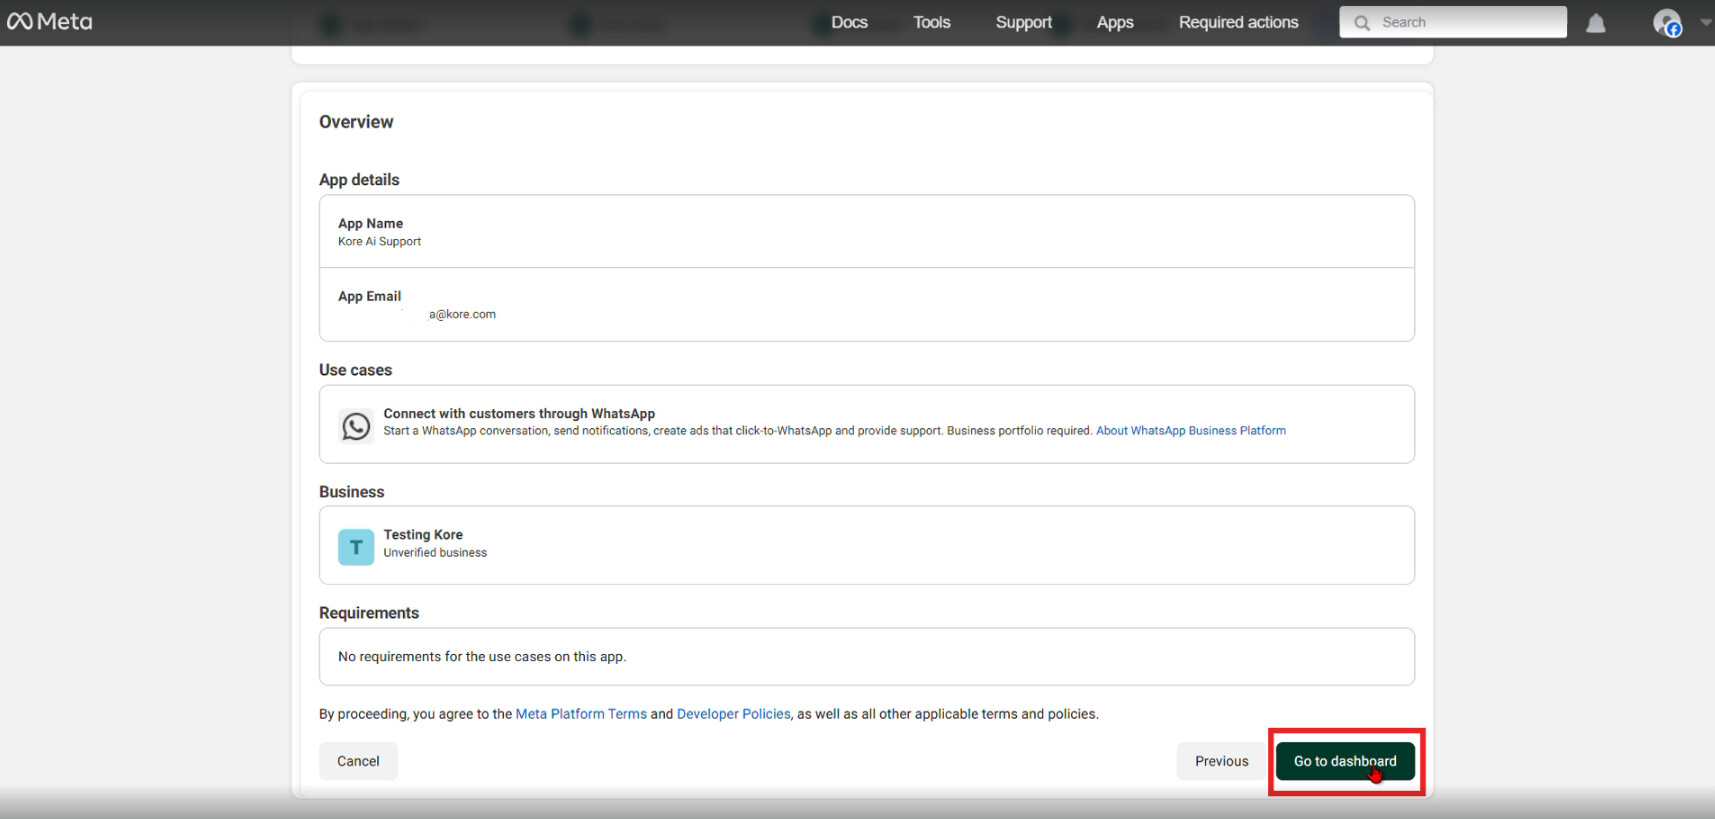
Review the overview and click Go to Dashboard.
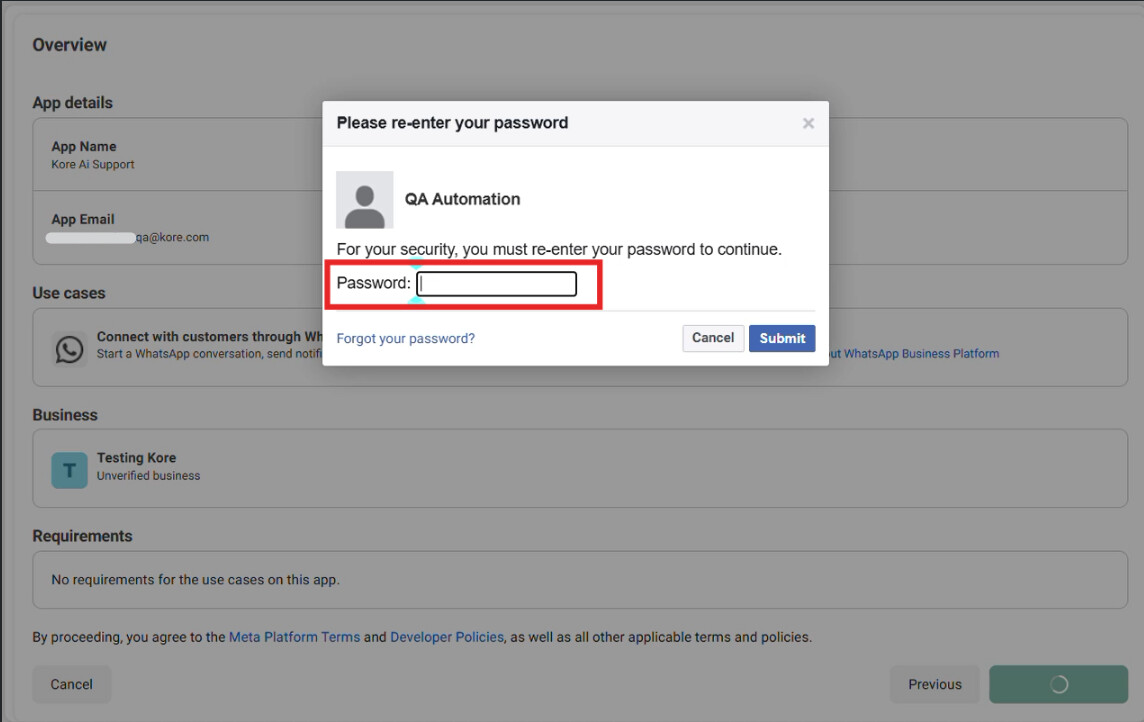
You may be asked to re-enter your password for verification. Complete the verification.
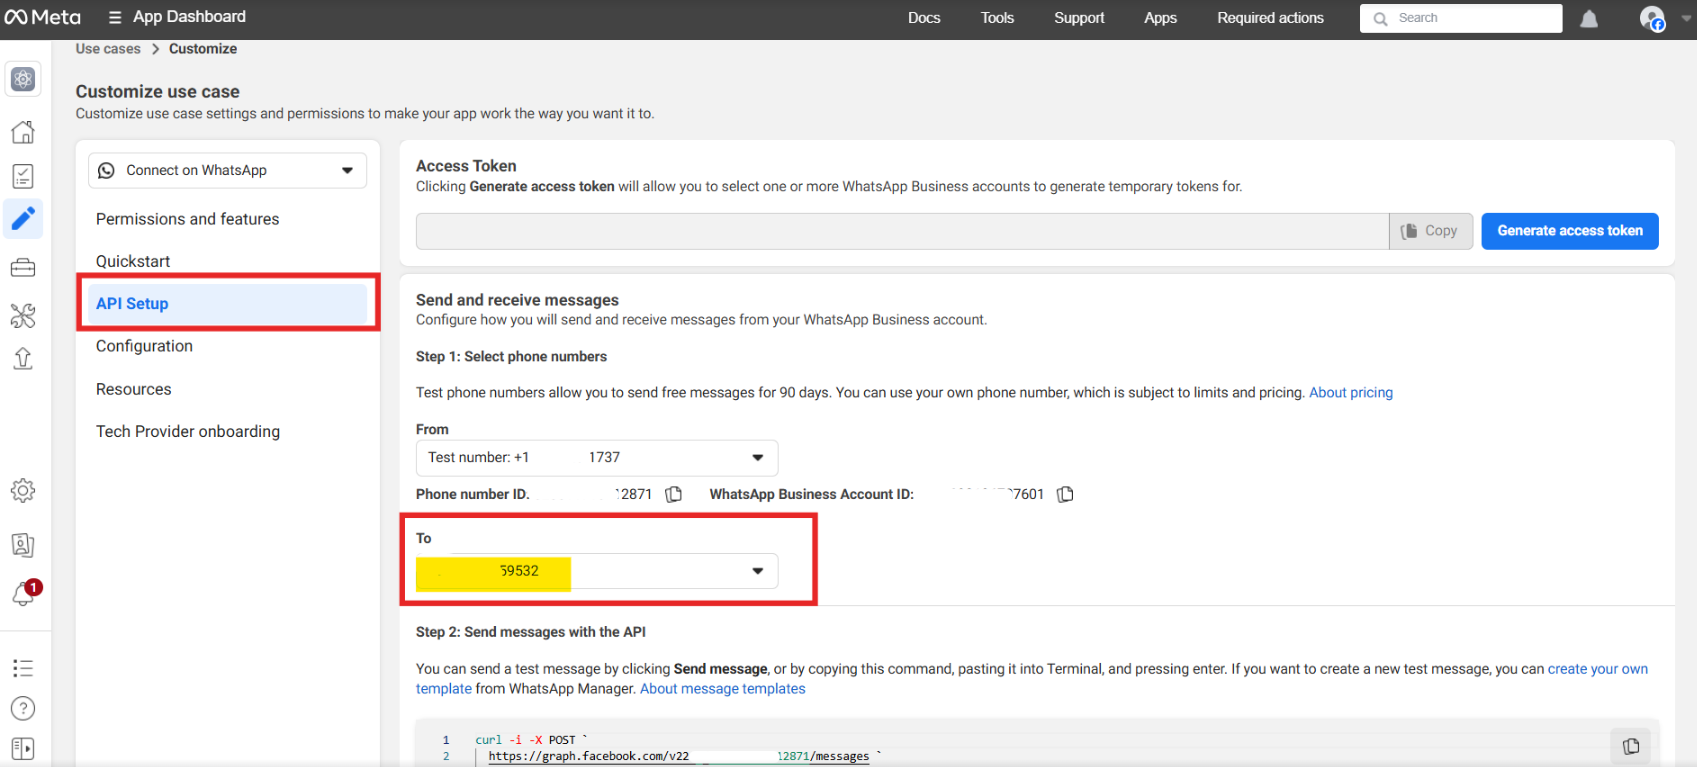
Under API Setup, Send and Receive Messages, select the Recipient Phone Number.
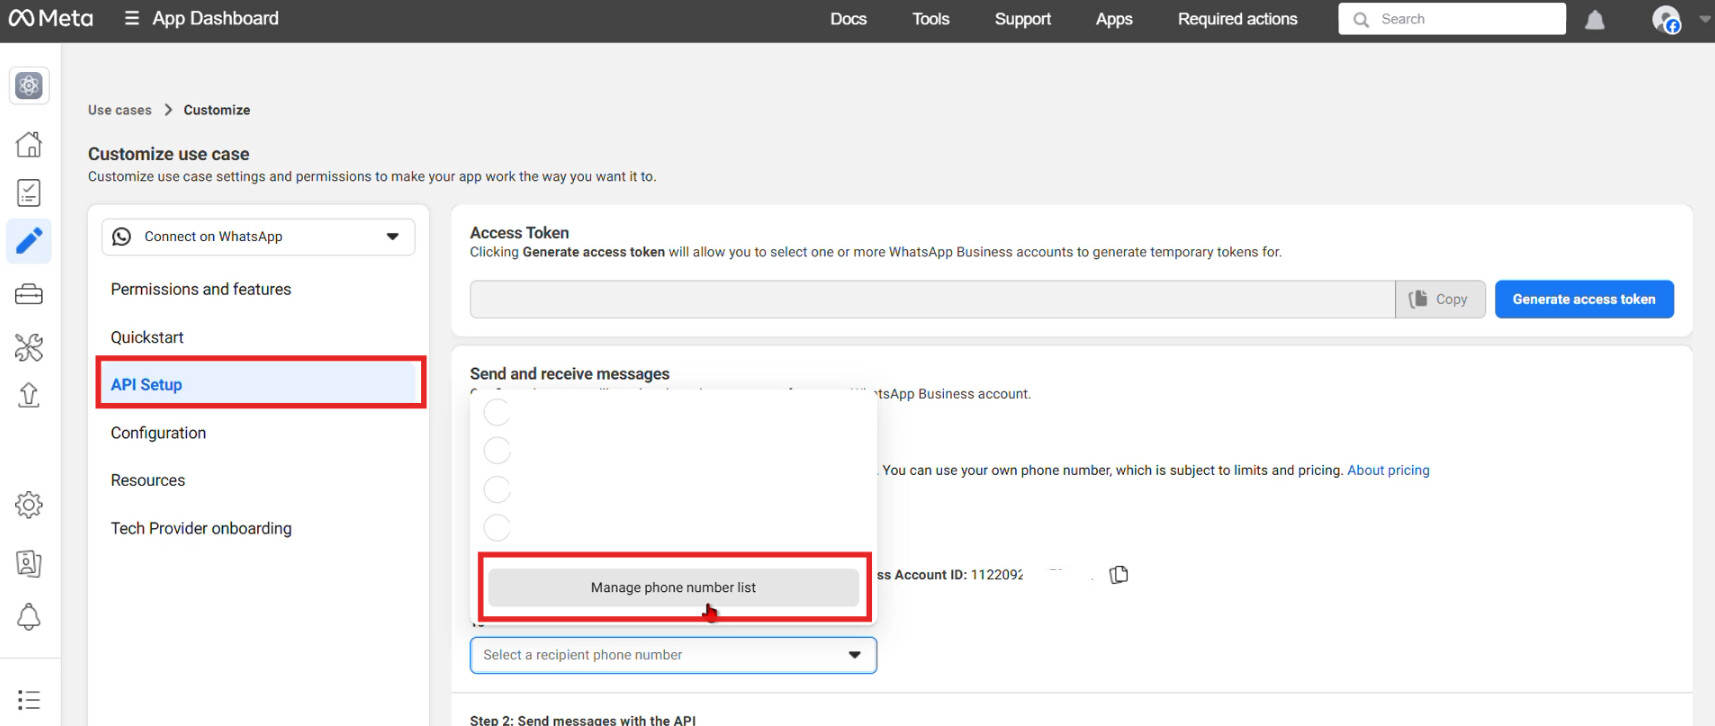
Add your phone number manually and click Save.

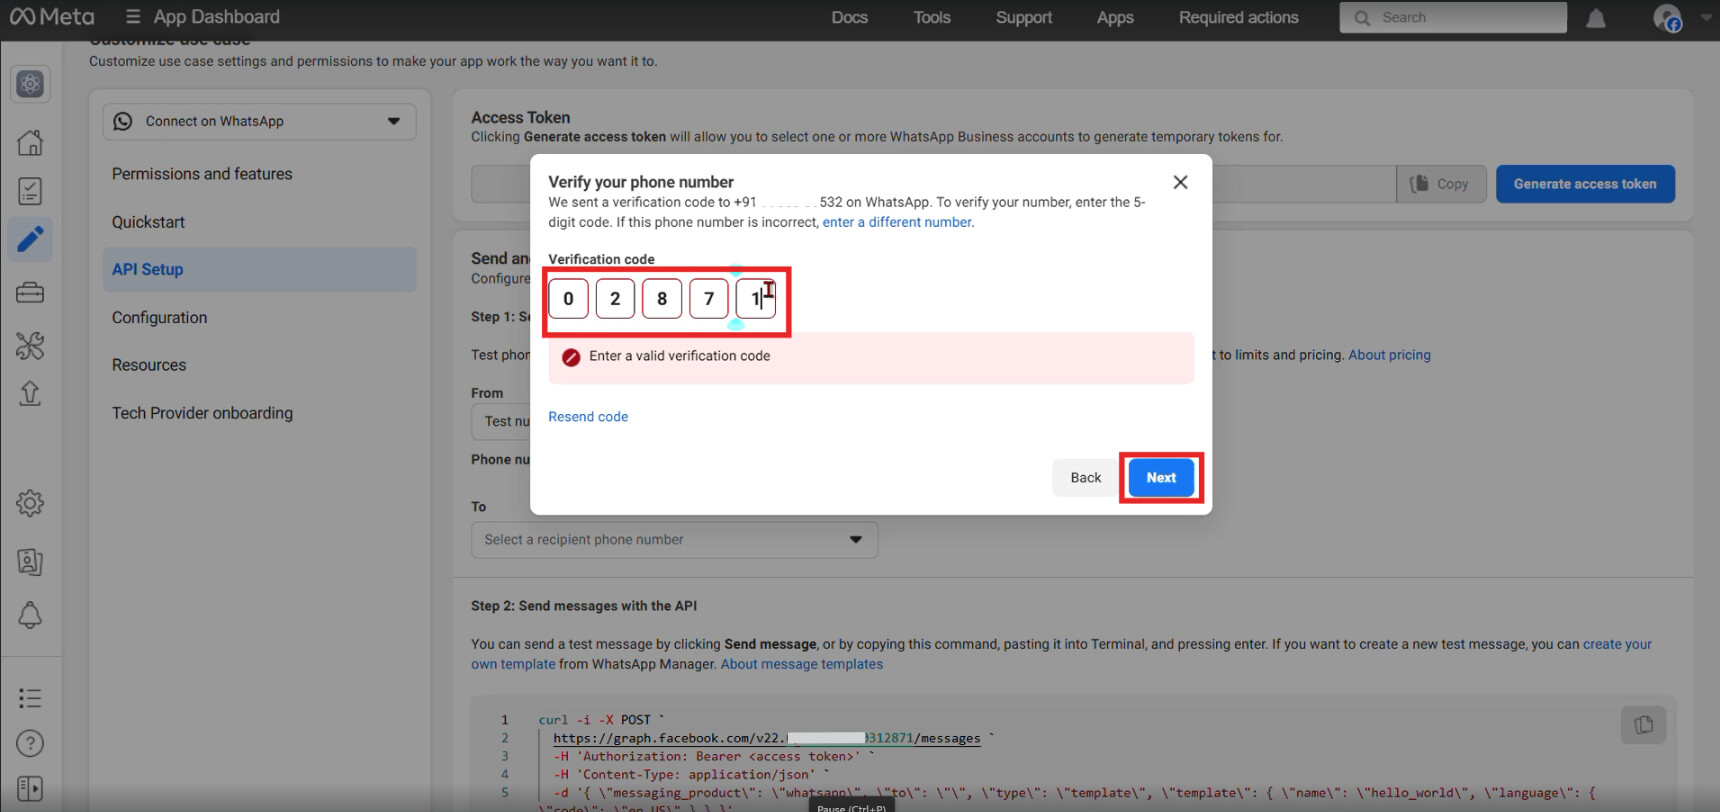
You will receive an OTP. Enter it to verify the number.
NOTE :
- Clicking Access Token allows generating tokens for multiple WhatsApp Business Accounts.
- If you need to integrate multiple WhatsApp Business Accounts, you can add and manage them using this token.
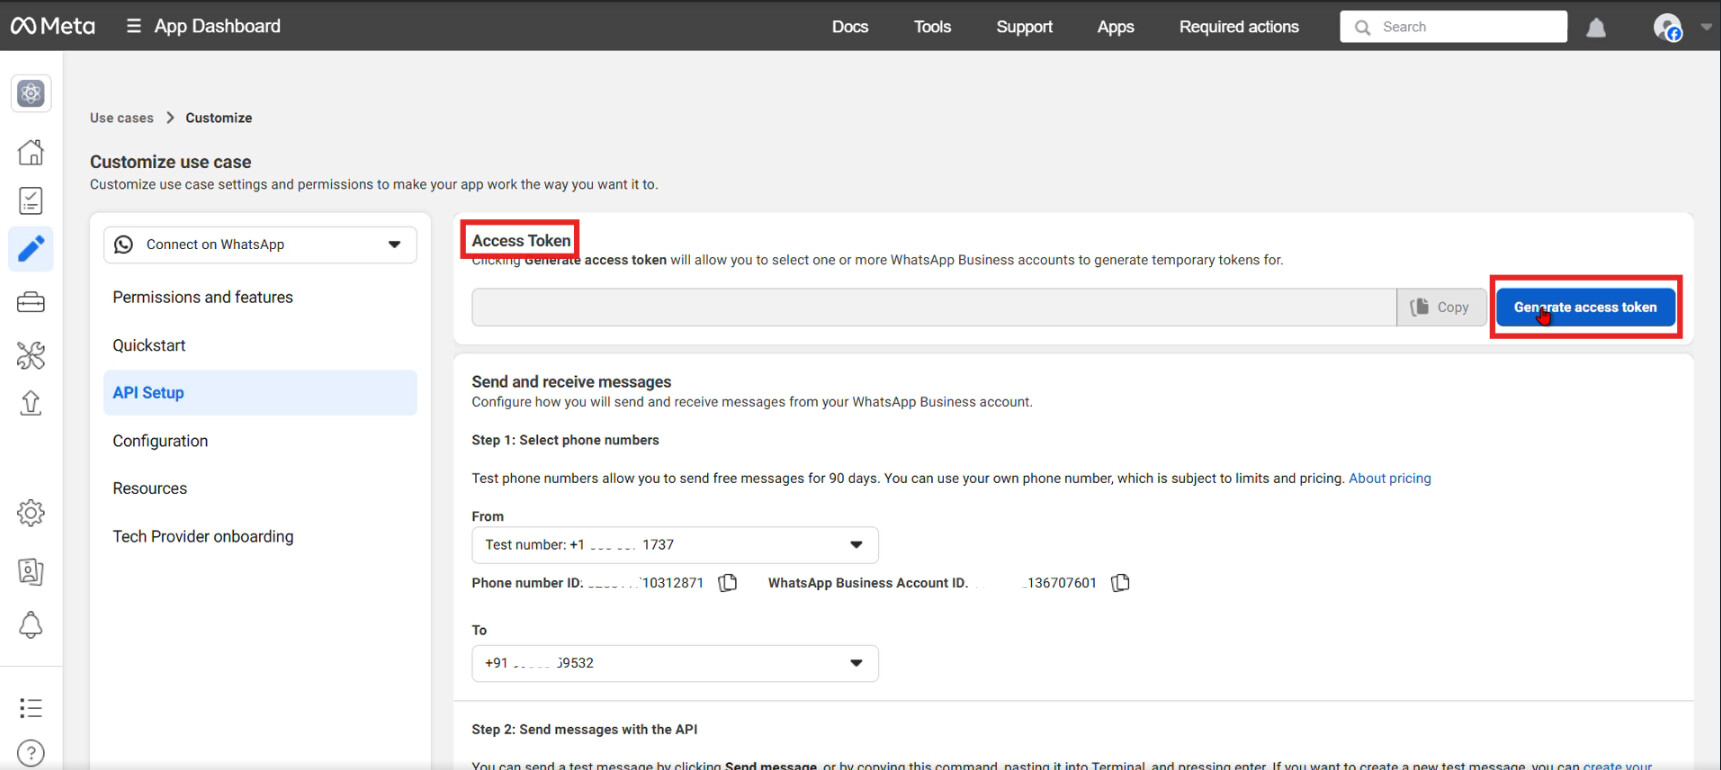
When generating the token, select the WhatsApp Channel you created. Confirm using the WhatsApp Business Account ID, then click Continue.
Copy and save the generated token securely.

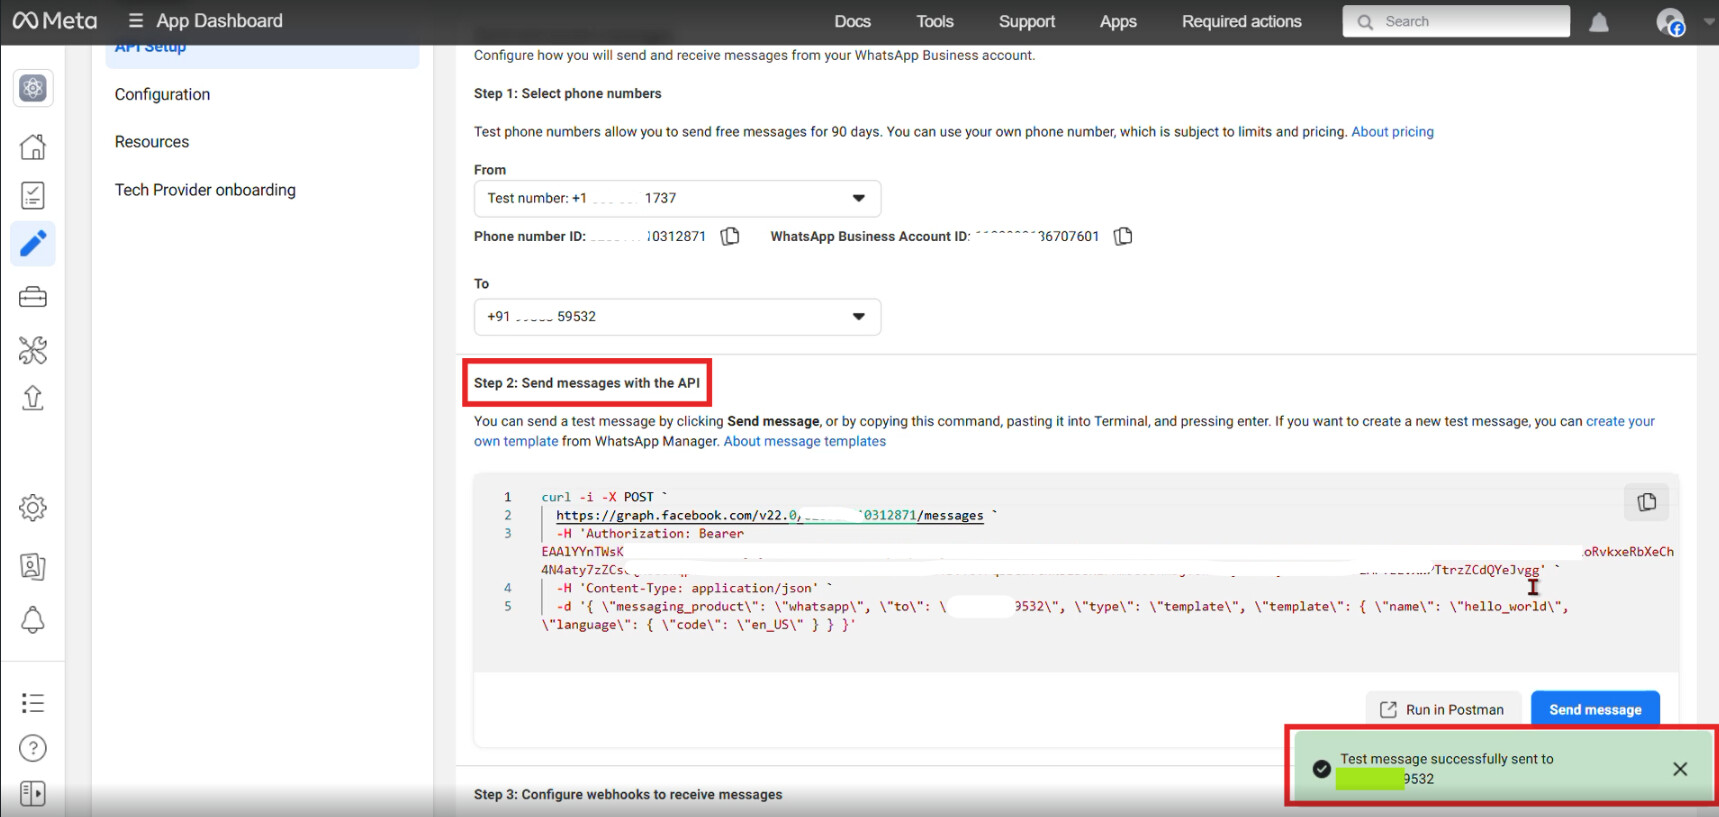
In the next step shown on the page, you will see a cURL command to test sending a message. Run this to send a test message to the registered number. So till here we successfully created a app.
Step 2 : Integrating WhatsApp Channel in Kore.ai
Go to Kore.ai Platform.
Navigate to Flows → Channels → Digital Channels.
Search for WhatsApp and click Add.
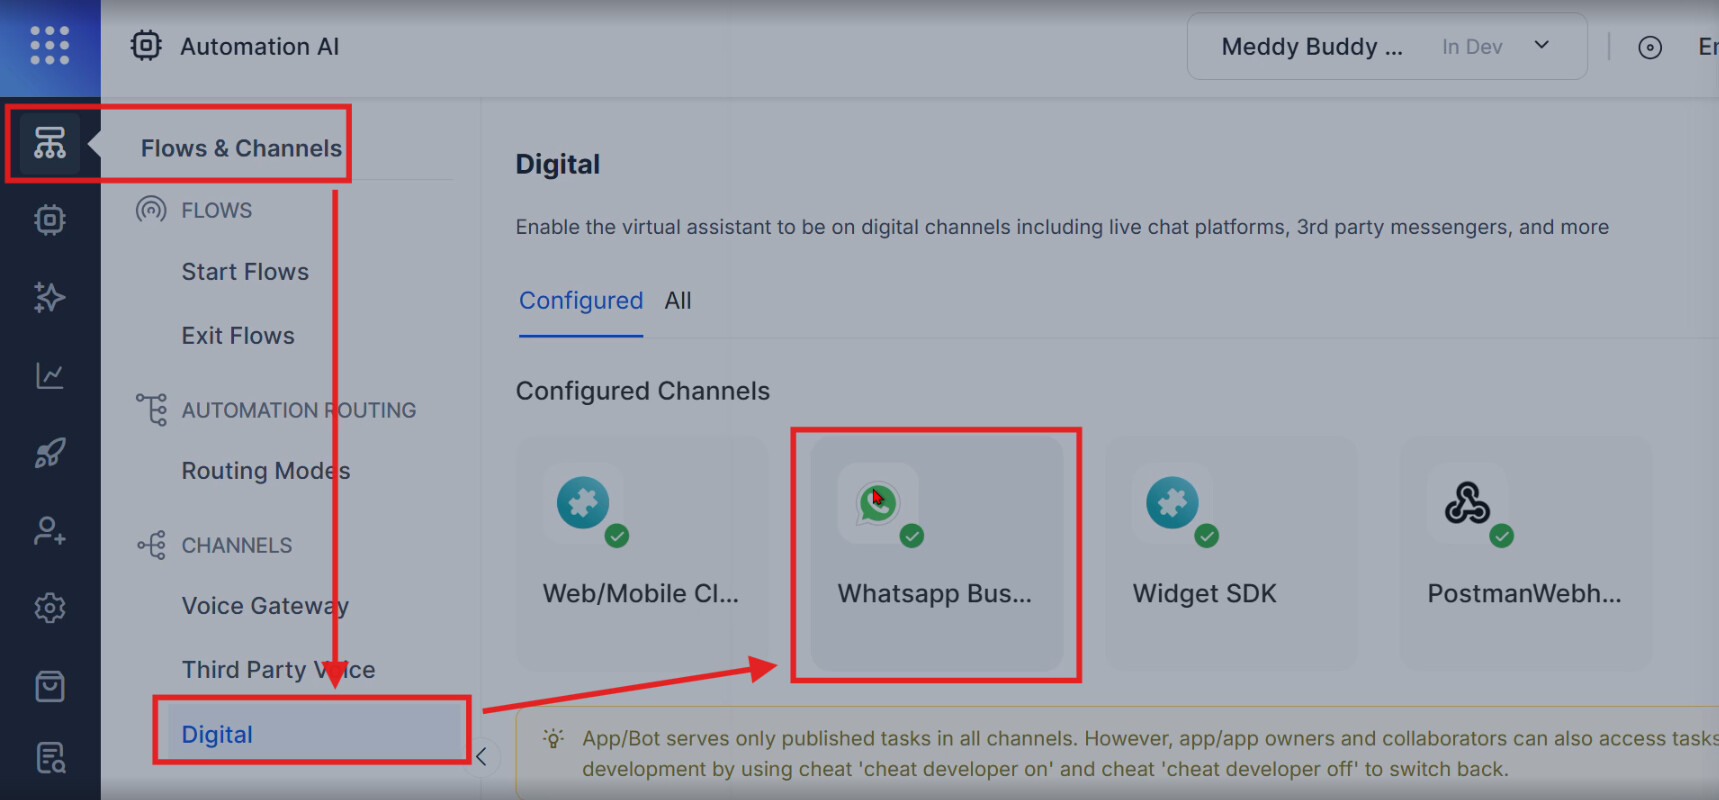
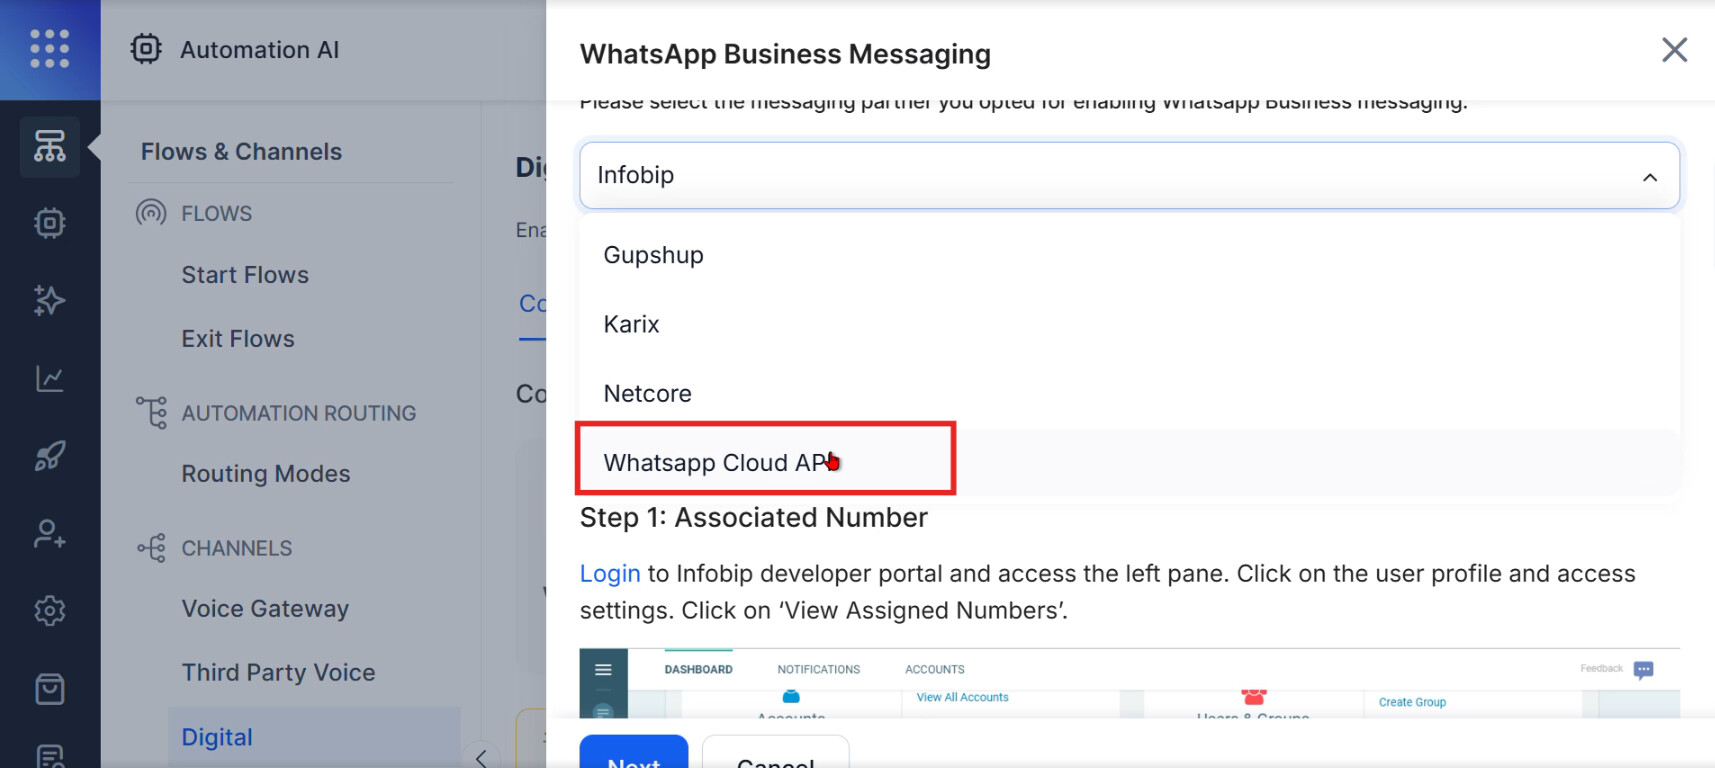
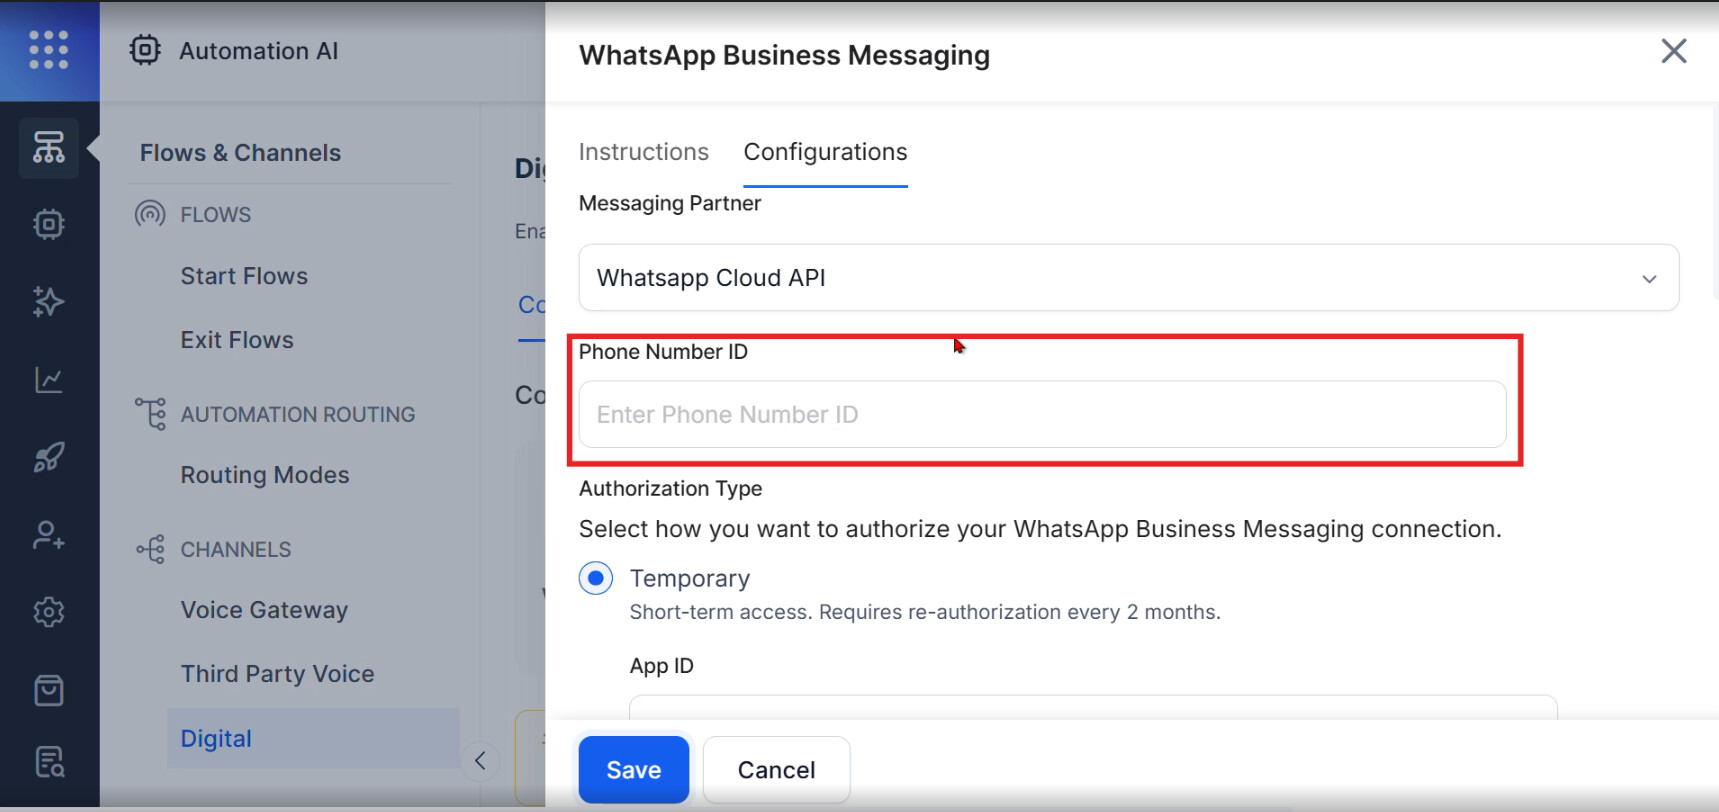
You will see multiple WhatsApp channel types; select WhatsApp Cloud API.
You will need the Phone Number ID. This is available in Meta Business Account under Phone Number section.
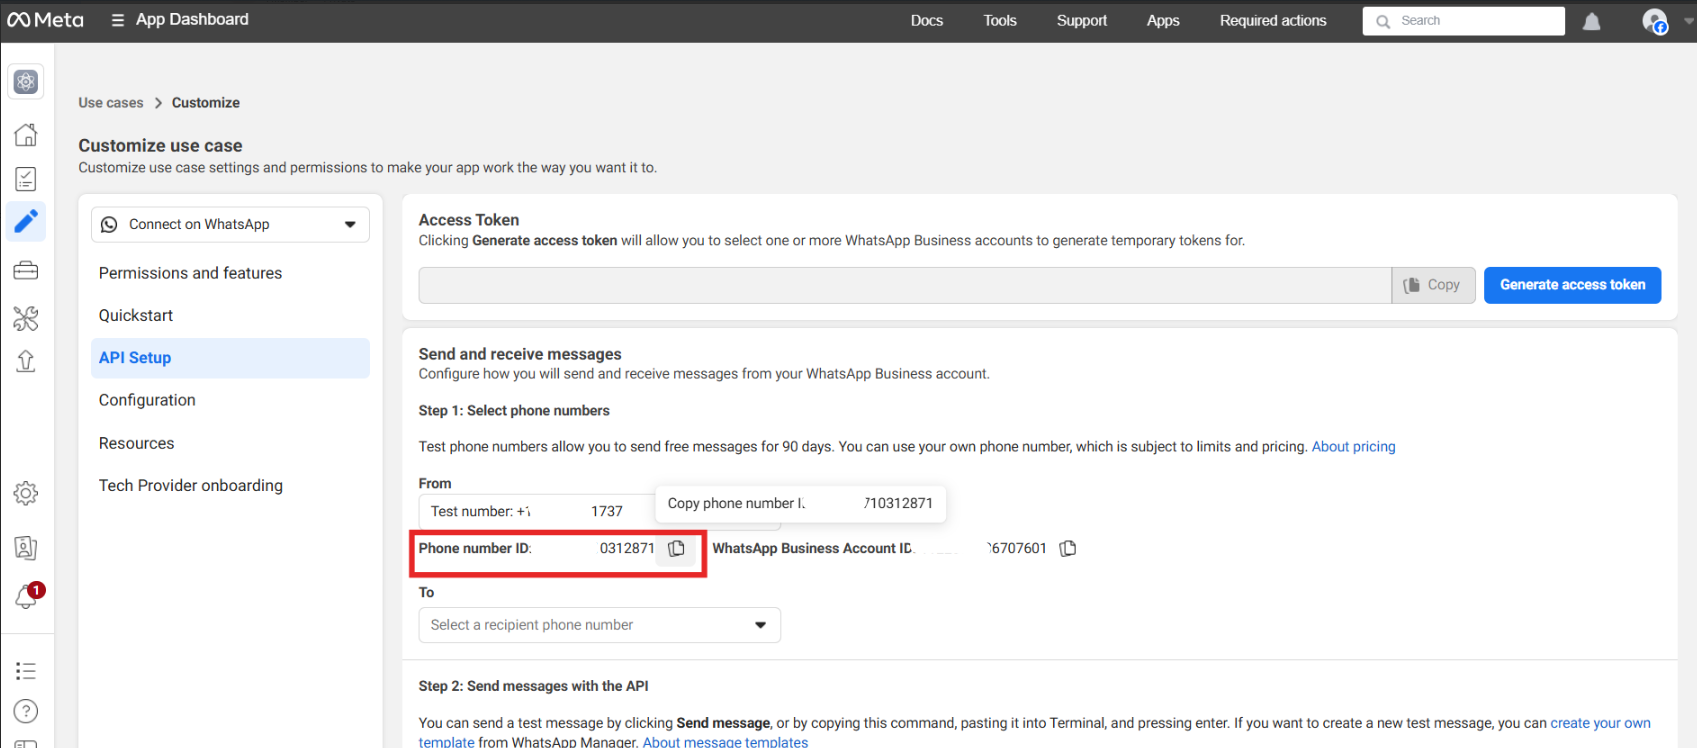
Now paste the Phone Number ID in the platform.
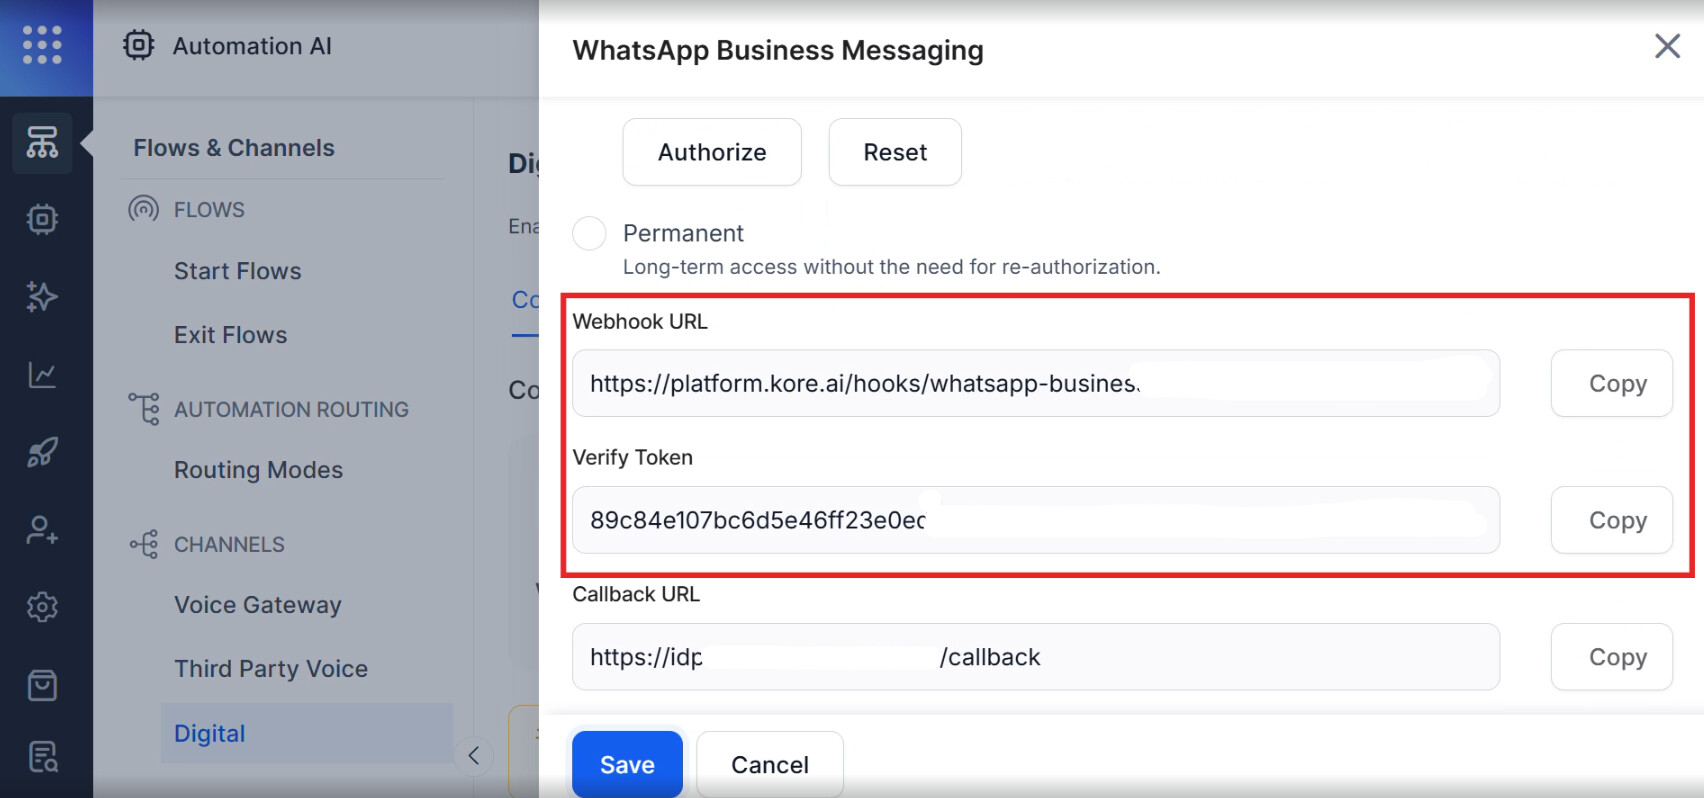
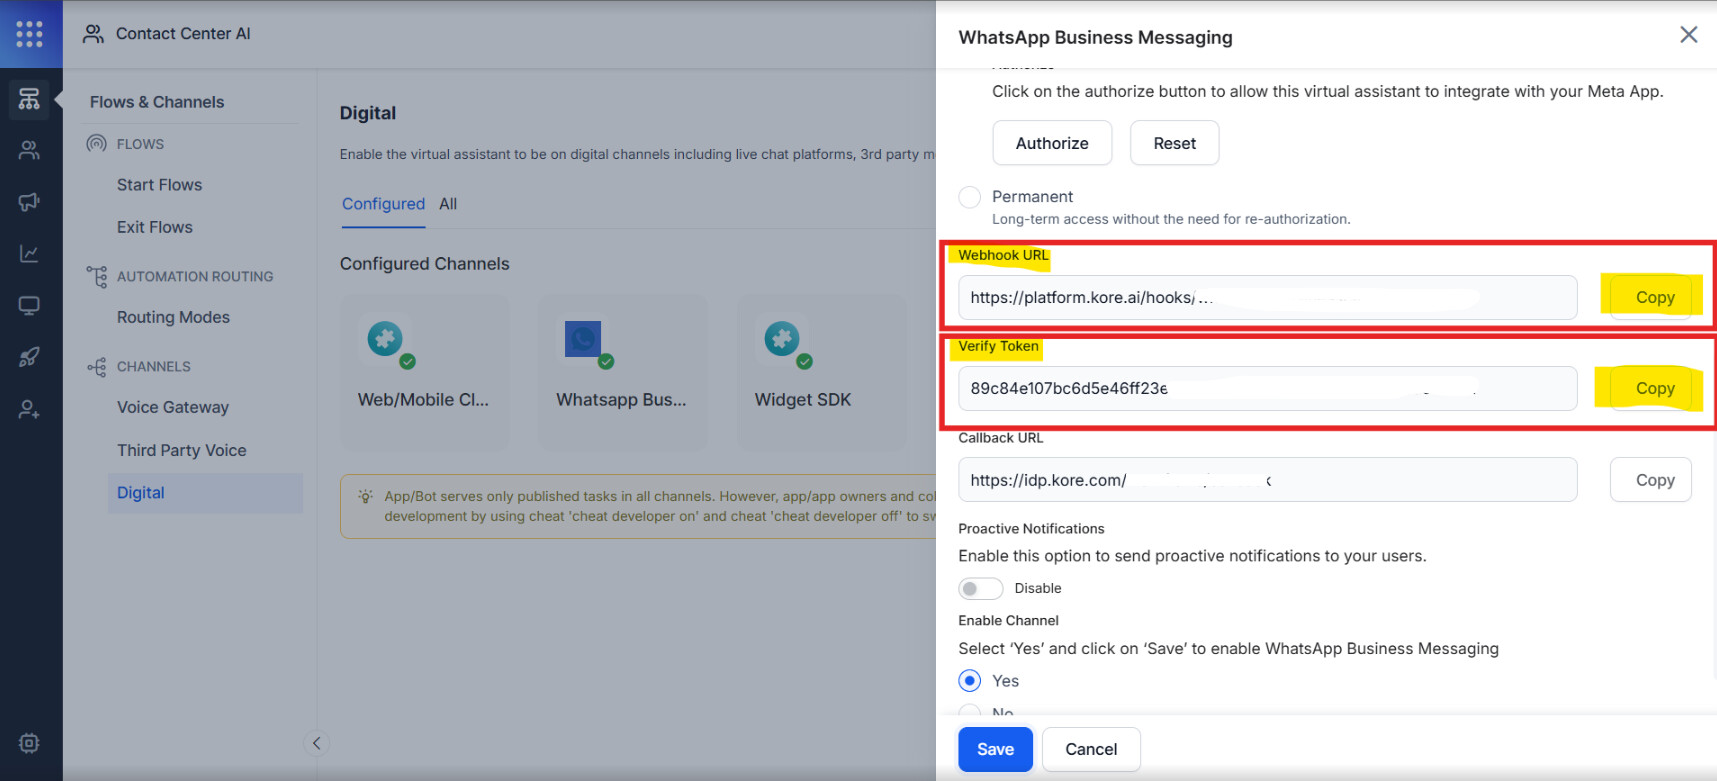
In the Kore.ai WhatsApp Cloud API configuration page, copy the Webhook URL and Verify Token.
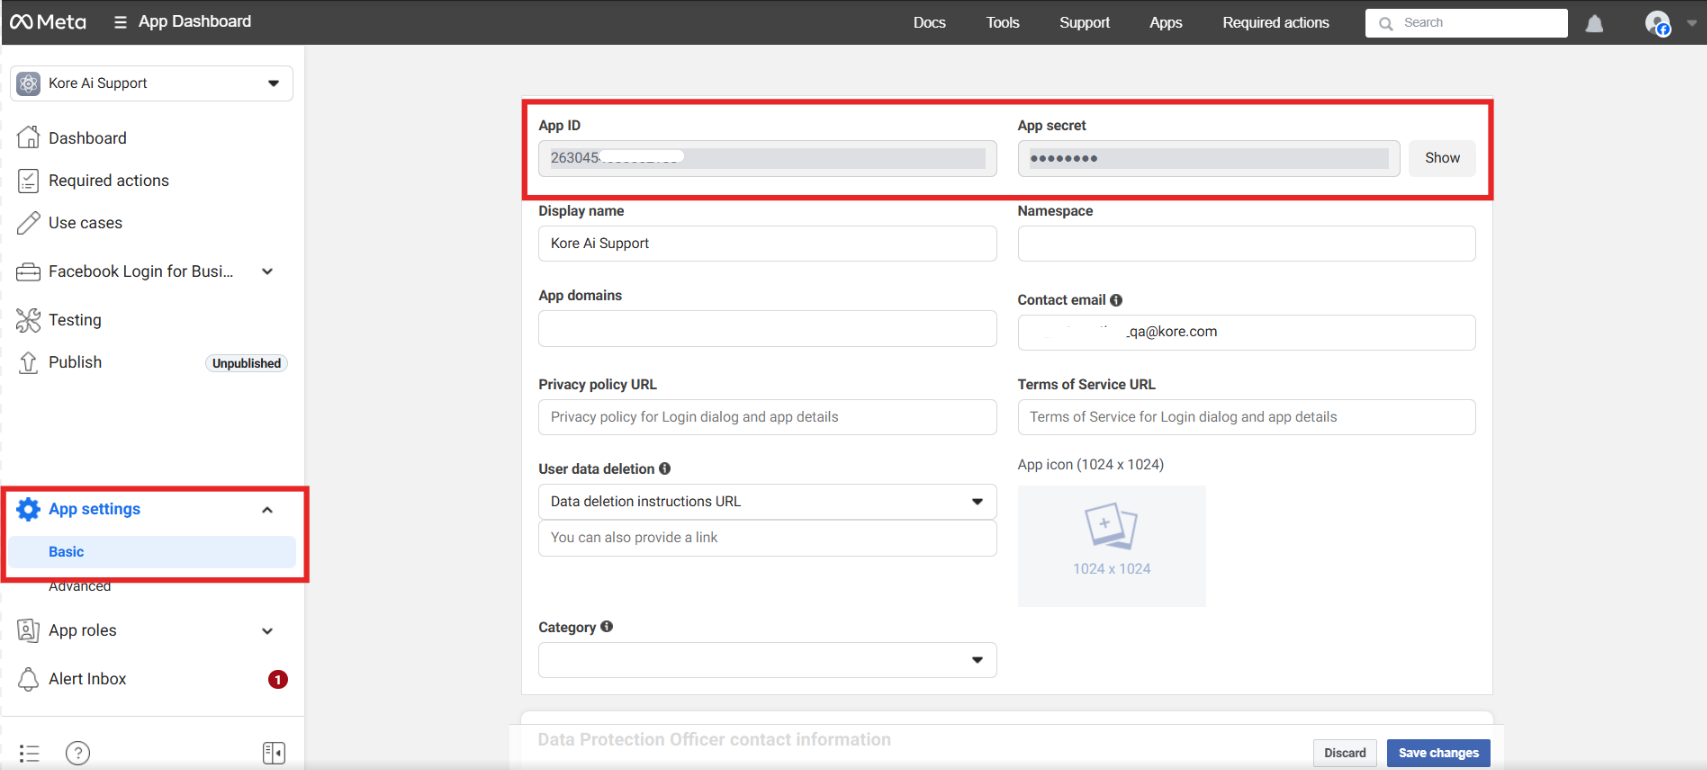
Also copy App ID and App Secret from Meta Developer Console → App Settings → Basic.
Step 3 : Webhook and Authorization Configuration
Open Facebook login for Business settings.
Under Valid OAuth Redirect URLs, paste the Callback URL obtained from Kore.ai .

On [Kore.ai], in WhatsApp Business Authorization Type, select Temporary.
Paste the App ID and App Secret copied from Meta and click Authorize.

Copy the Webhook URL and Verify Token from Kore.ai again for the next step.
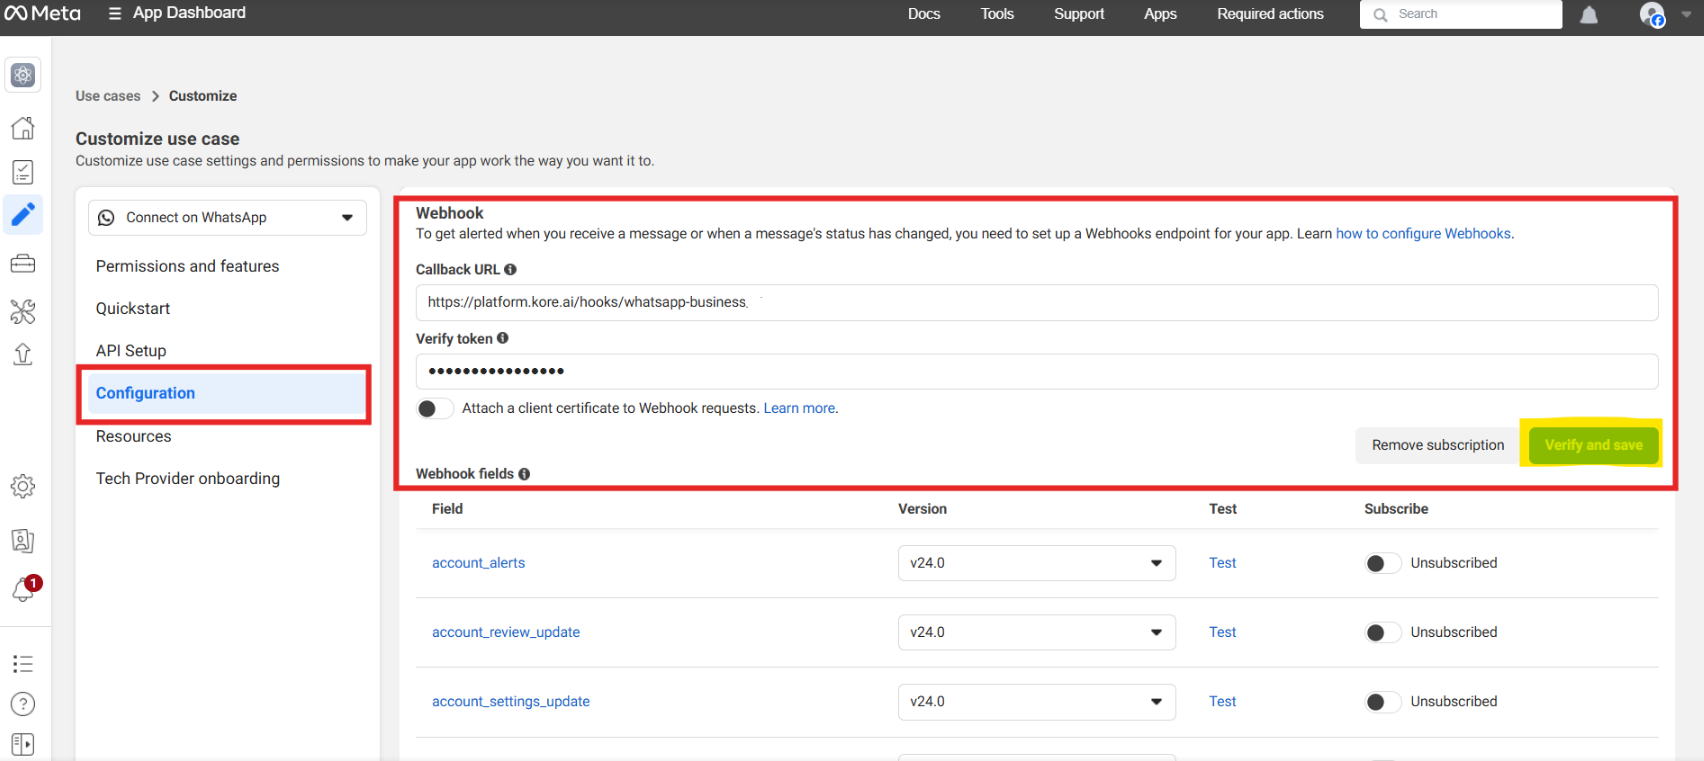
Go to Meta → Webhooks → Configuration and paste:
- Callback URL
- Verify Token
Click Verify to confirm the webhook connection.
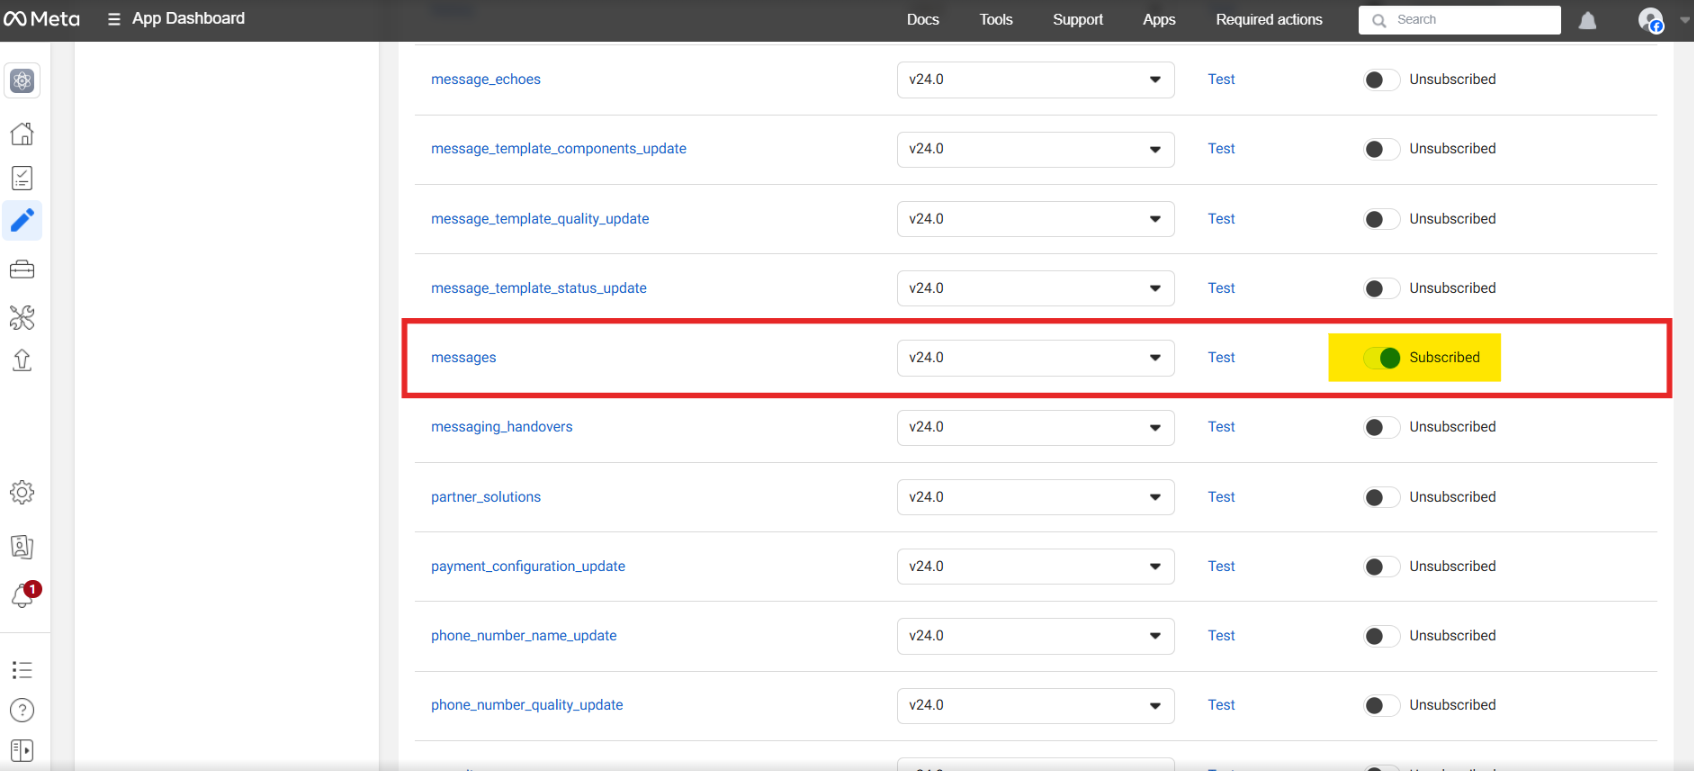
Scroll down to Webhook Subscriptions and enable the messages event (subscribe).
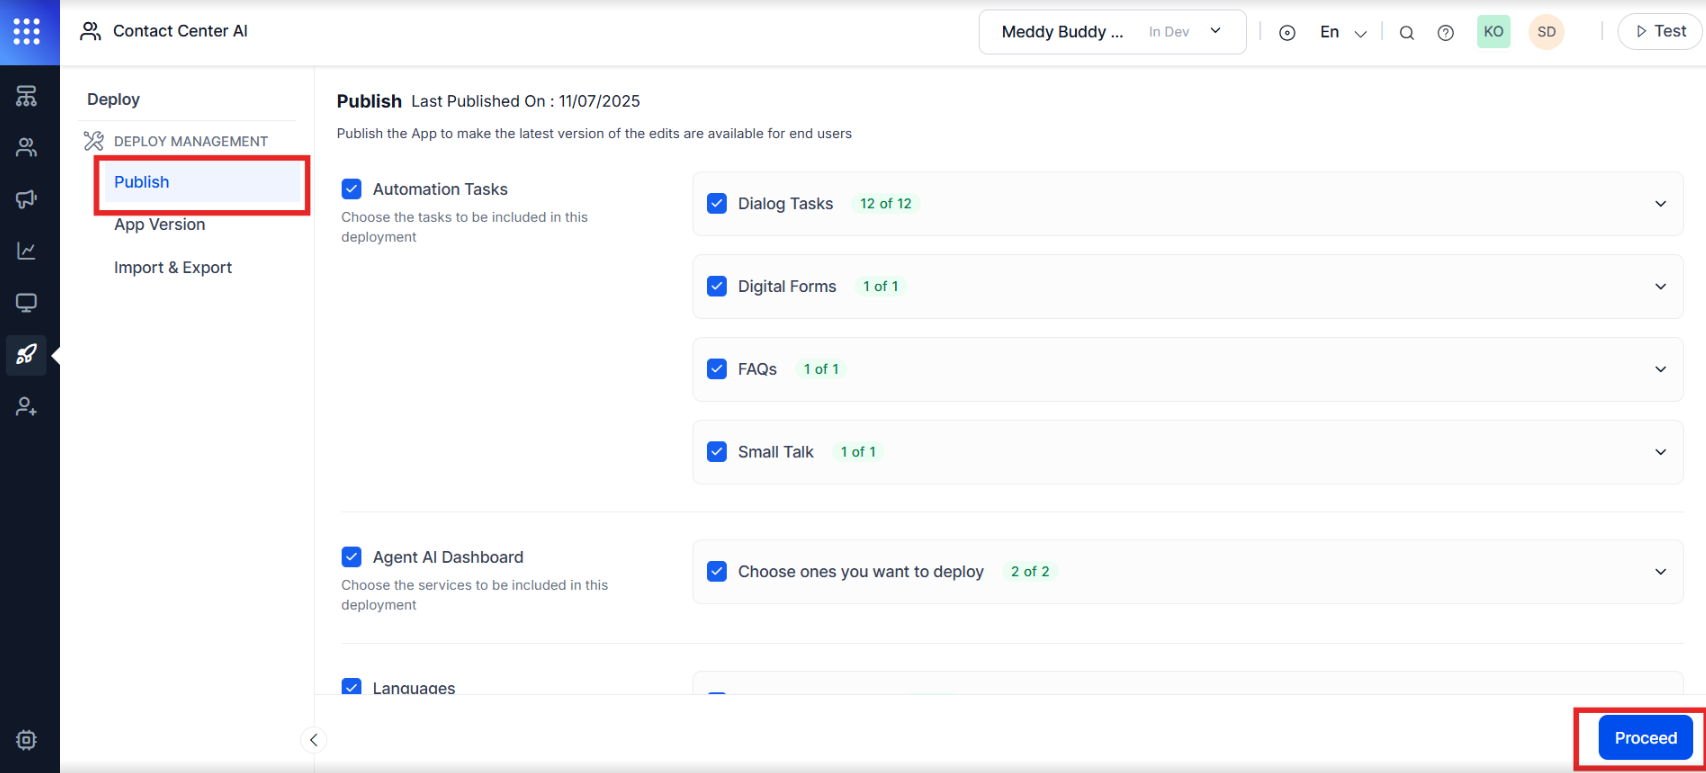
Also publish the App in http://Kore.ai platform
Step 4 : Final Step
You will receive a test message to the registered mobile number.
You can now start chatting with your bot via the WhatsApp Business number.