This article provides a detailed guide on MS Teams integration with Kore.ai and enabling Proactive Notifications.
NOTE: To enable MS teams, users should have a valid Azure account with admin access.
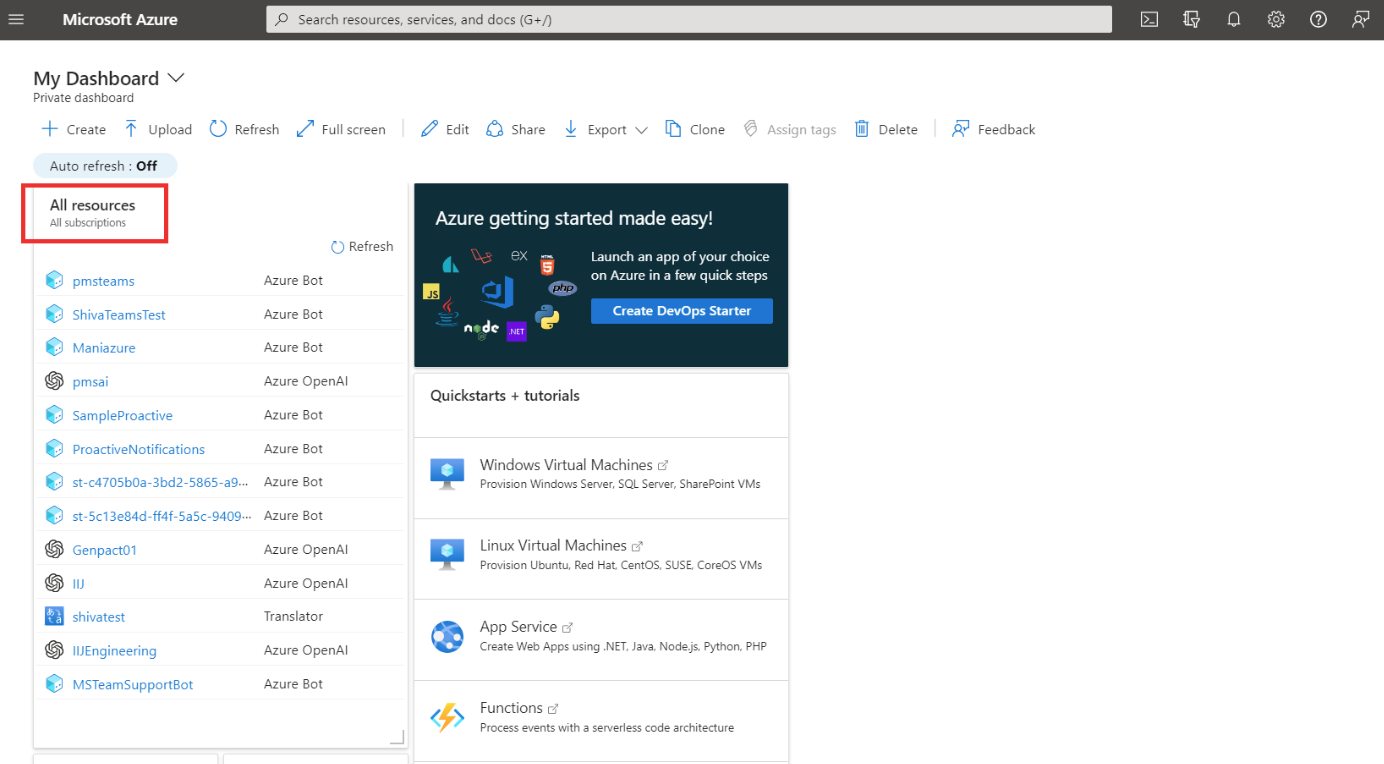
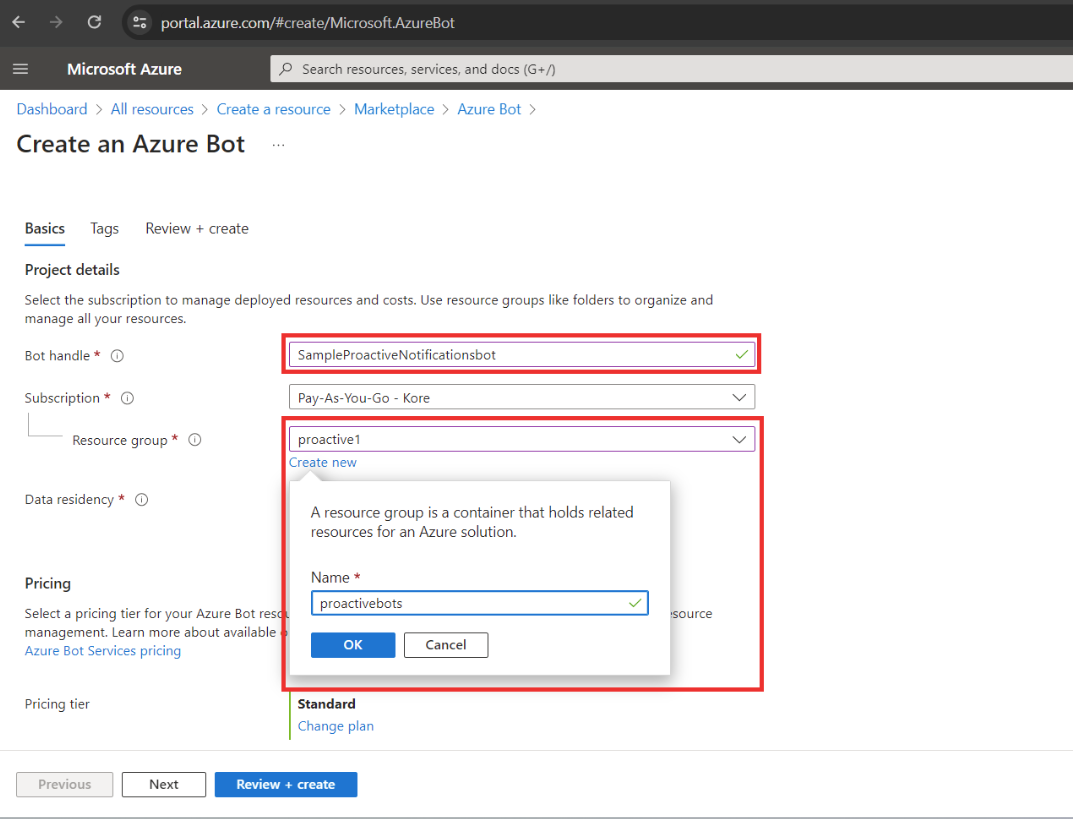
- Login to the Azure portal and click on “All resources”.
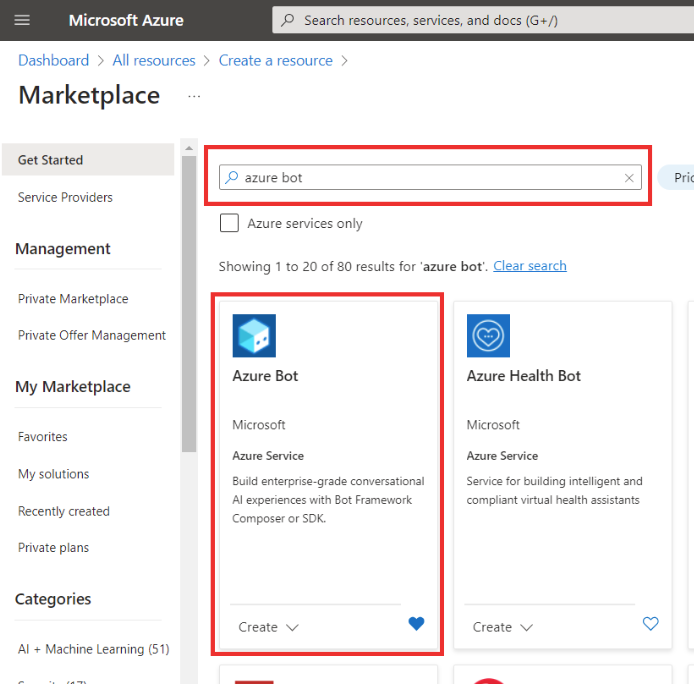
- Click on “Create”

- Search for “Azure bot“ and choose “Azure bot“ from the search results.
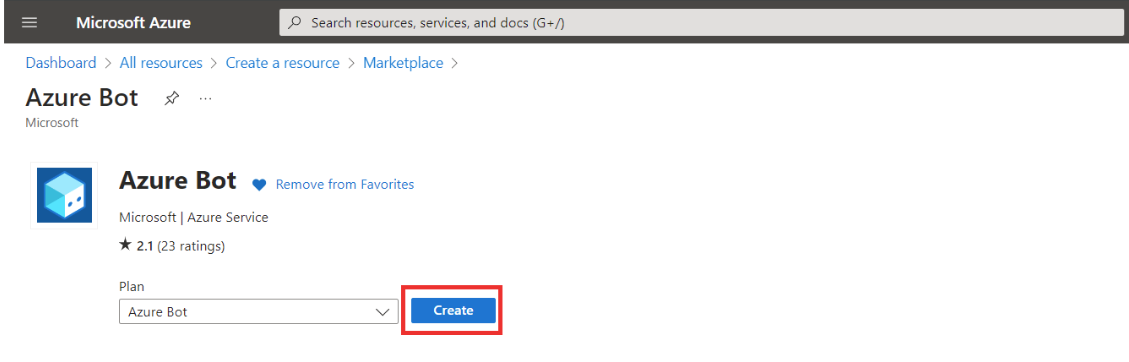
- Select “Azure bot“ widget and click on “Create“.
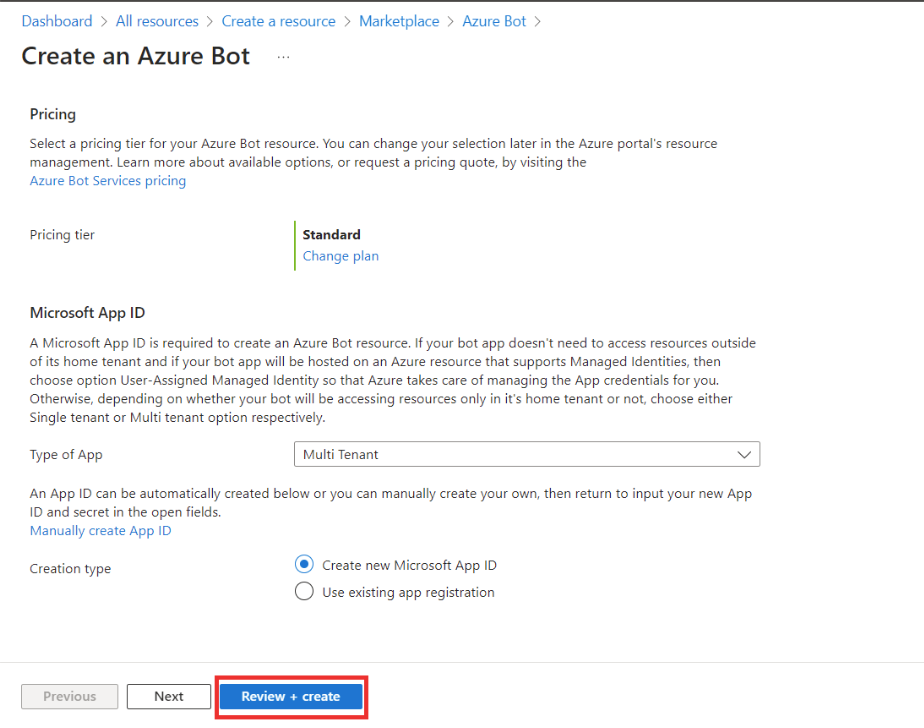
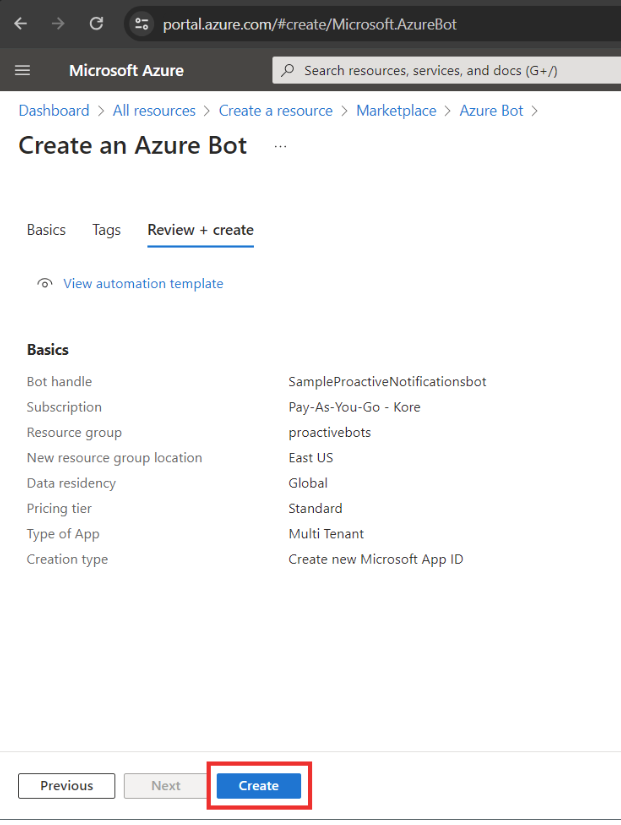
- Edit all the required fields and click on “Review + create“
- Click on “Create“
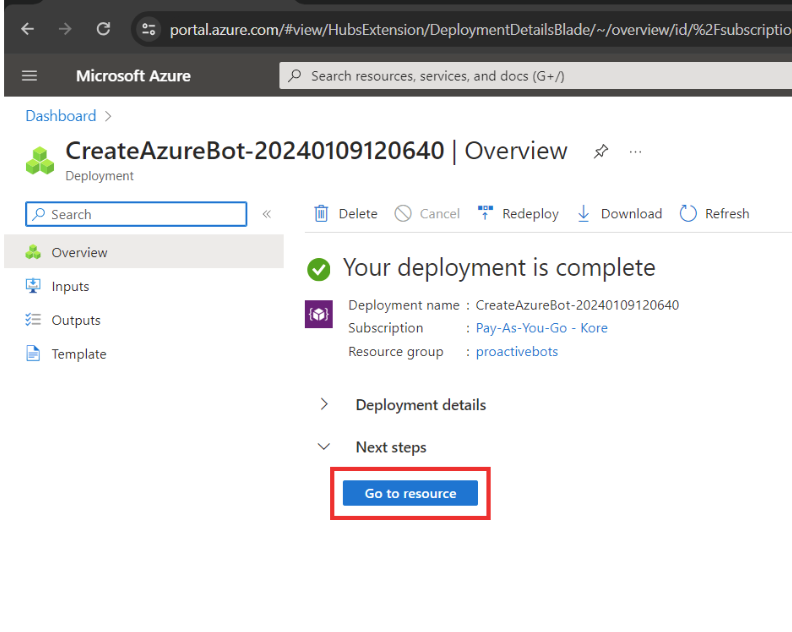
- After creating the Azure Bot you will see that “Your deployment is complete“.
Then click on “Go to resource“
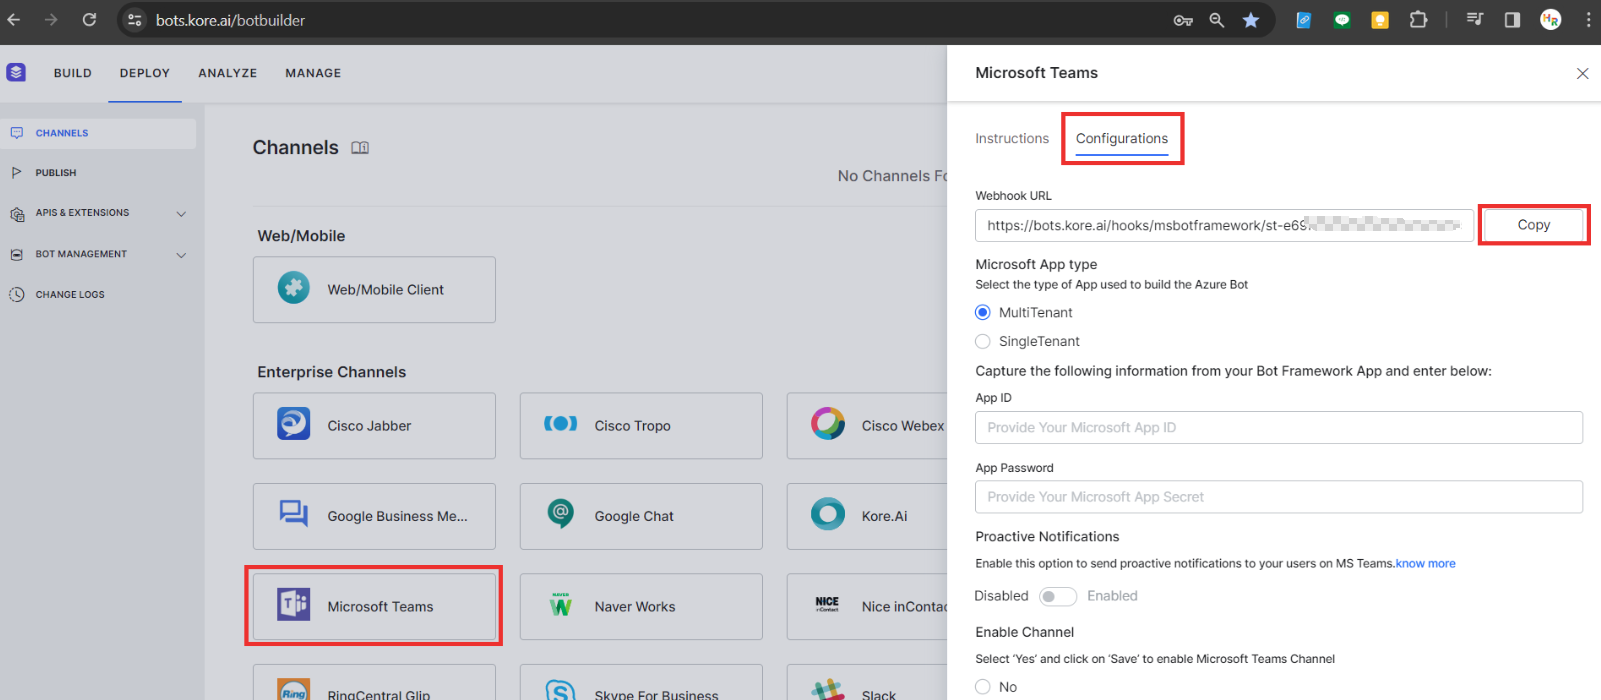
- Go to the Botbuilder and Click on the configurations tab of the Microsoft Teams channel as shown below. Copy the Webhook URL in the configurations tab.
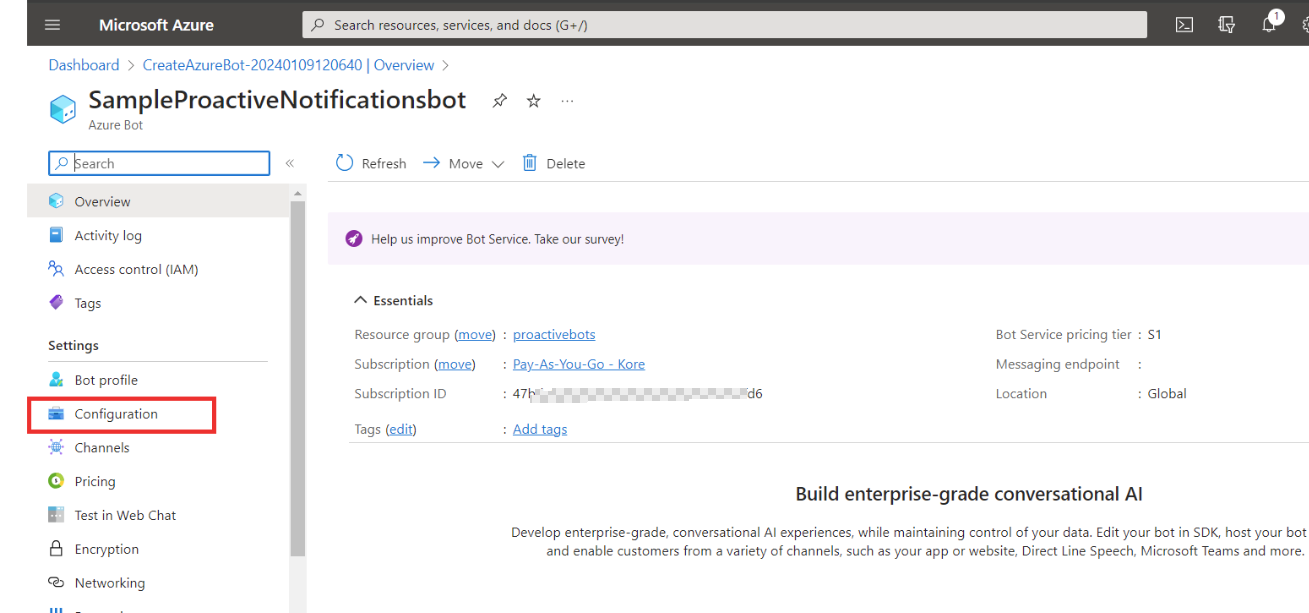
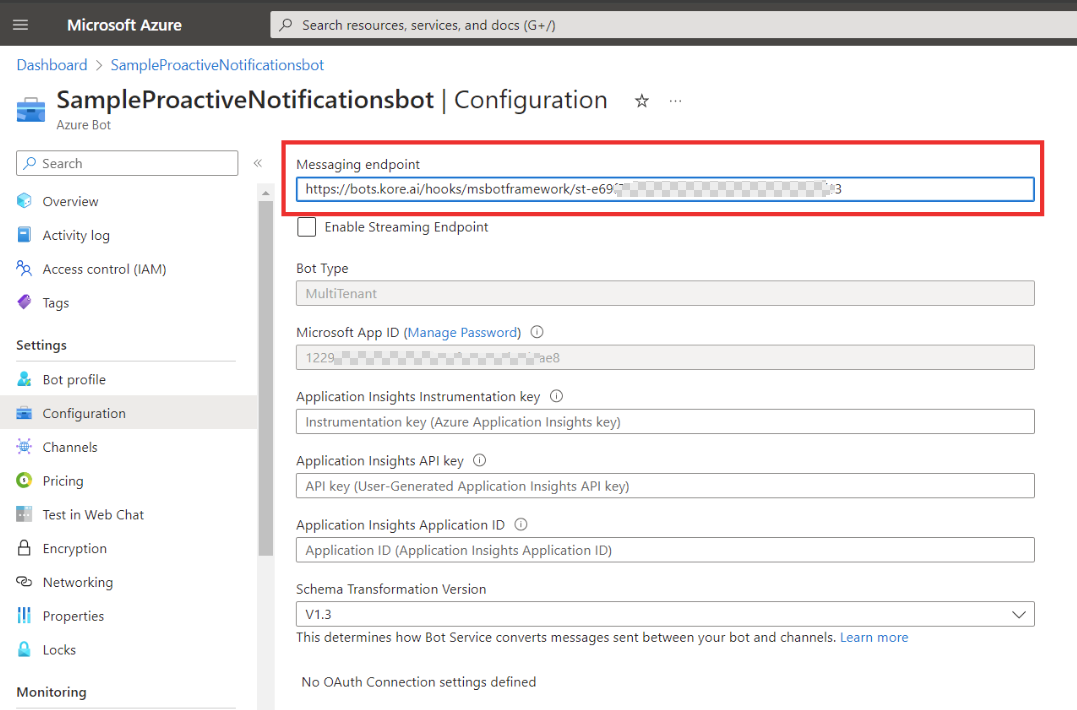
- Now go to the Azure portal and click on Configurations tab on the left side as shown below.
- Paste that Webhook URL in the Messaging endpoint field.
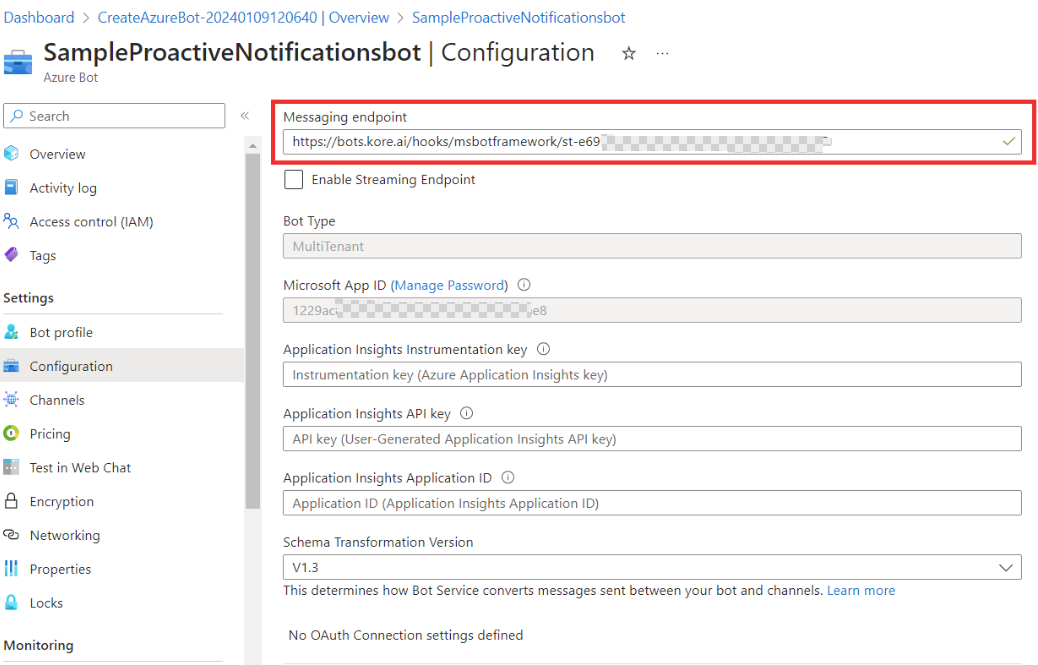
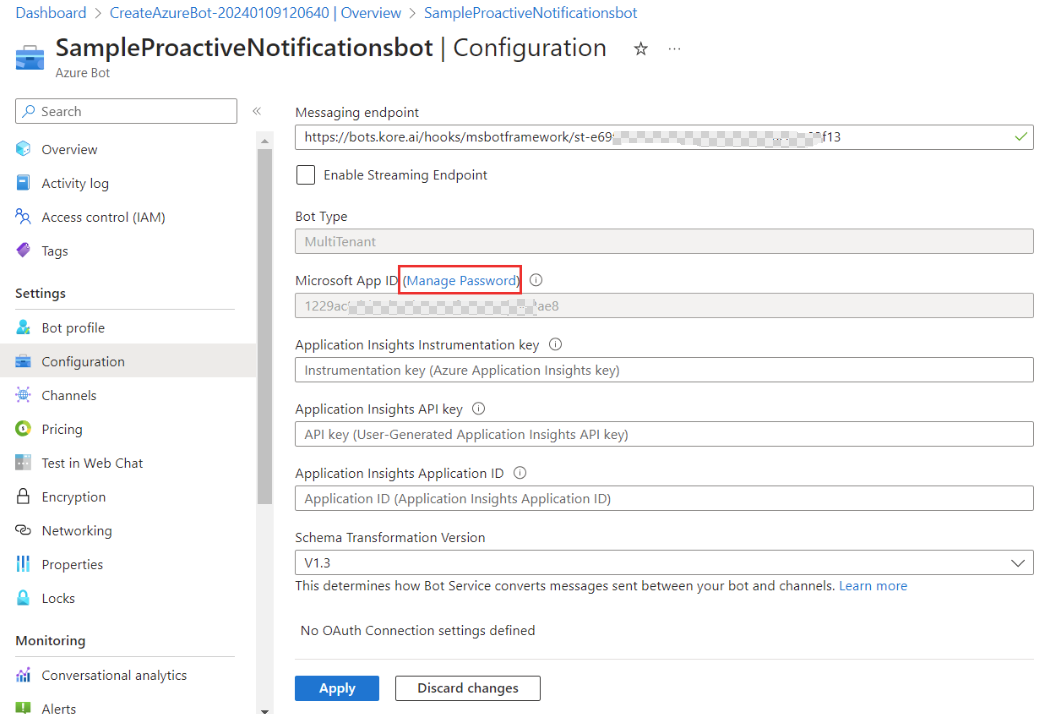
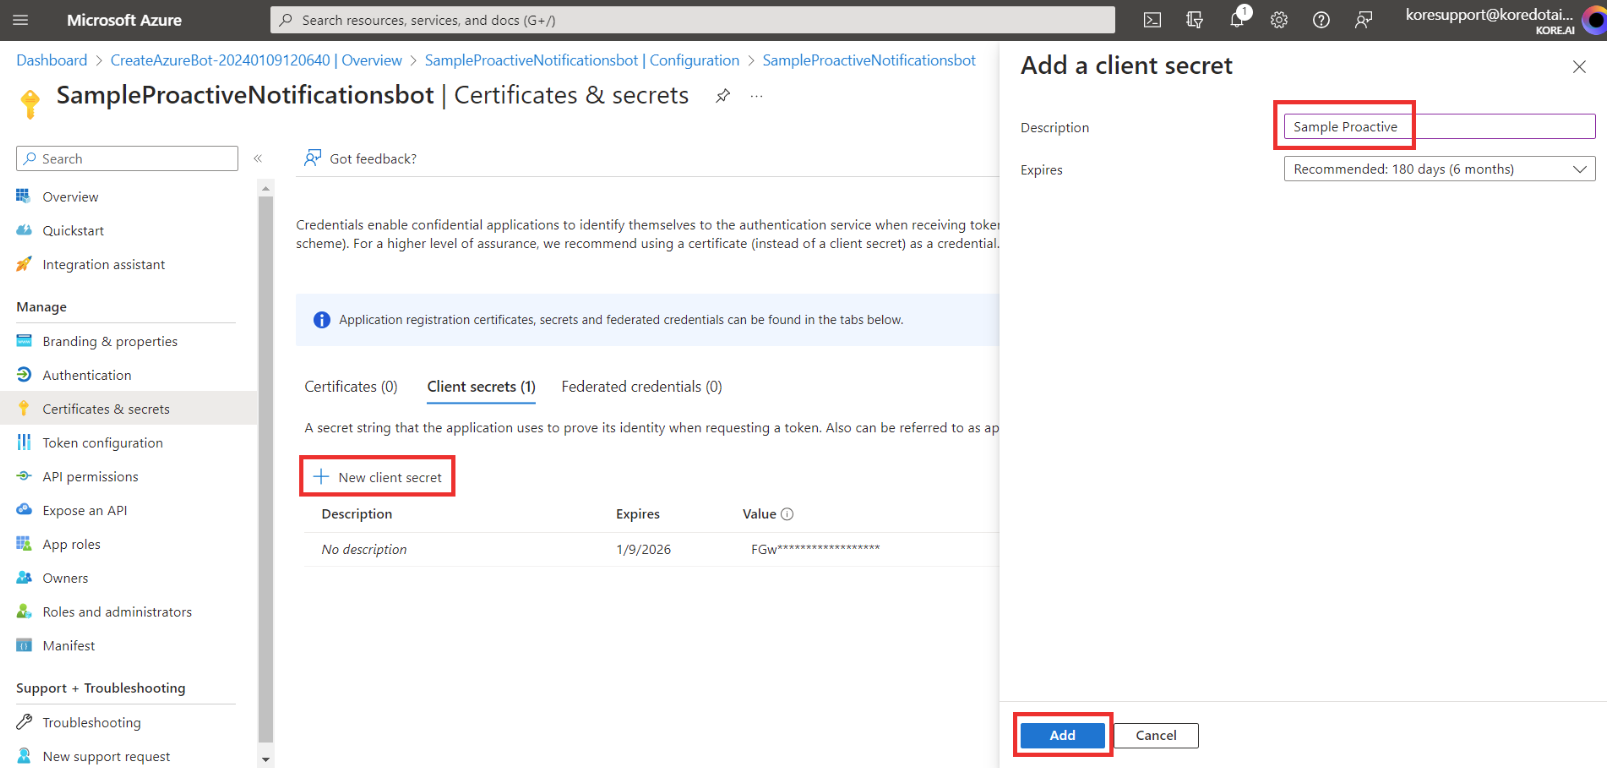
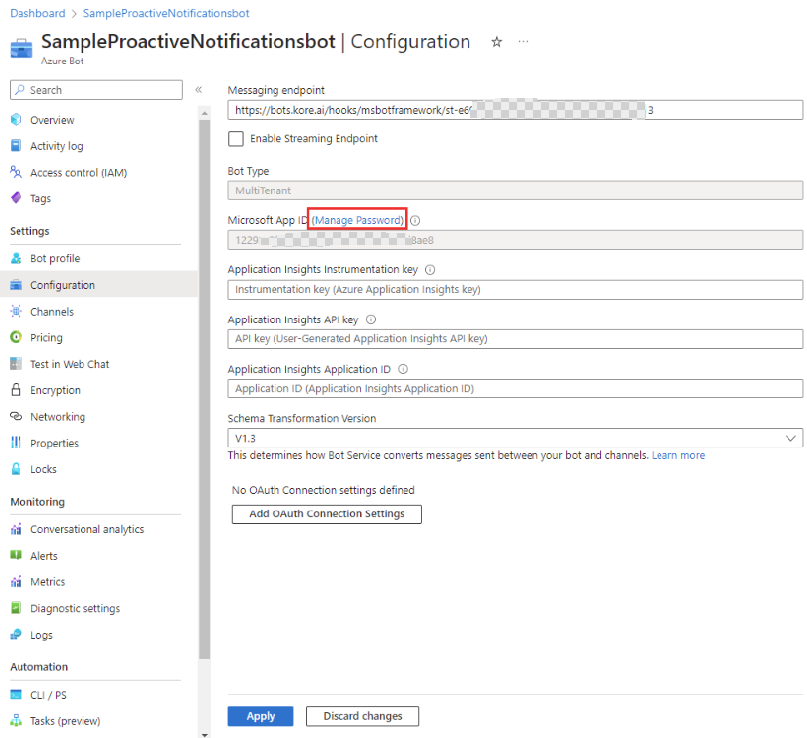
- Click on the Manage Password link which is located beside “Microsoft App ID“ field.
- Create a New Client secret by clicking on “New client secret“ button as shown below.
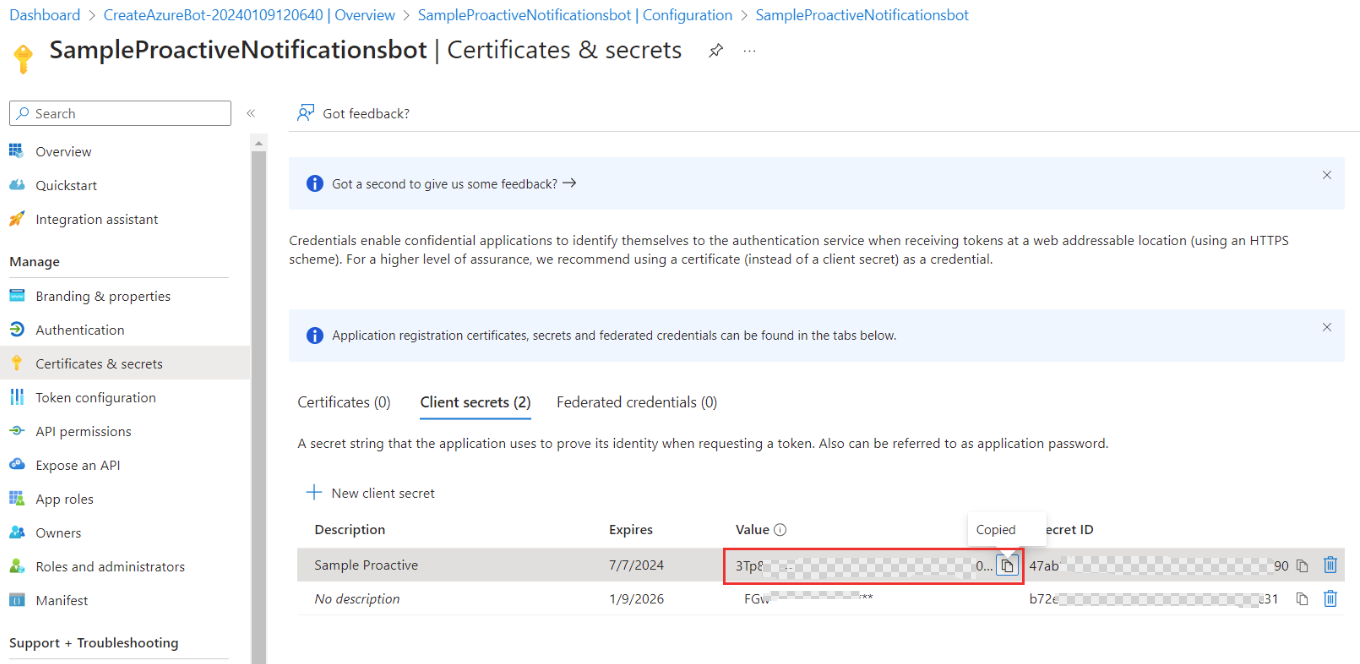
- After creating the client secret, copy that value and paste that in the “App Password“ field of the MS teams configurations in the bot builder.

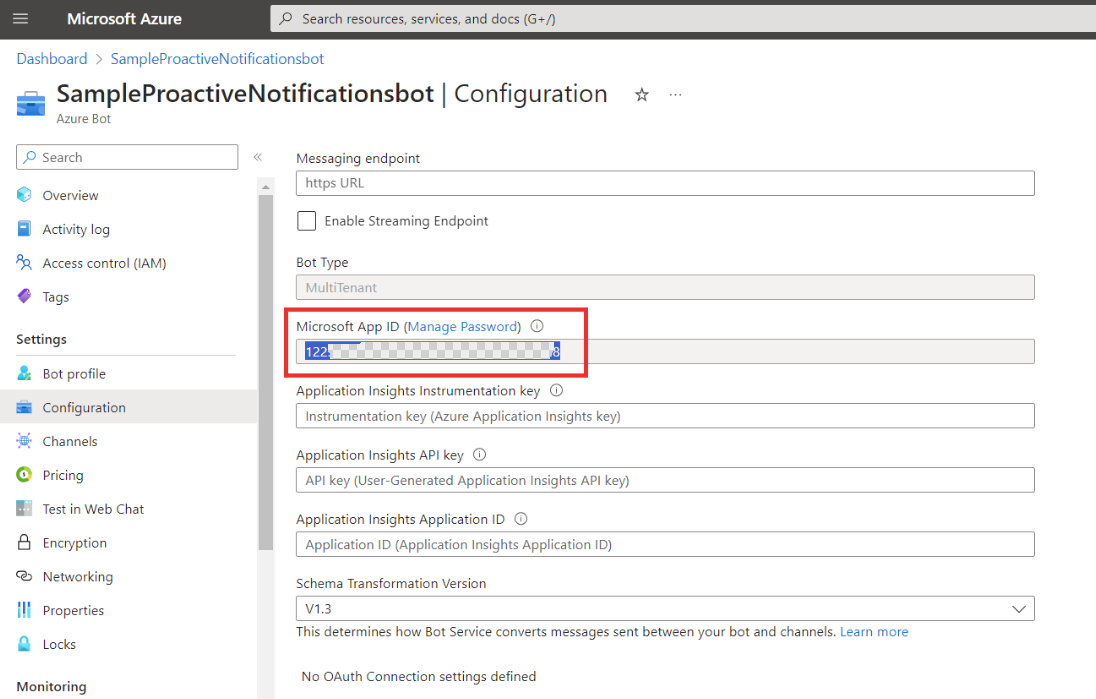
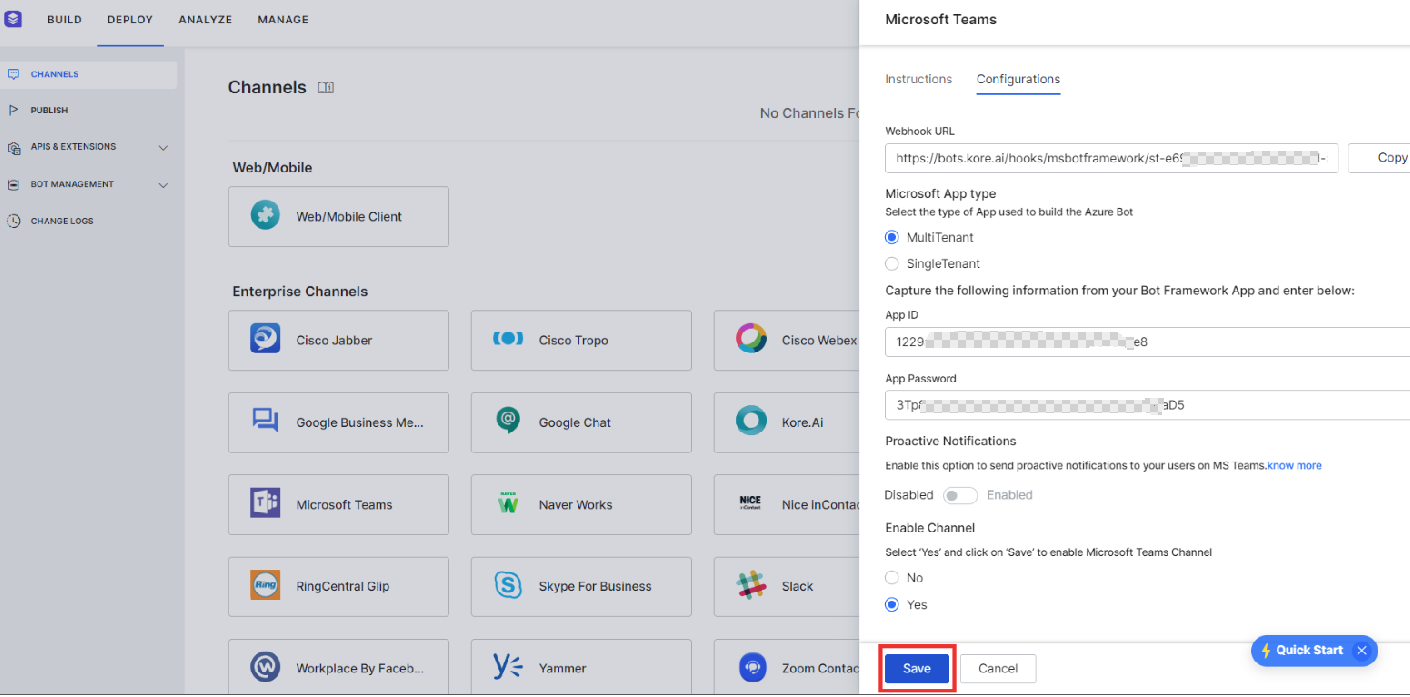
- Copy the Microsoft App ID and paste that value in the App ID field of the Microsoft teams configurations in the bot builder as shown below.
- Copy the Webhook URL and paste it in the Messaging endpoint field as shown below and click on Apply.
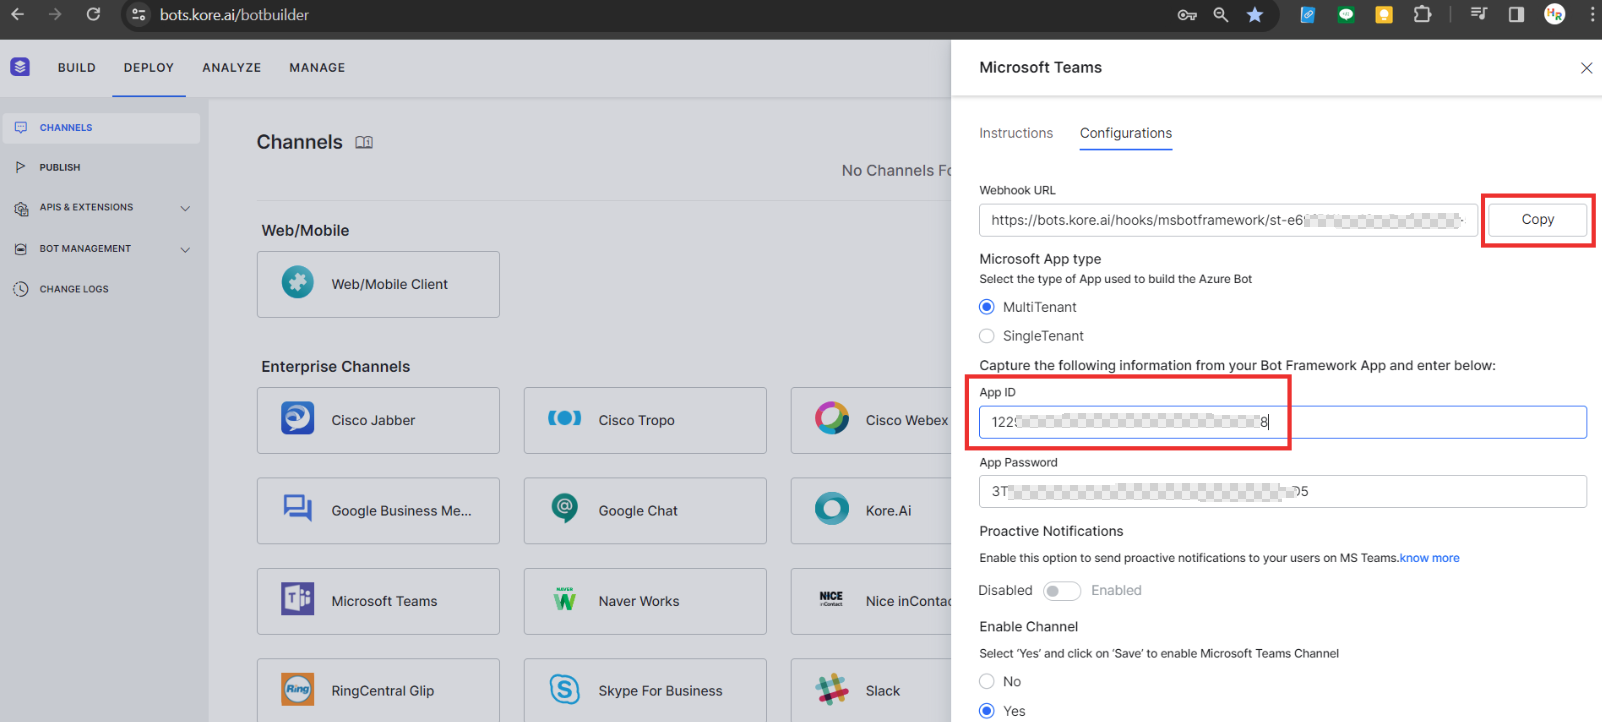
- Save the Microsoft teams configurations in the Bot builder by clicking the Save button.
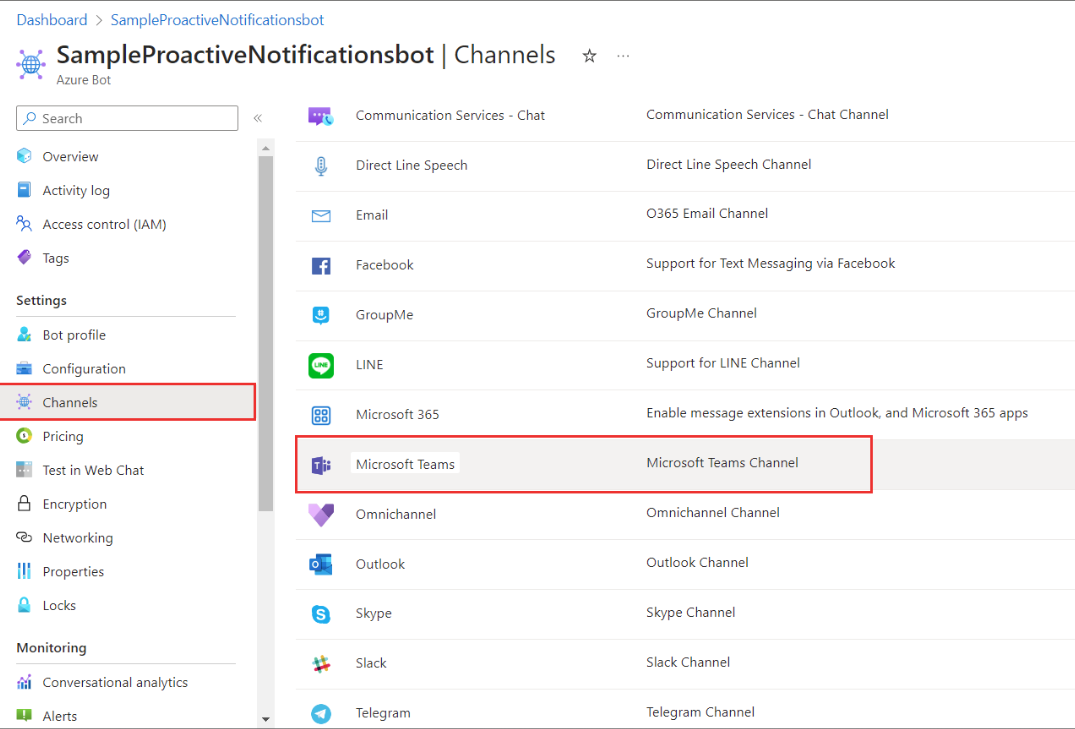
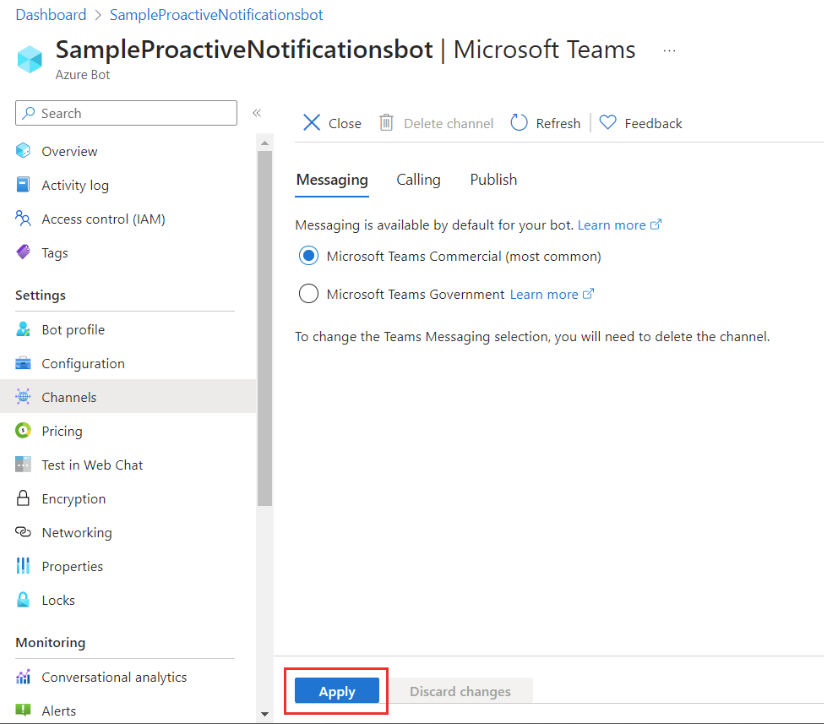
- Click on “Channels“ settings and click on Microsoft Teams option as shown below.
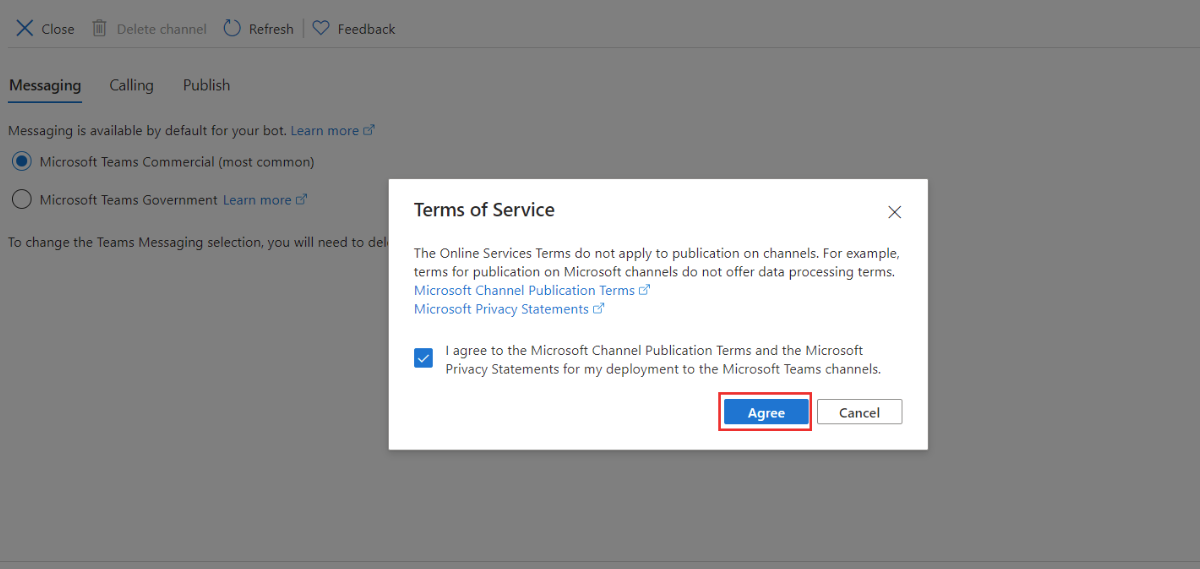
- Select the option as shown below and click on “Agree“
- Click on “Apply“
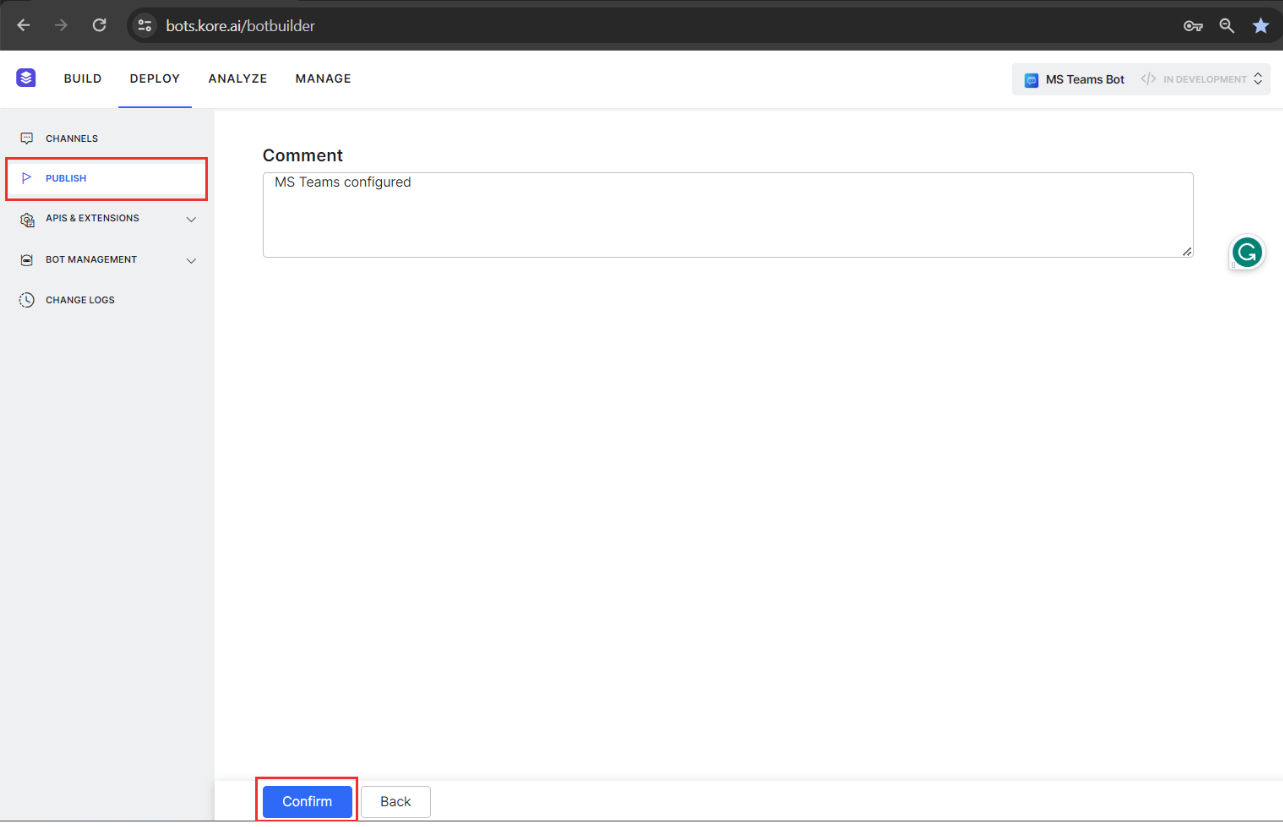
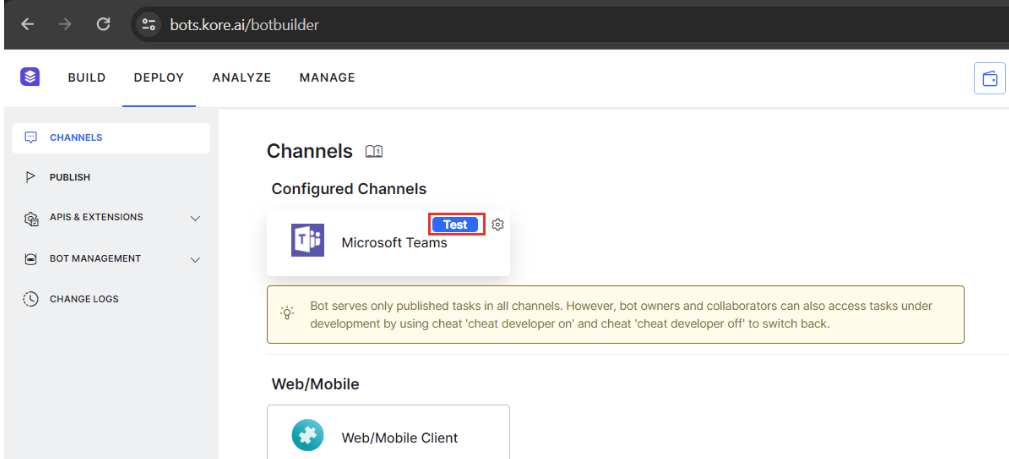
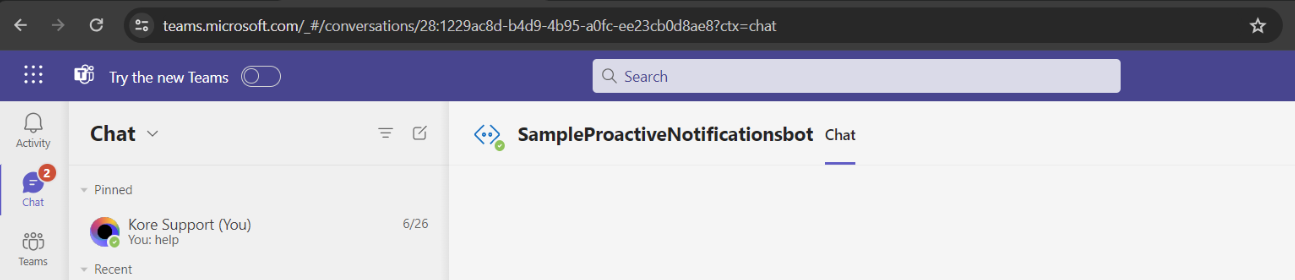
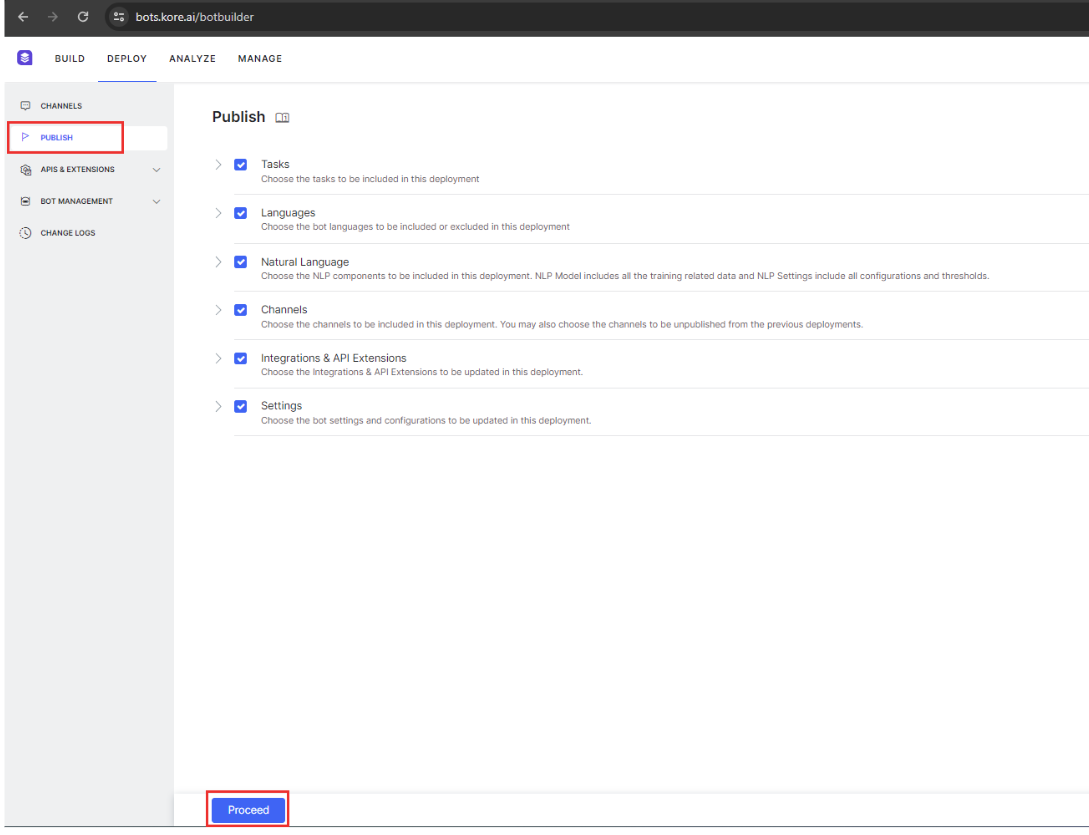
- Publish your bot and then you can talk to your bot through the MS Teams Channel.
Configuring the Proactive Notifications
What are Proactive Notifications ?
Proactive notifications/alerts are a series of messages that can be pre-programmed by a company to regularly communicate with customers.
Ex: Banking – Server maintenance message
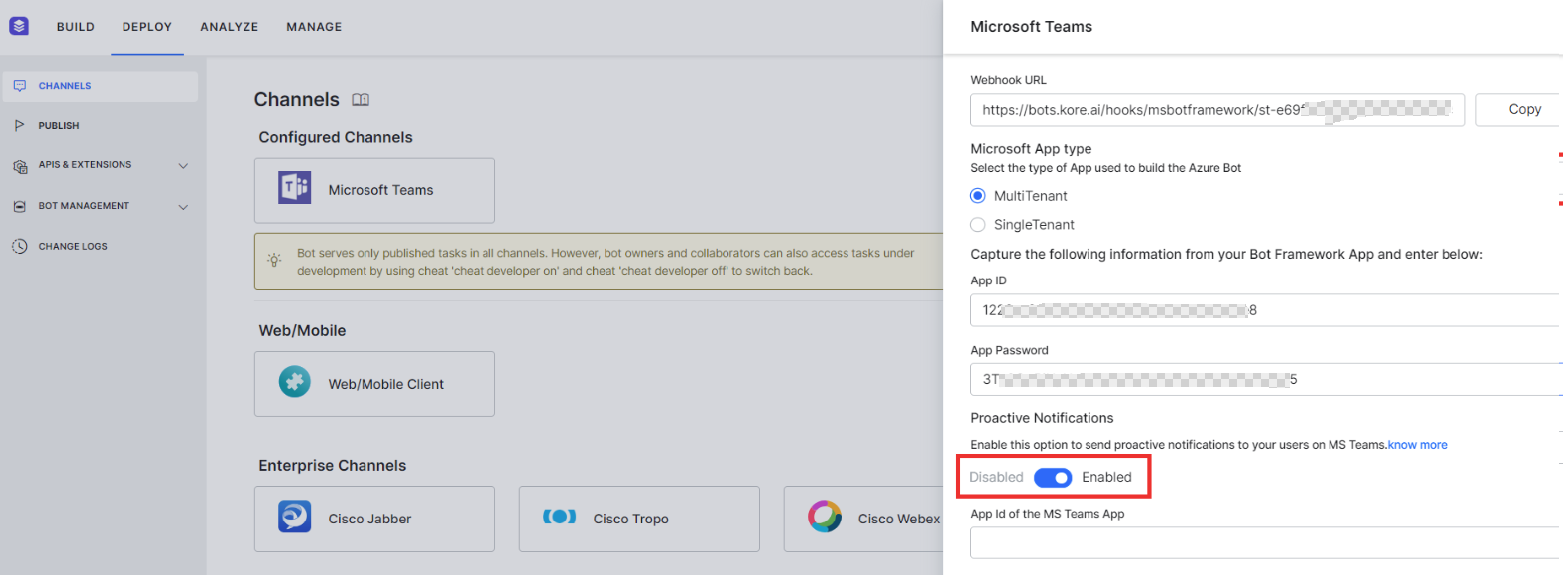
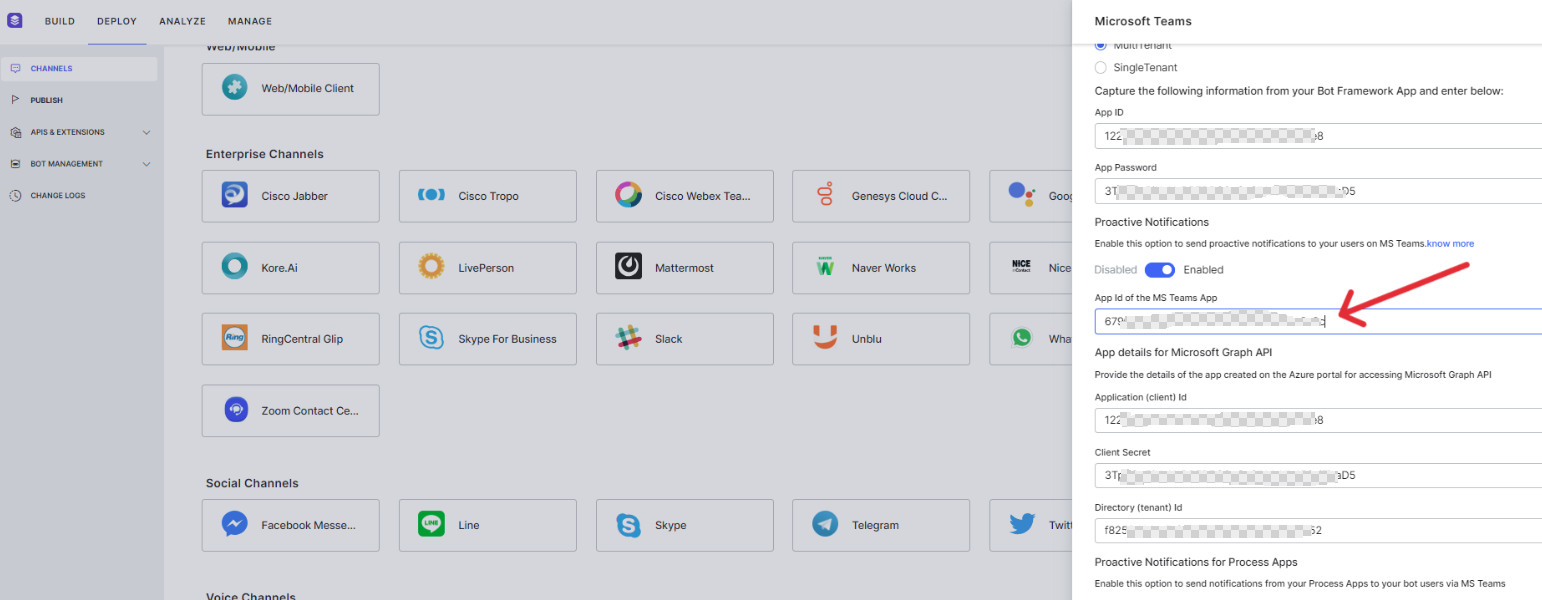
- Click on the toggle button and Enable the Proactive Notifications Option as shown below.
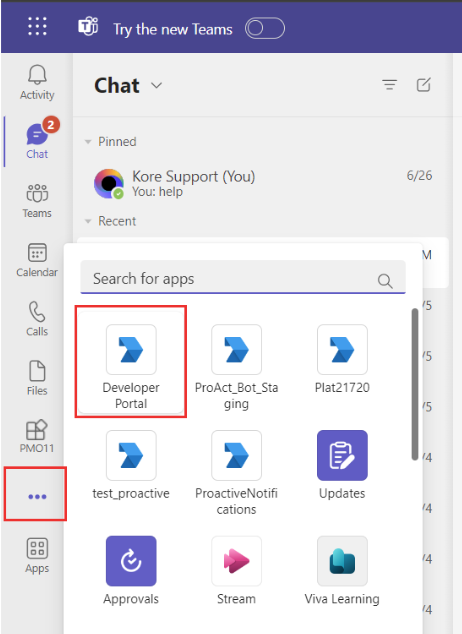
- Go to the Teams Developer portal.
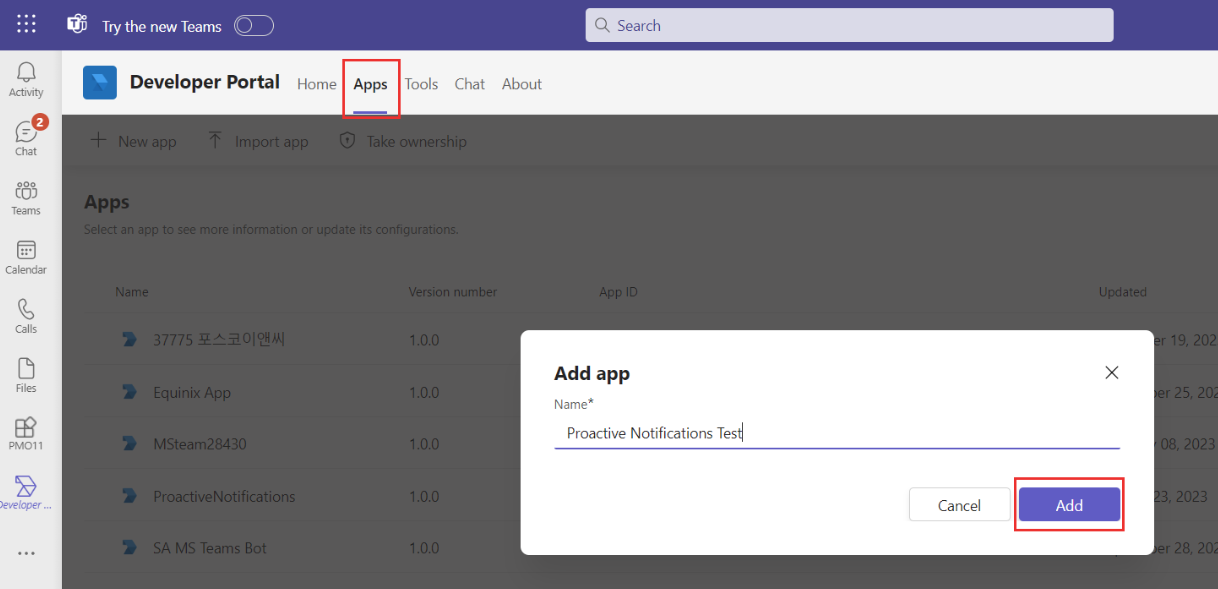
- Click on “Apps“ section and define a name for your app and click on “Add“ button as shown below.
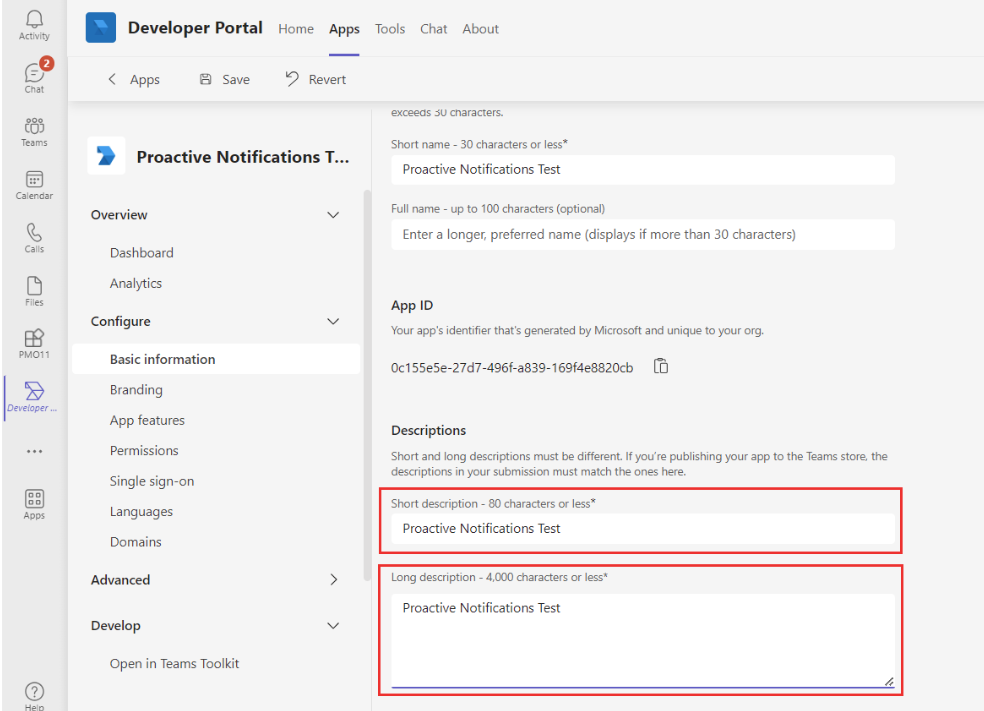
- Add the Basic information as shown below.
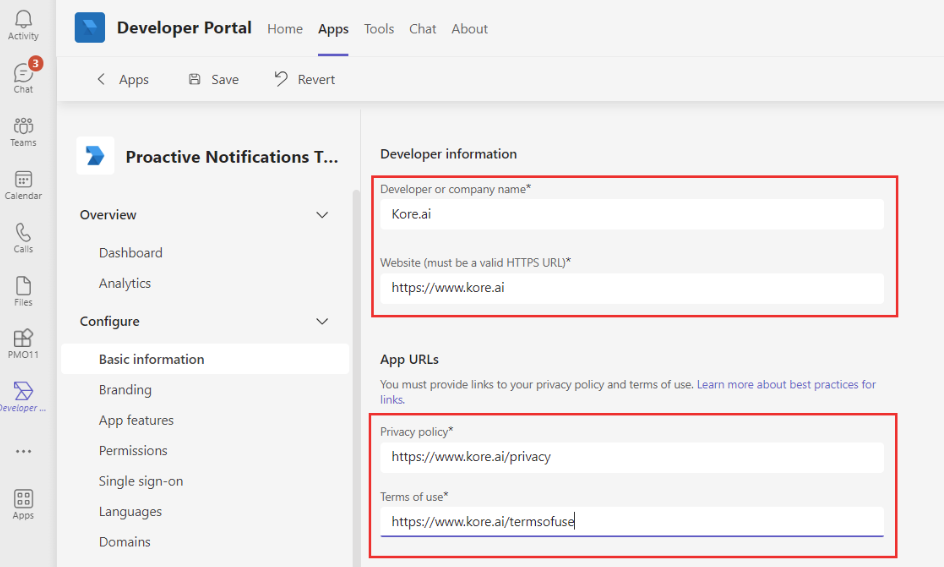
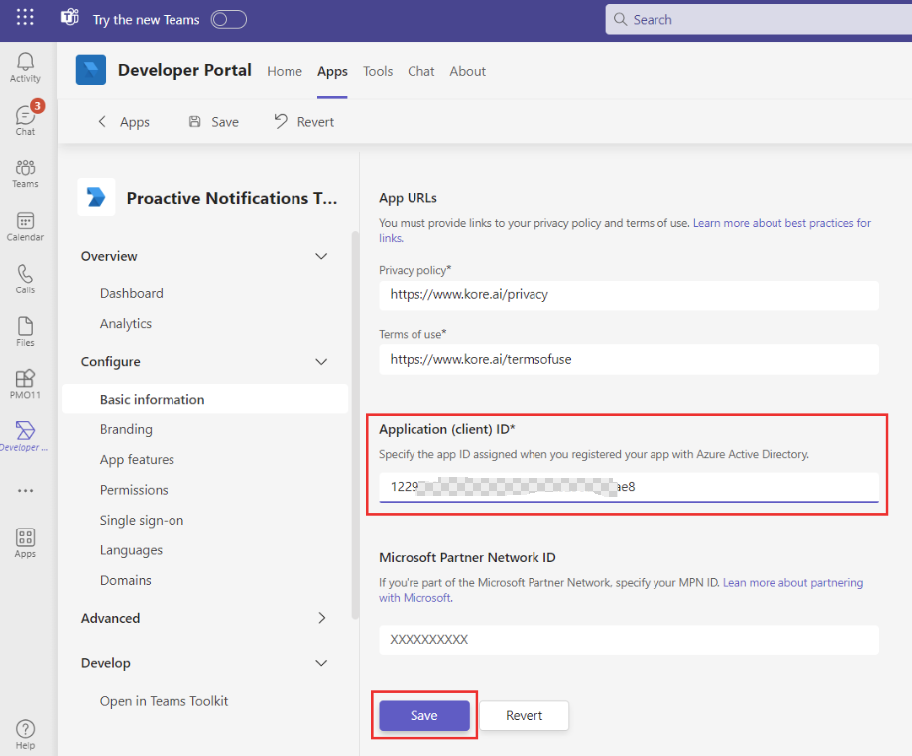
- Go to the Bot Builder and copy the App ID and paste that in the Application (client) ID and click on Save.
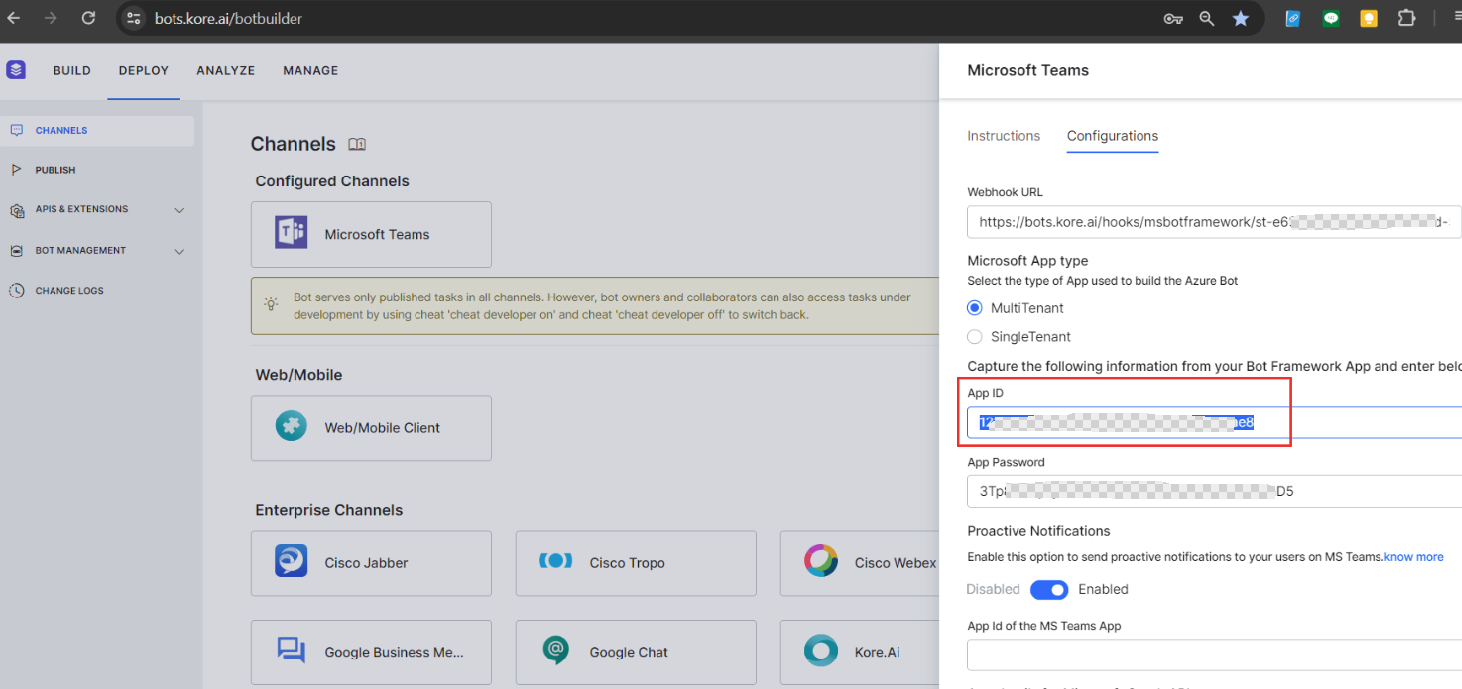
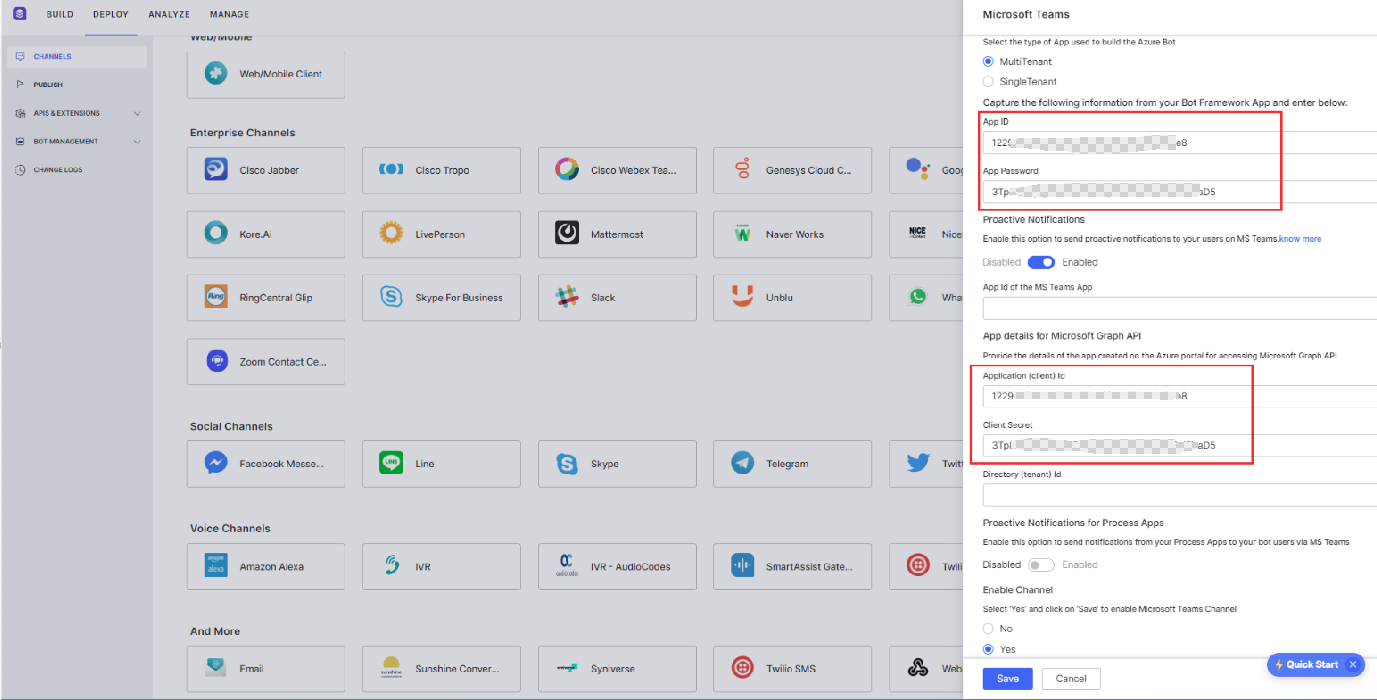
- Copy and paste the App ID and App Password and paste those values in Application (client) ID and Client secret.
- Click on the “Configuration“ settings in the Azure portal and click on “Manage Password“ link as shown below.
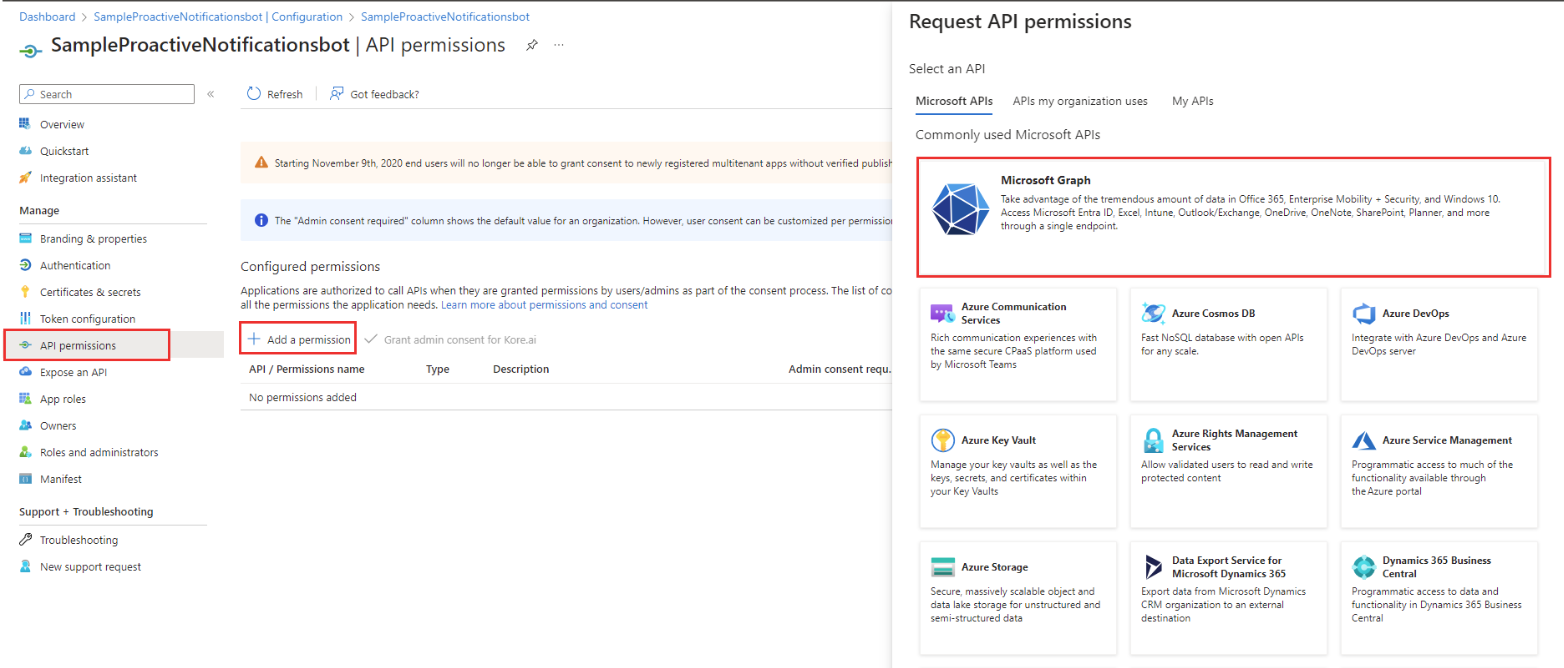
- Go to API Permissions then add a permission by clicking the “Add a Permission“ button and select Microsoft Graph option.
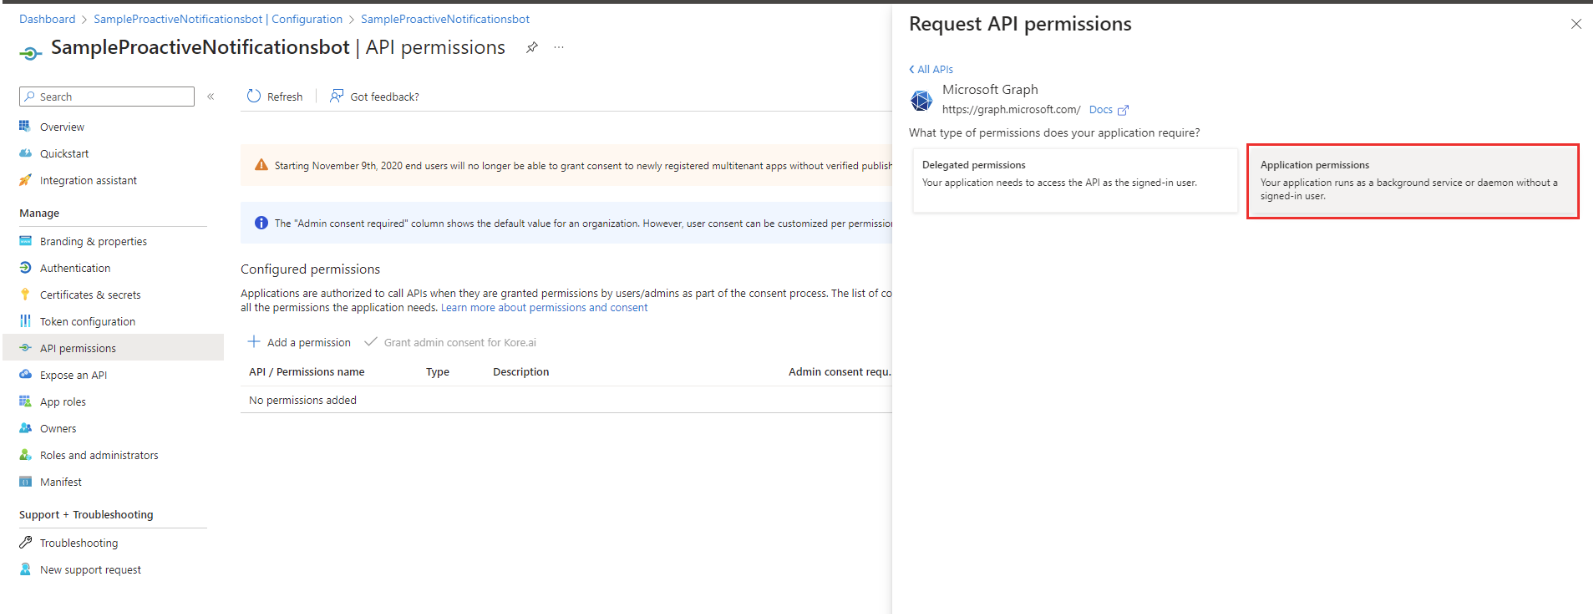
- Select Application Permission option
- Search for “teamsapp“ and enable “TeamsAppInstallation.ReadWriteForUsers.All“ and “User.ReadAll“ permissions as shown below.
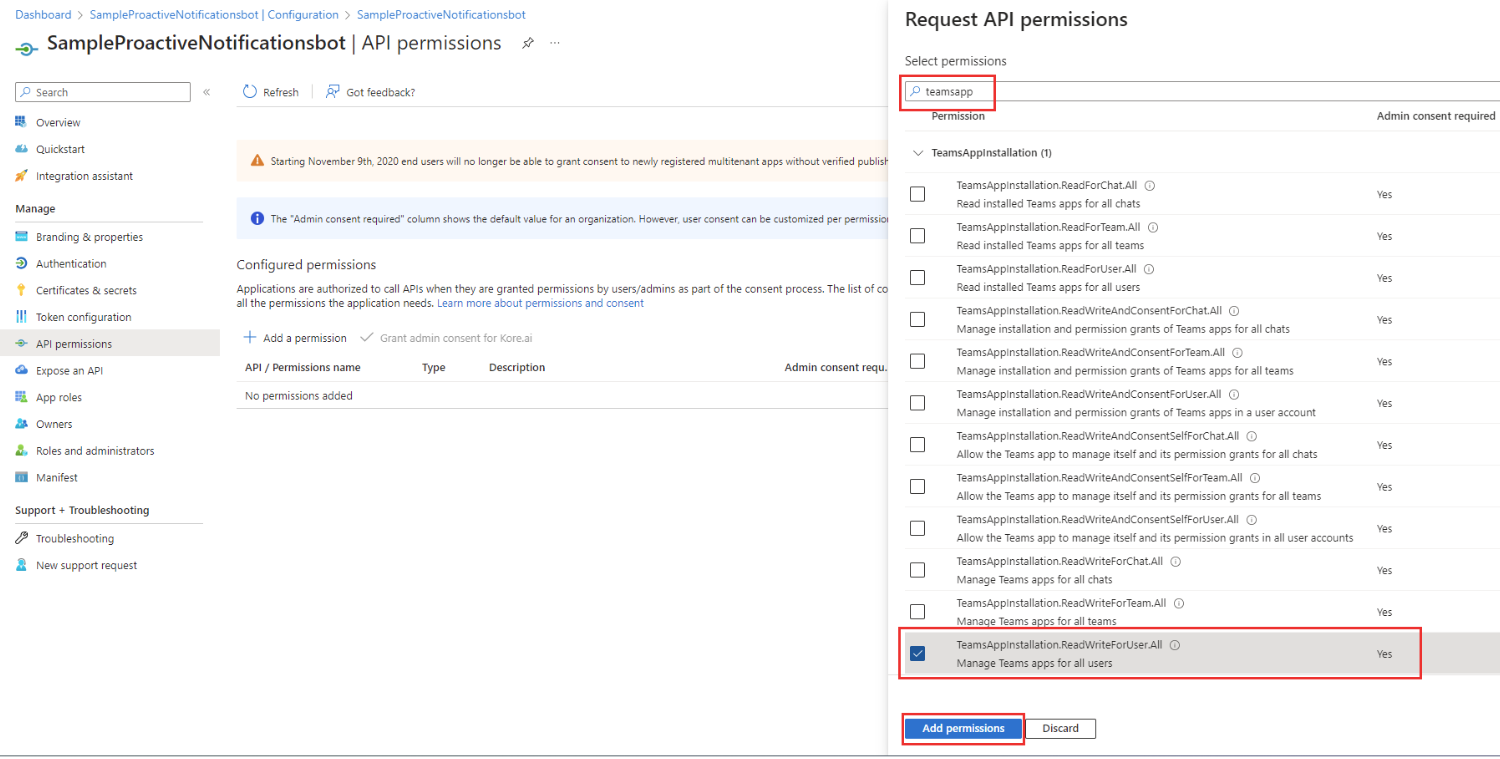
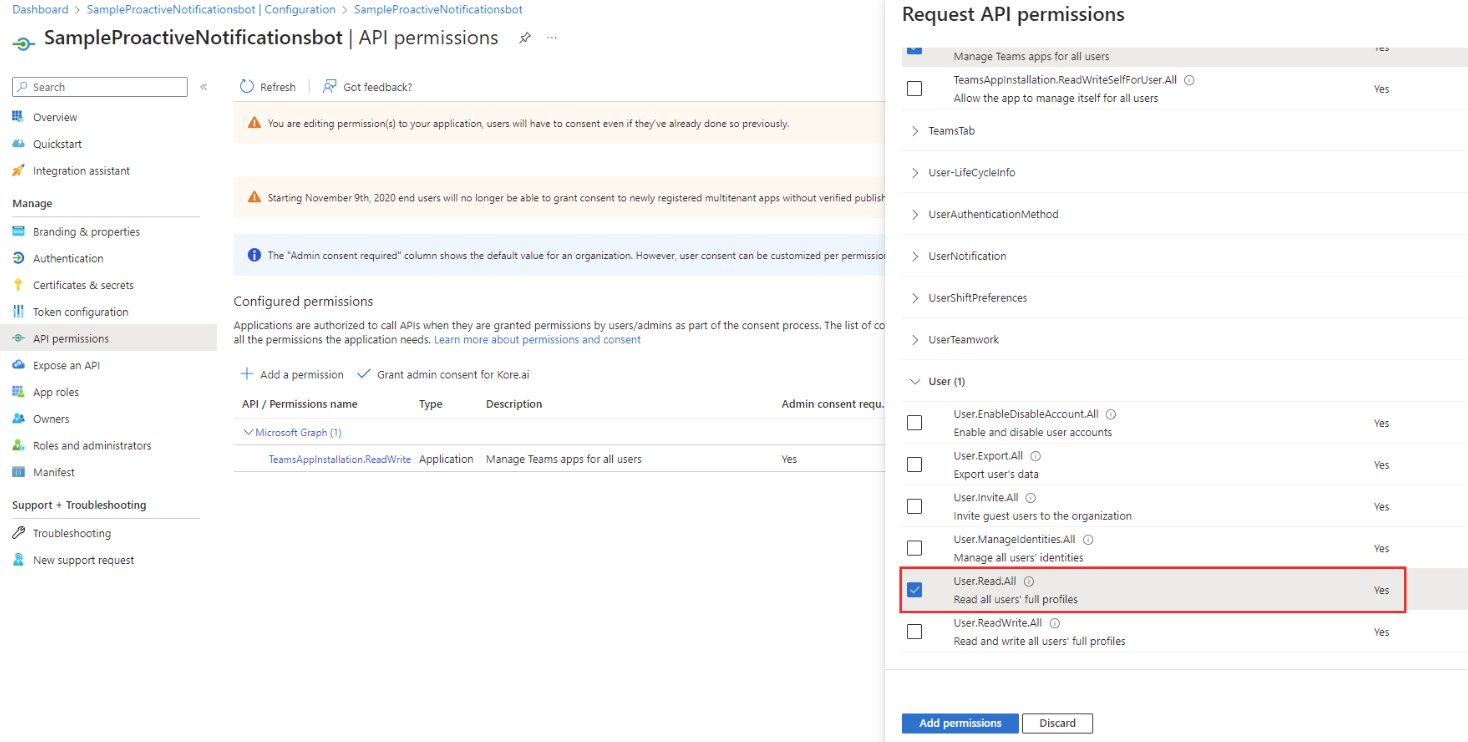
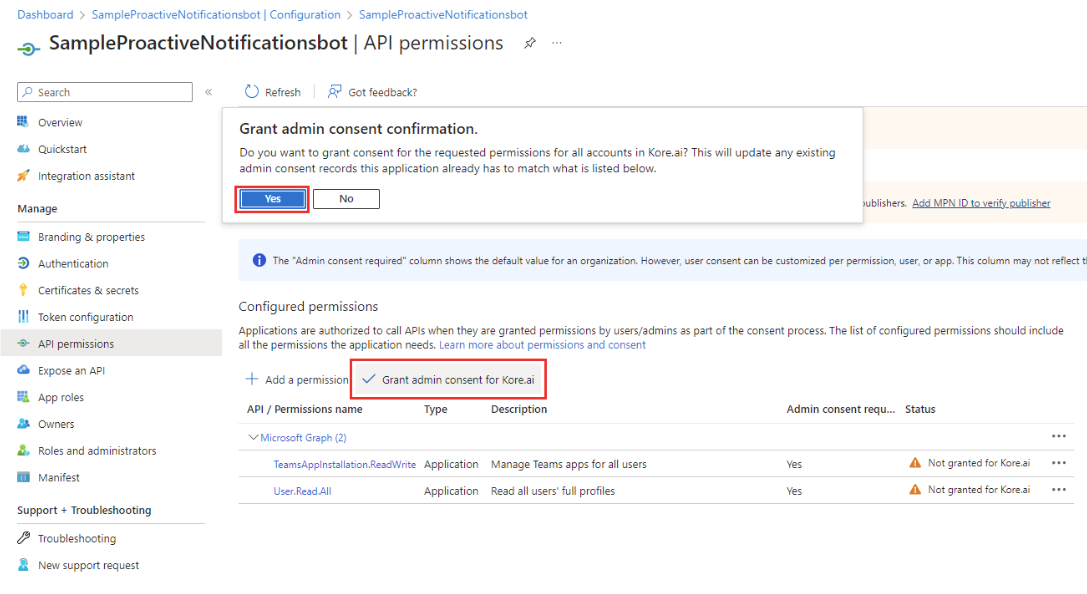
- Click on Grant admin consent and select Yes.
-
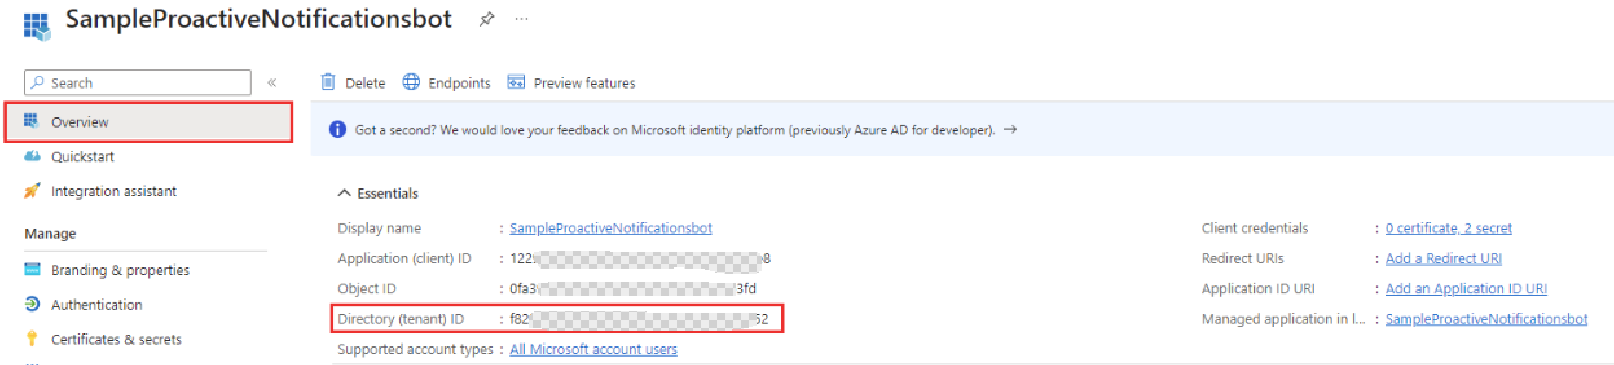
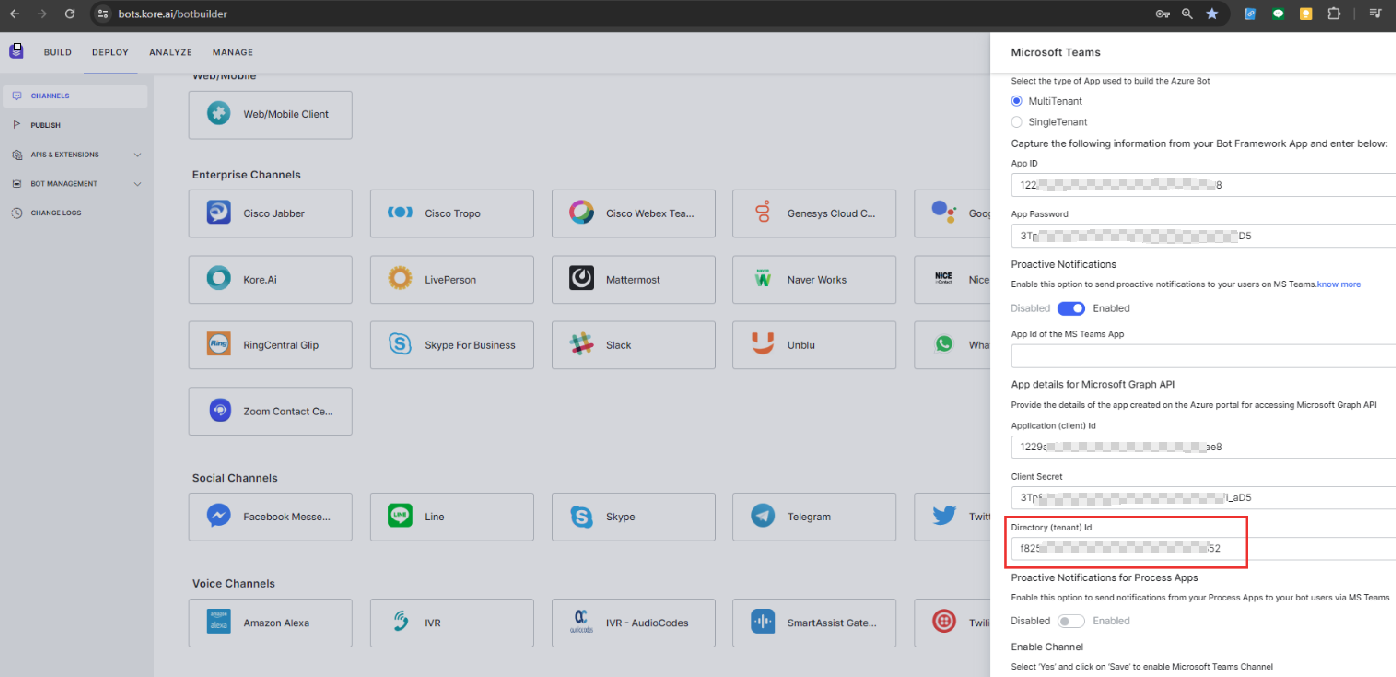
Now go to the Overview section and copy the Directory (tenant) ID value
-
Paste that value in the Directory (tenant) Id field of the MS Teams configurations as shown below.
-
Copy the App ID value in the Bot Builder.

- Go to the “App features” section in the Teams developer portal and select “Bot“ option as shown below.

- Paste the App ID value which was copied before in the “Enter a Bot ID“ field and modify the fields with your desired values as shown below and click on save.
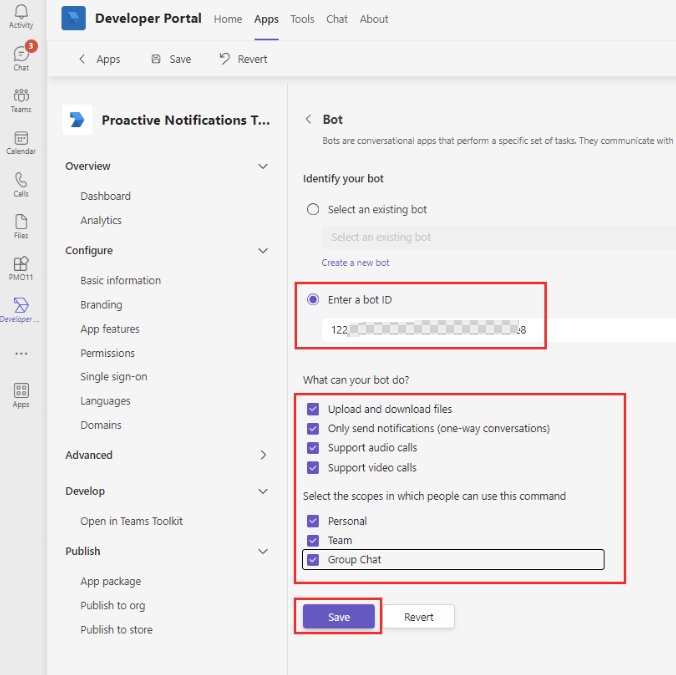
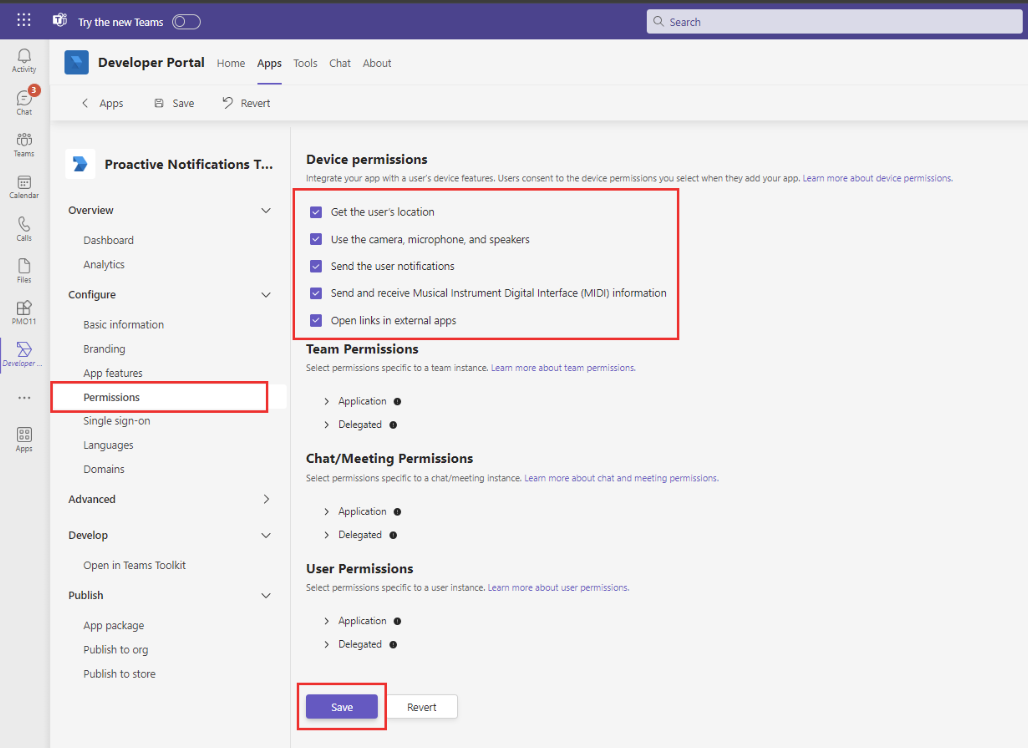
- Enable your desired permissions and click on save as shown below.
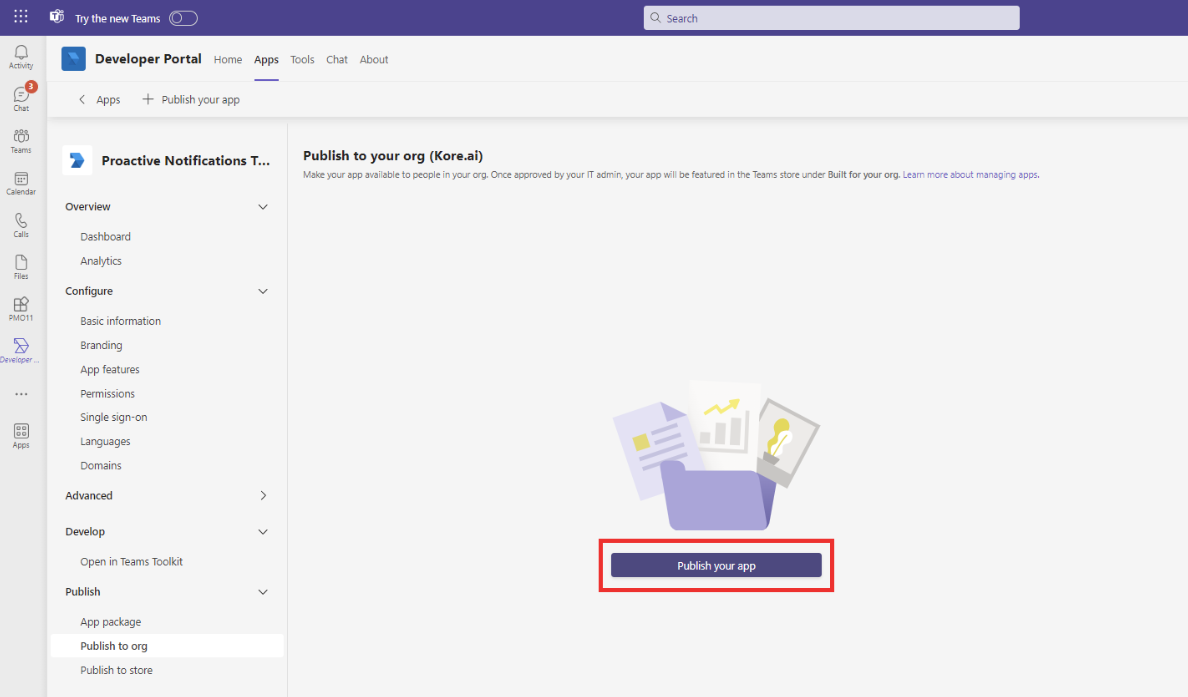
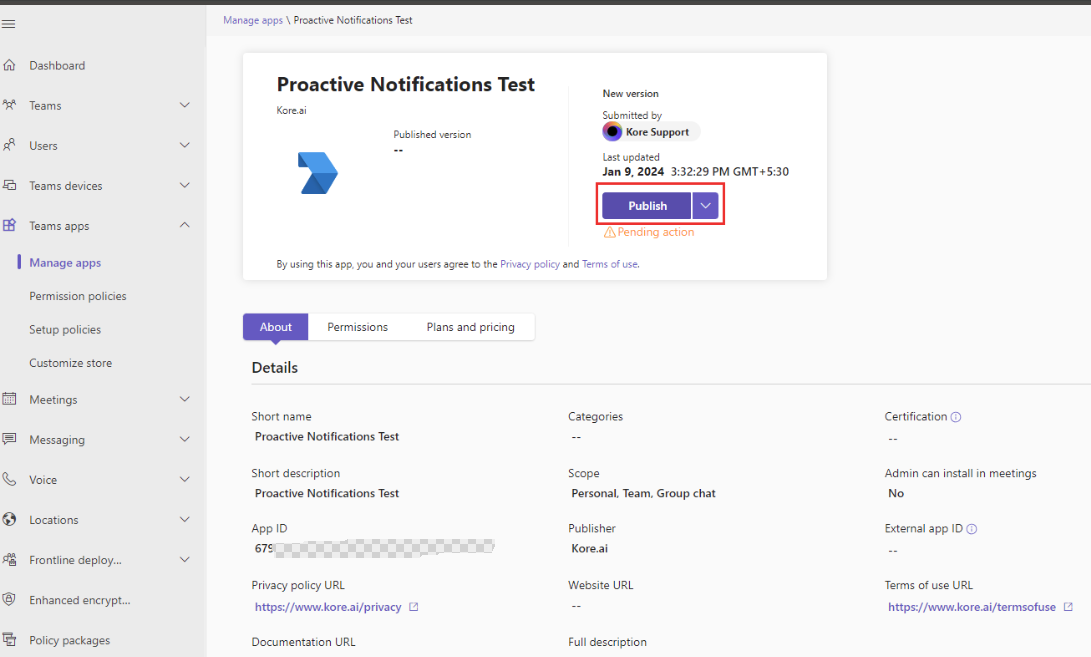
- Select “Publish to your org“ option.
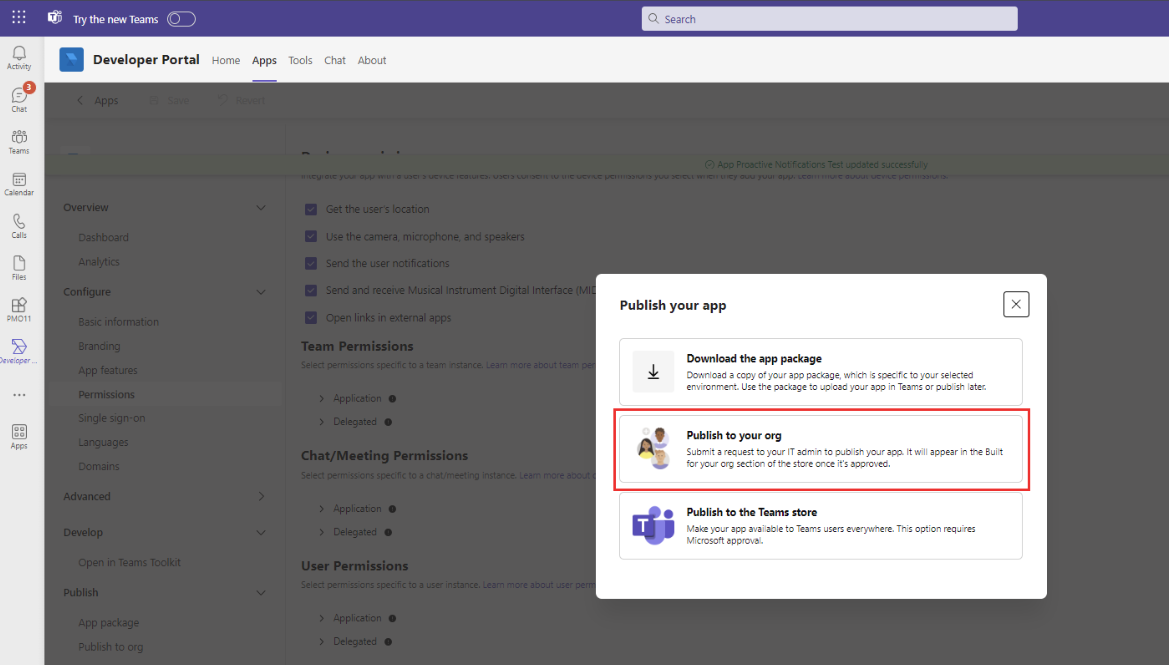
- Click on ”Publish your app”
- Open admin.microsoft.com URL and go to “Manage apps“ and search for your MS Teams app that you created before and select that.
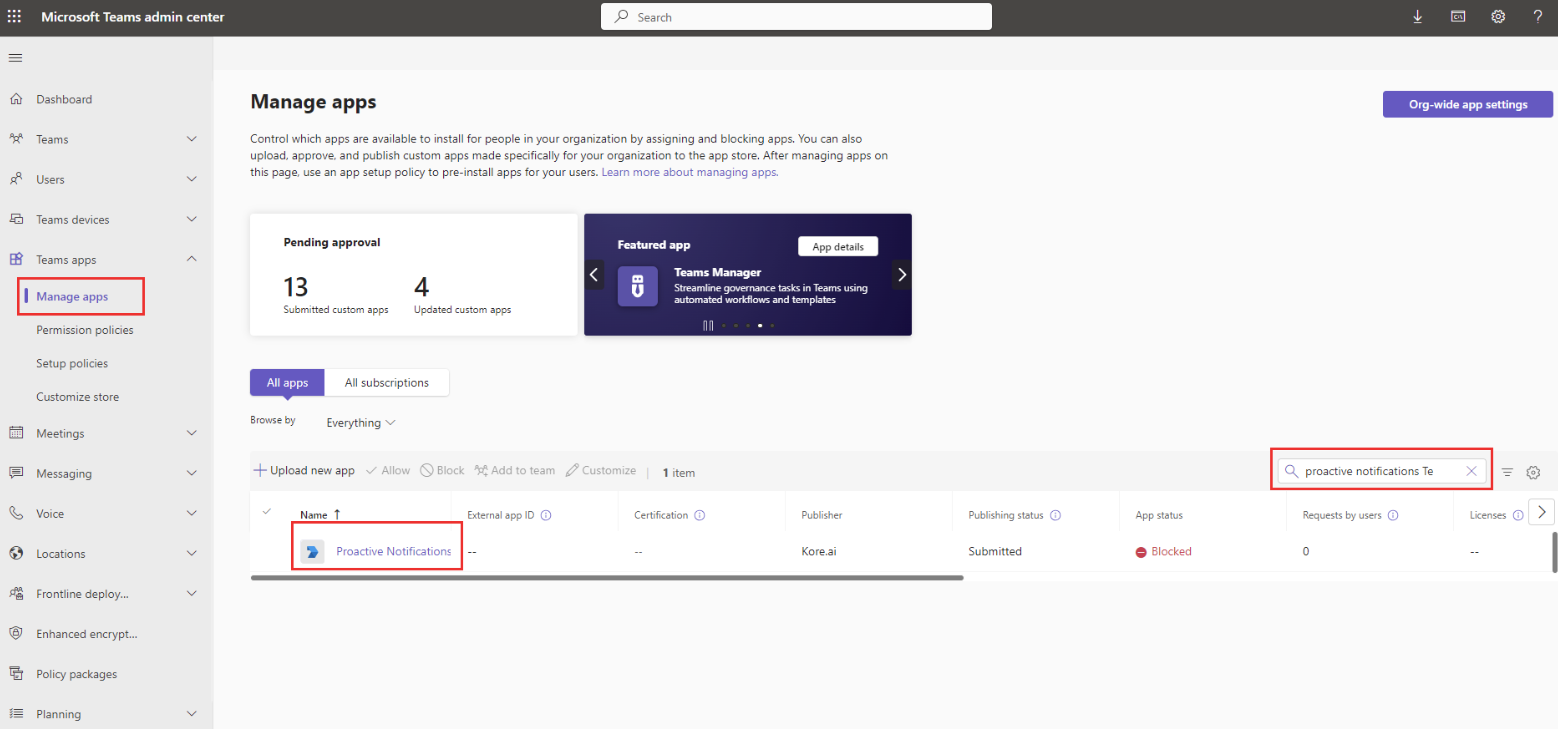
- Copy the App ID and paste that value in “App Id of the MS Teams App“ field of the Bot Builder as shown below.

- Click on Publish Button to publish your MS Teams App.
- After making the changes publish your bot.
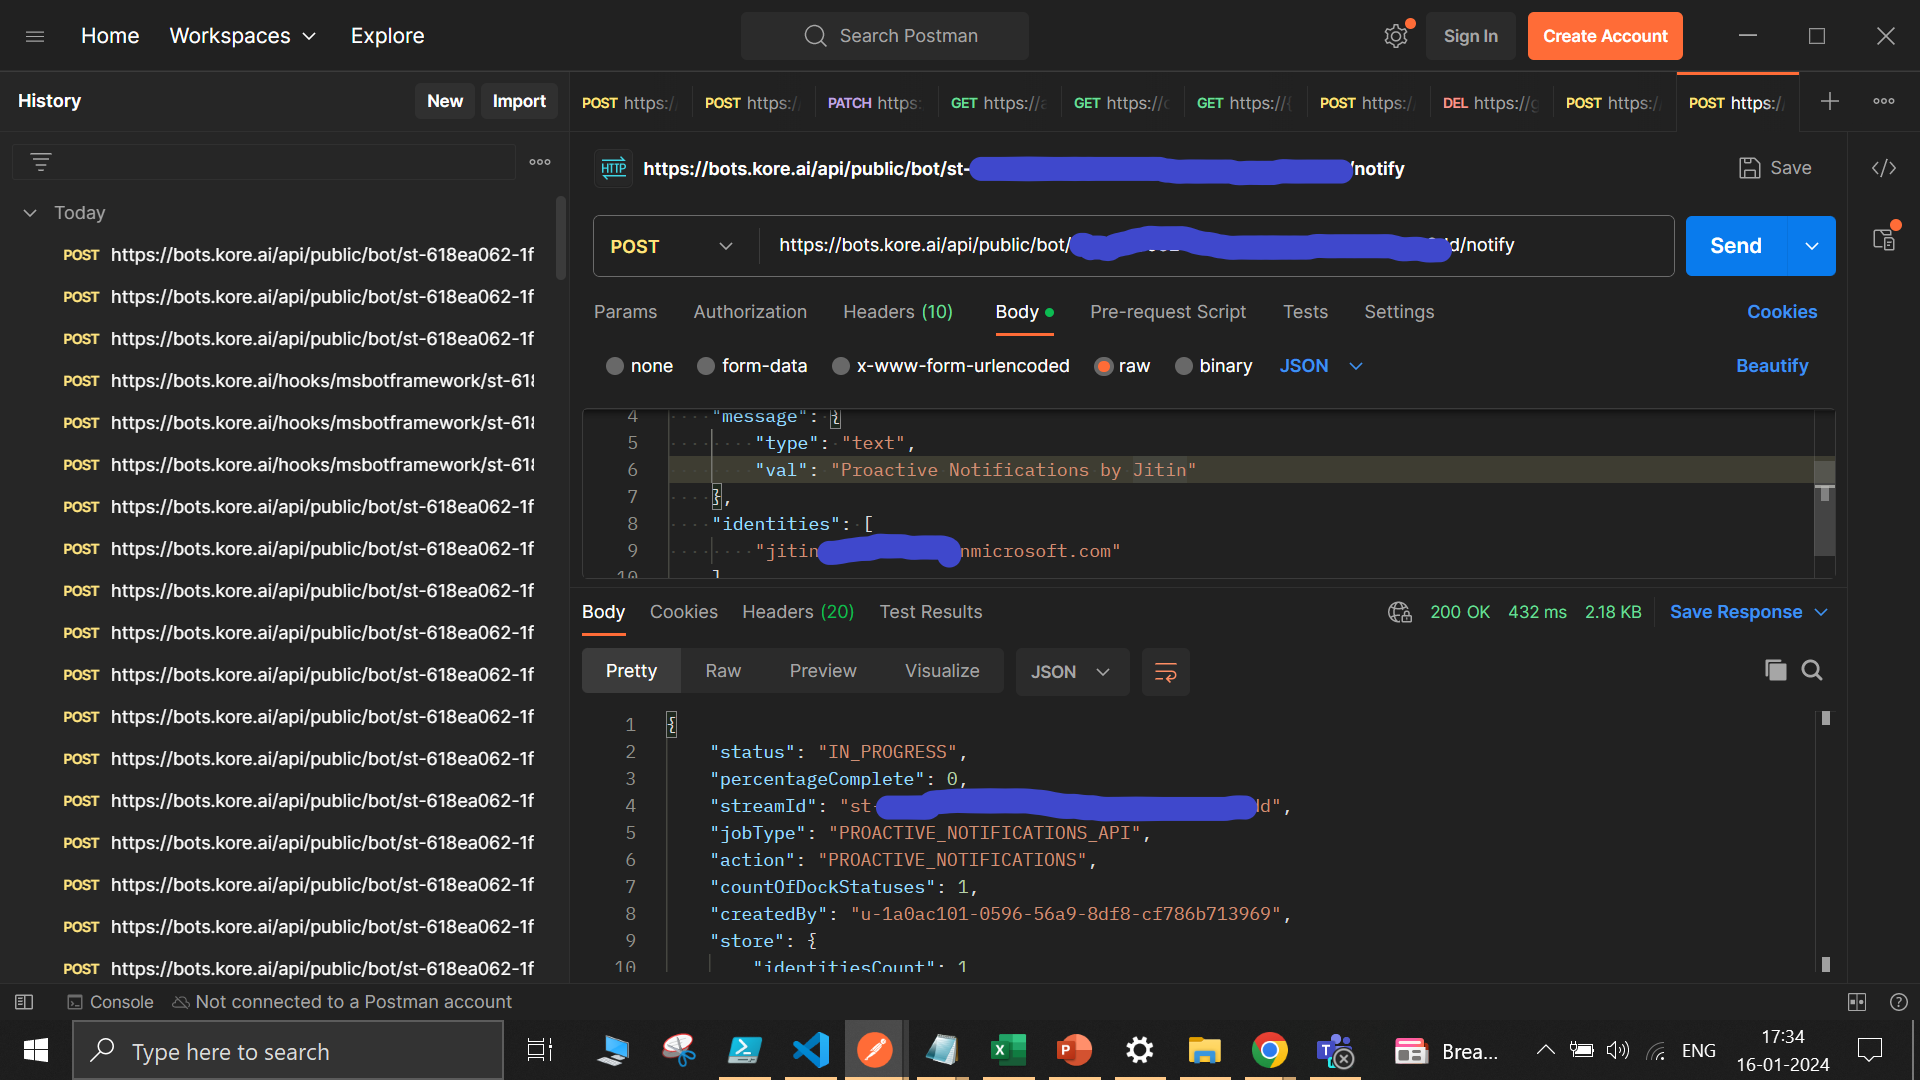
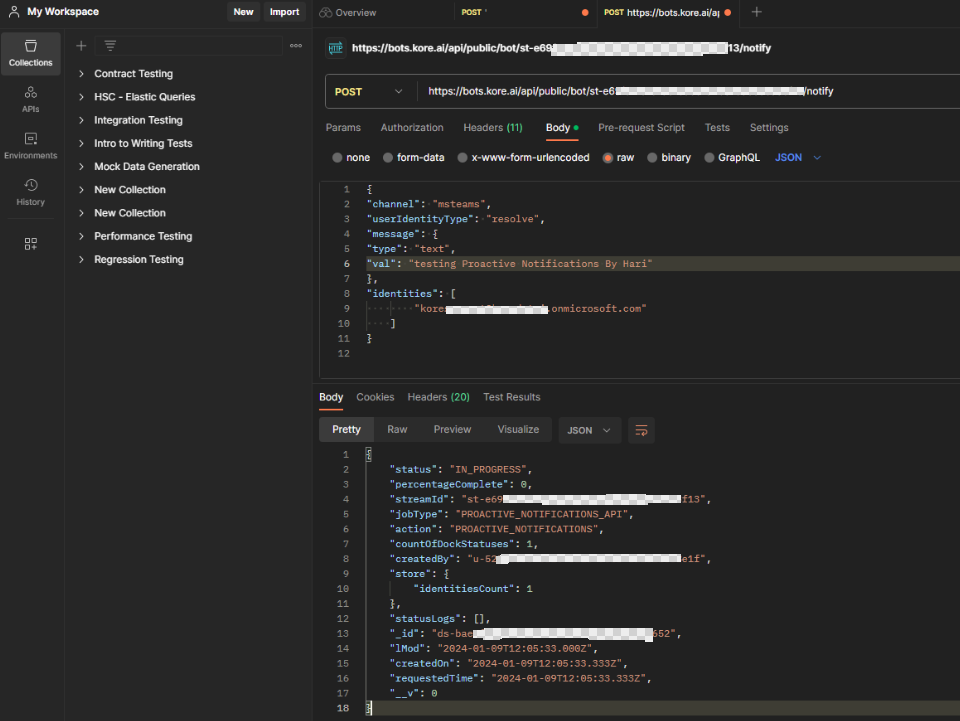
- Now you can be able to send the Proactive Notifications to your Bot by using the Proactive Notifications API.

Content Credit: @hariraj.gandepalli @neharikha.karumajji