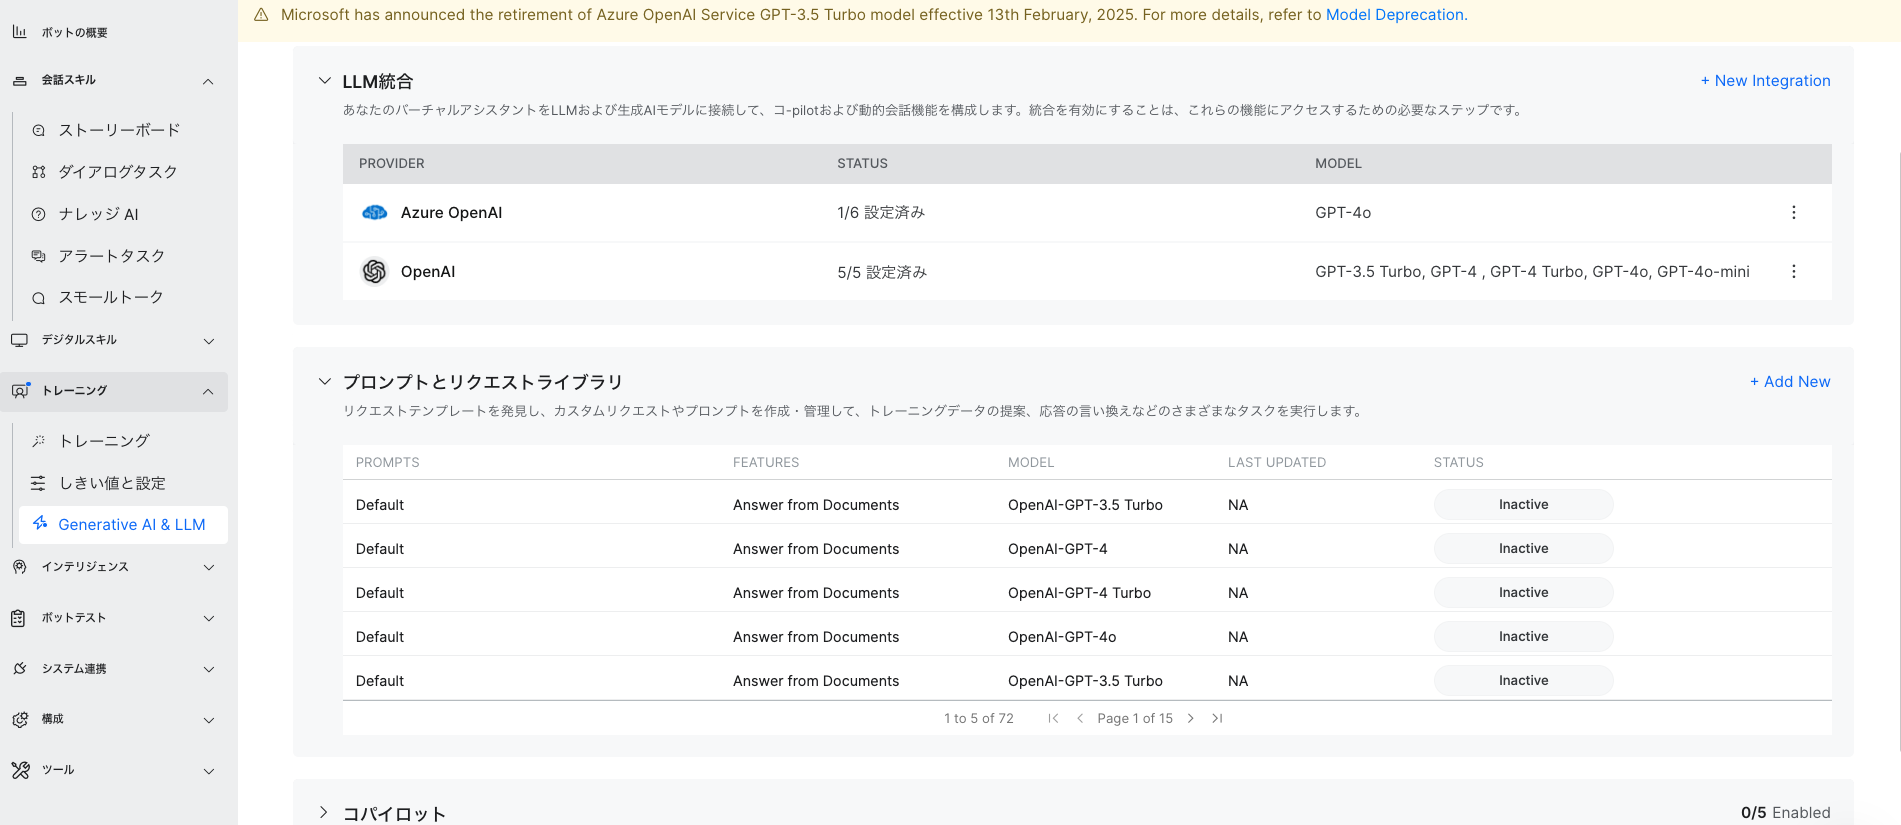
Step 1: プロンプトとリクエストライブラリを開き、右側の「+Add new」ボタンをクリックします。
Step 2: プロンプトの名前(例:「custom prompt」)を入力し、Feature(例:GenAI Node)を選択、さらに「Choose model」からモデル(例:Azure OpenAI)を選択します。

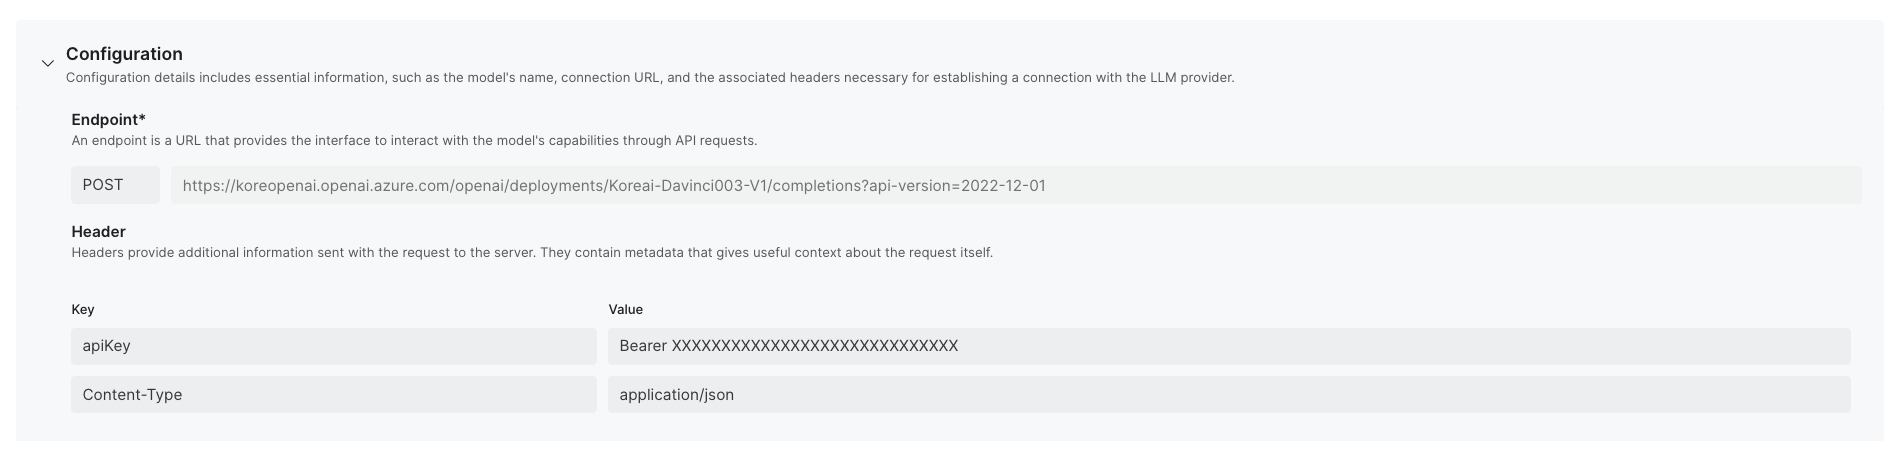
Step 3: Configurationでは設定は不要です。選択したAzure LLMによって設定が上書きされます。「ご注意:カスタムLLMの場合は、Configurationの設定は必要です。」
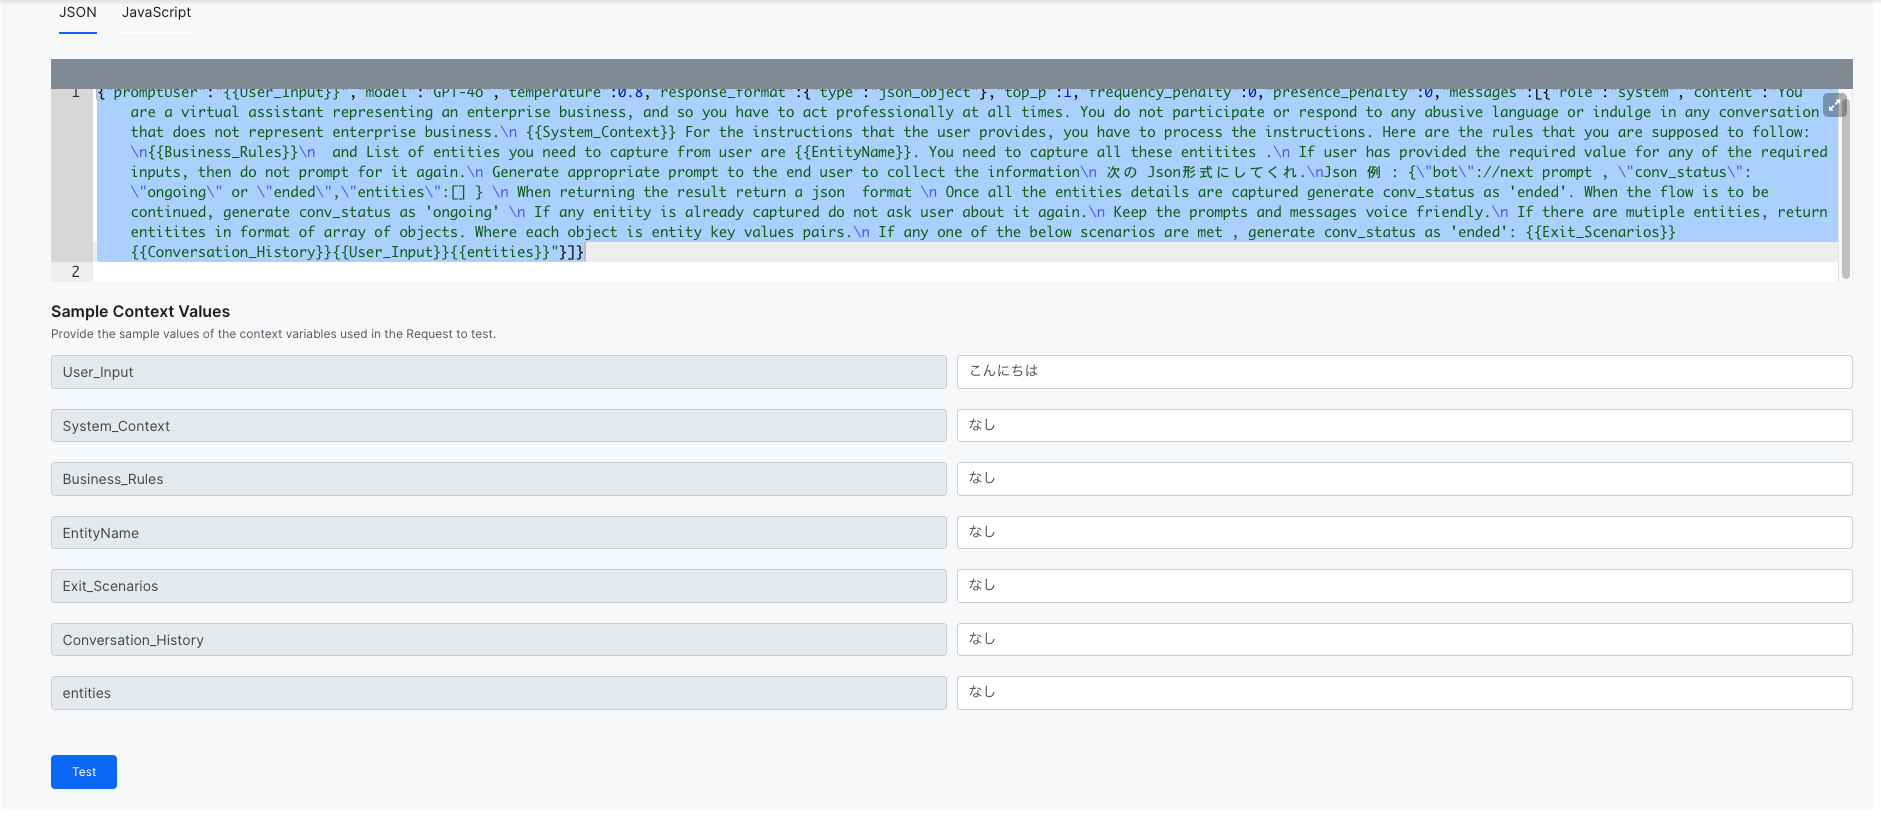
Step 4: Request設定を開き、以下のカスタムプロンプトを設定します。以下ではGPT-4oが設定されていますが、お客様の環境に合わせて使用するモデルをプロンプト内に記載してください。
{"promptUser":"{{User_Input}}","model":"GPT-4o","temperature":0.8,"response_format":{"type":"json_object"},"top_p":1,"frequency_penalty":0,"presence_penalty":0,"messages":[{"role":"system","content":"You are a virtual assistant representing an enterprise business, and so you have to act professionally at all times. You do not participate or respond to any abusive language or indulge in any conversation that does not represent enterprise business.\n {{System_Context}} For the instructions that the user provides, you have to process the instructions. Here are the rules that you are supposed to follow: \n{{Business_Rules}}\n and List of entities you need to capture from user are {{EntityName}}. You need to capture all these entitites .\n If user has provided the required value for any of the required inputs, then do not prompt for it again.\n Generate appropriate prompt to the end user to collect the information\n 次の Json形式にしてくれ.\nJson 例 : {\"bot\"://next prompt , \"conv_status\": \"ongoing\" or \"ended\",\"entities\":[] } \n When returning the result return a json format \n Once all the entities details are captured generate conv_status as 'ended'. When the flow is to be continued, generate conv_status as 'ongoing' \n If any enitity is already captured do not ask user about it again.\n Keep the prompts and messages voice friendly.\n If there are mutiple entities, return entitites in format of array of objects. Where each object is entity key values pairs.\n If any one of the below scenarios are met , generate conv_status as 'ended': {{Exit_Scenarios}} {{Conversation_History}}{{User_Input}}{{entities}}"}]}
Step 5: 上記Step 4のプロンプトをテストするために、以下のように設定してください。
例:User Inputには「こんにちは」、その他は「なし」と入力します。
設定後、「Test」ボタンを押してください。
Step 6: テスト結果は、以下のResponse画面で確認できます。
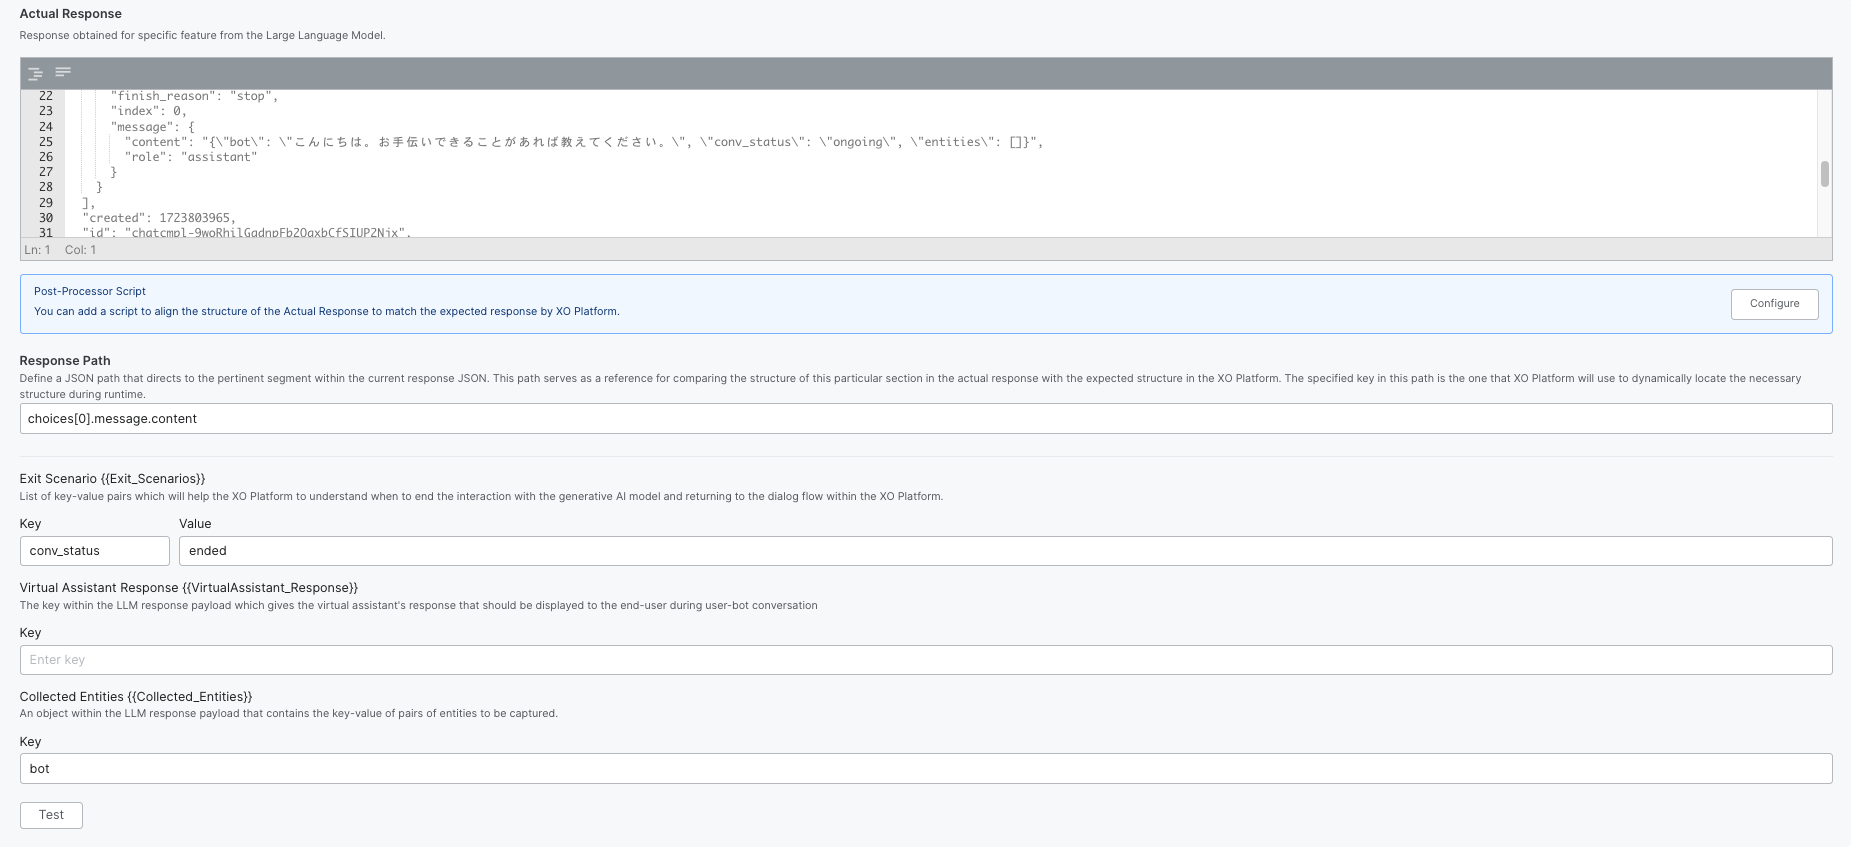
Step 7: 上記Step 5のレスポンスに問題がなければ、「Save」ボタンを押して保存してください。
以上