On the Kore.ai Single Sign-On page, in the Security & Control module of the Bots Admin Console, you can configure Single Sign-On (SSO) authentication for your Kore.ai-managed users.
This article focuses on how to configure Single Sign-On on the Kore.ai Platform through the Okta app.
Configurations on both ends - Kore.ai XO Platform, as well as Okta, is essential. You will need to log on to the Kore.ai platform as an admin (Bot Admin Console). You will also need admin rights on Okta. We recommend that you log on to both simultaneously.
Kore - Step 1
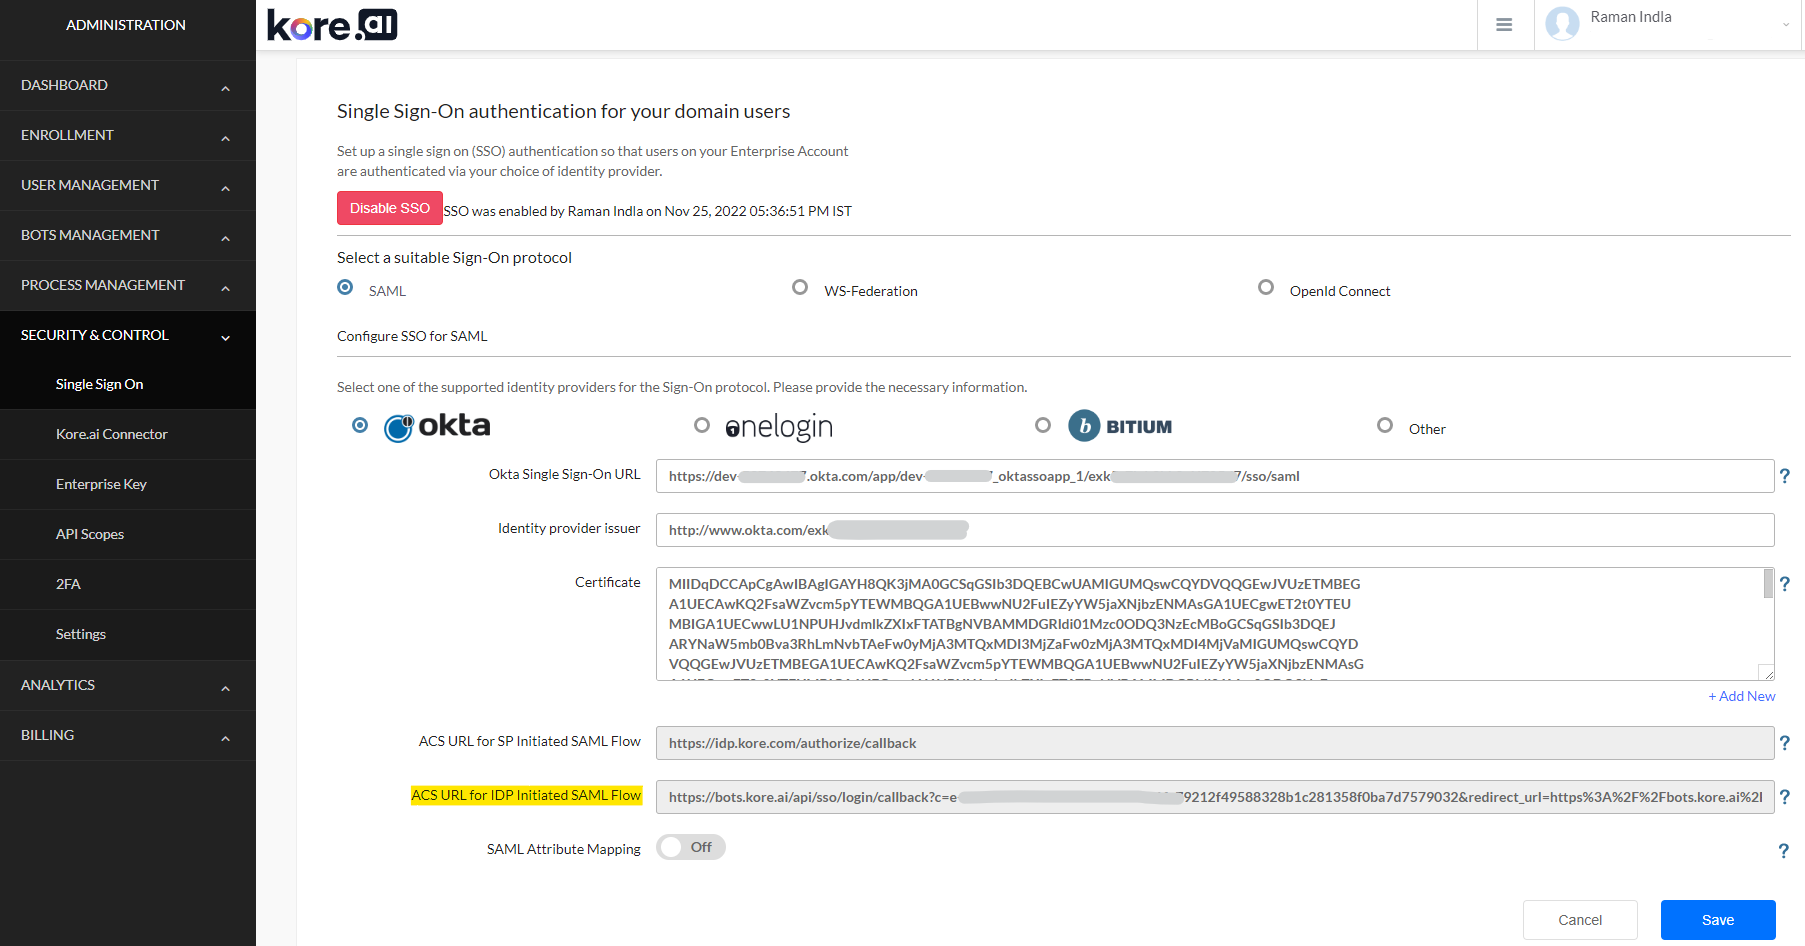
- Log on to Bot Admin Console. Go to Security & Control → Single Sign-on page.
- Enable SSO and choose SAML as sign-on protocol.
- Stay on this page for now.
Okta - Step 1
- Log on to Okta.
- On the Home page, click Admin. The Dashboard page is displayed.
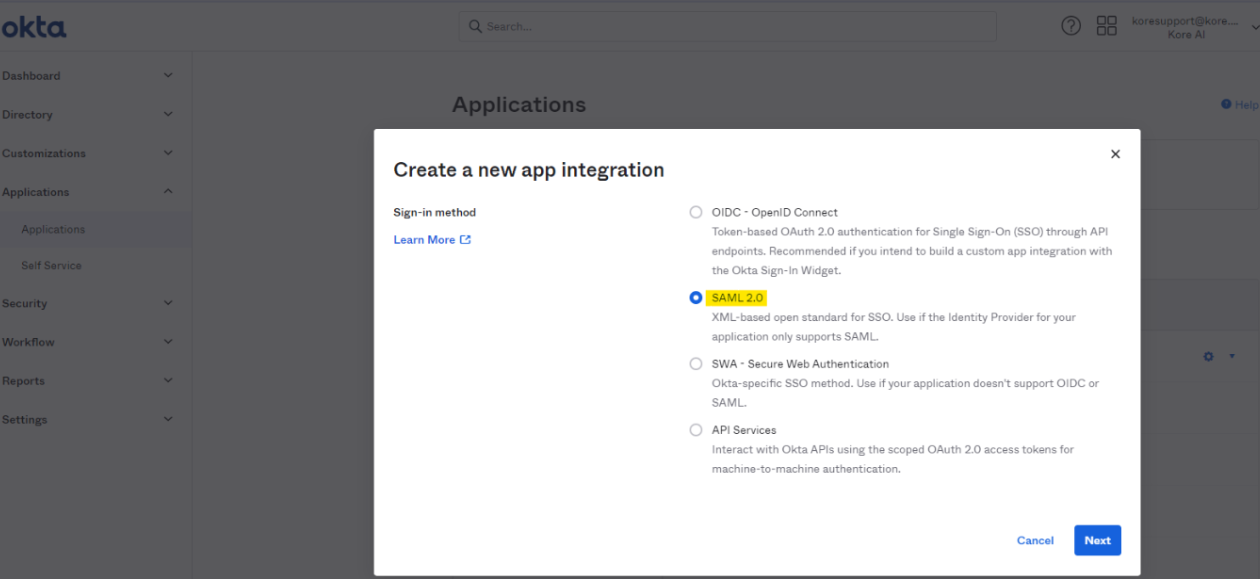
- On the top navigation bar, click Applications.
- Click Create App Inntegration. Select Sign-in-method as SAML 2.0
- In the General settings, provide an App name and click Next.
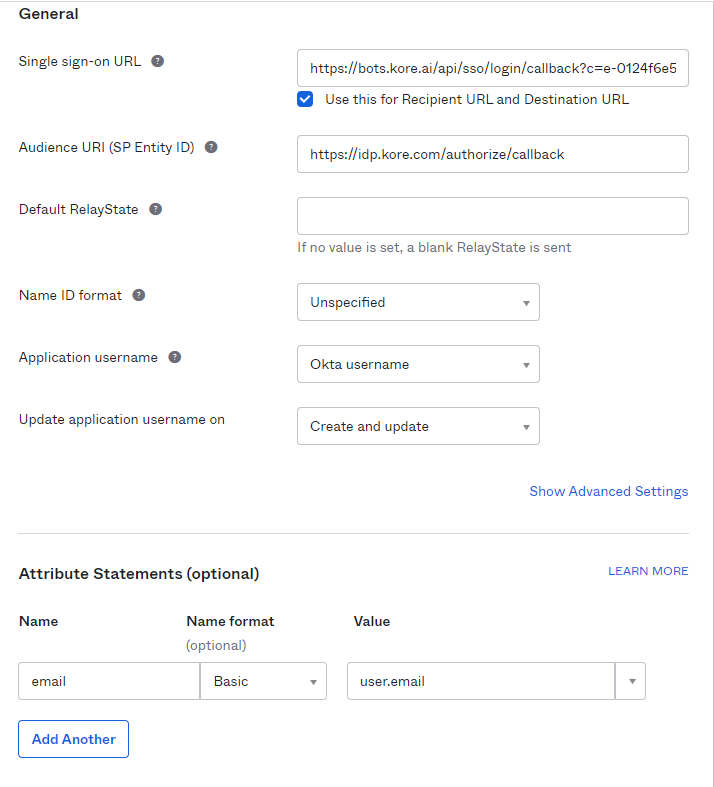
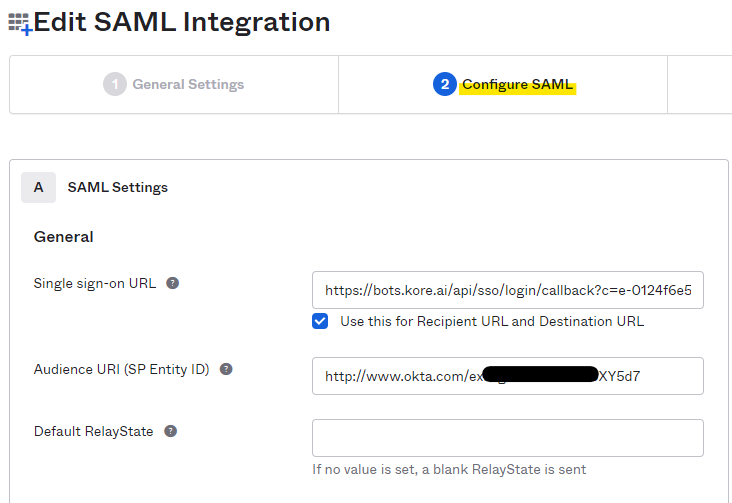
- In Configure SAML, provide the Single SignOn URL. Copy and paste the complete value for ACS URL for IDP Initiated SAML Flow as highlighted and shown above in Kore - Step 1 screenshot.
- In most cases, you may check “User this Recipient URL and Destination URL”. In case you are using internal redirection URLs, please reach out to your internal admin/network teams.
- (This is temporary) Keep the Audience URI field as ACS URL for SP Initiated SAML Flow (https://idp.kore.com/authorize/callback).
- Provide attribute mapping and click next
- Select the options as shown below and Finish.
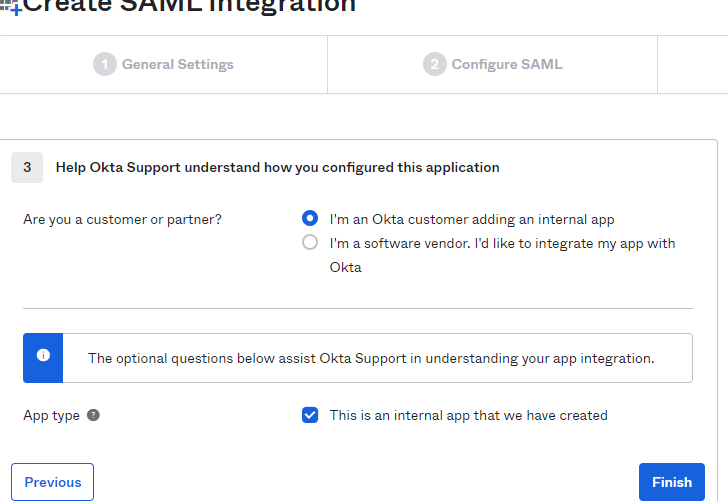
- Note - In case you are choosing ‘I’m a software vendor. I’d like to integrate my app with Okta’ please refer to Okta documentation. This is beyond Kore.ai’s purview.
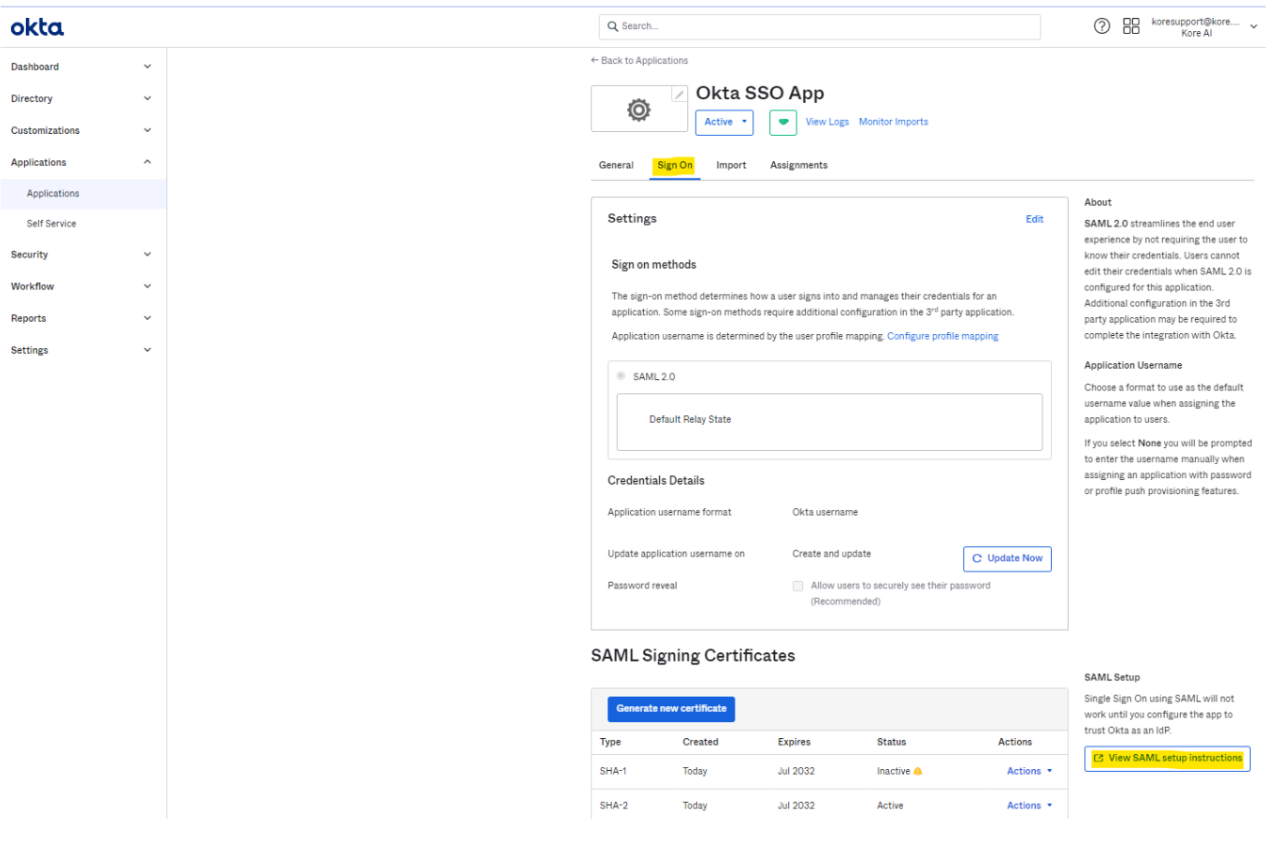
- On Final page click “View SAML setup instructions”.
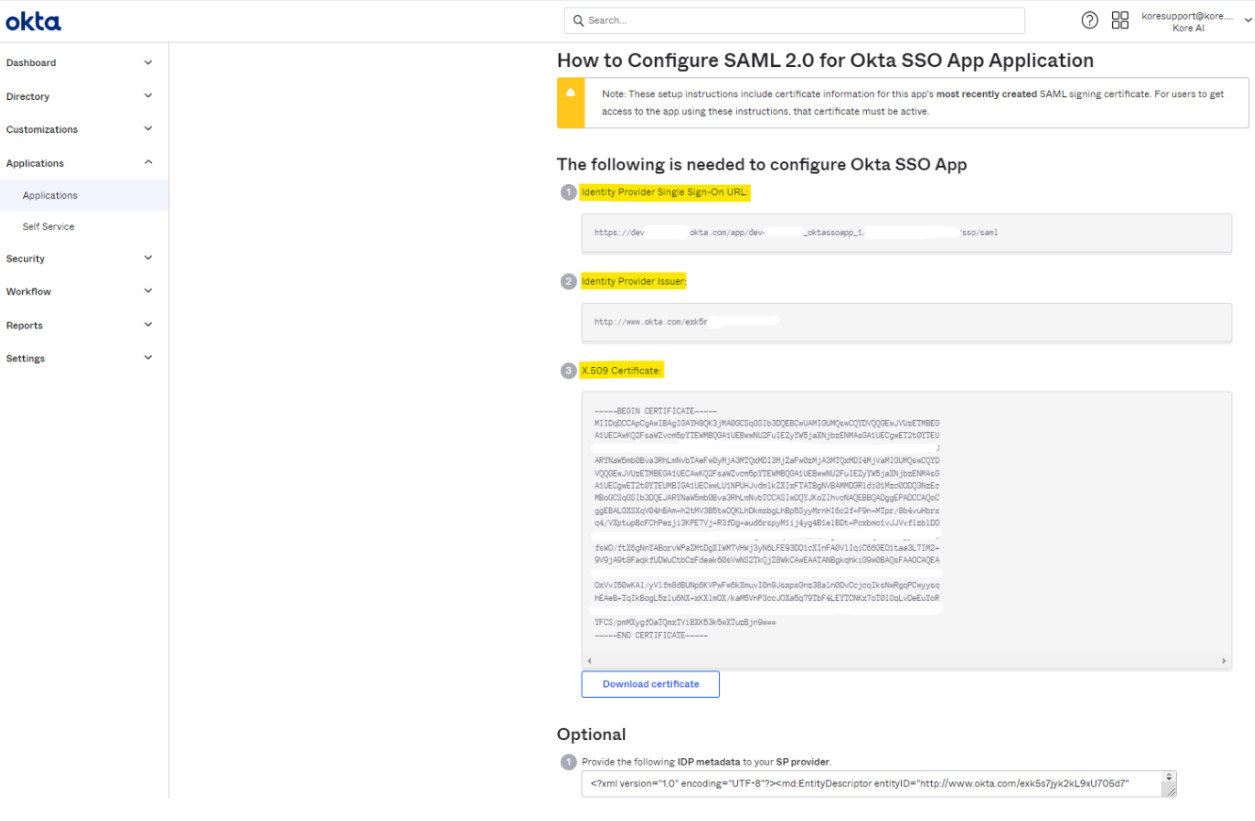
- Now you should be on the below page - ’ How to Configure SAML 2.0 for Okta Kore Application’.
- Copy the ‘Identity Provider Issuer’. You will need to edit the
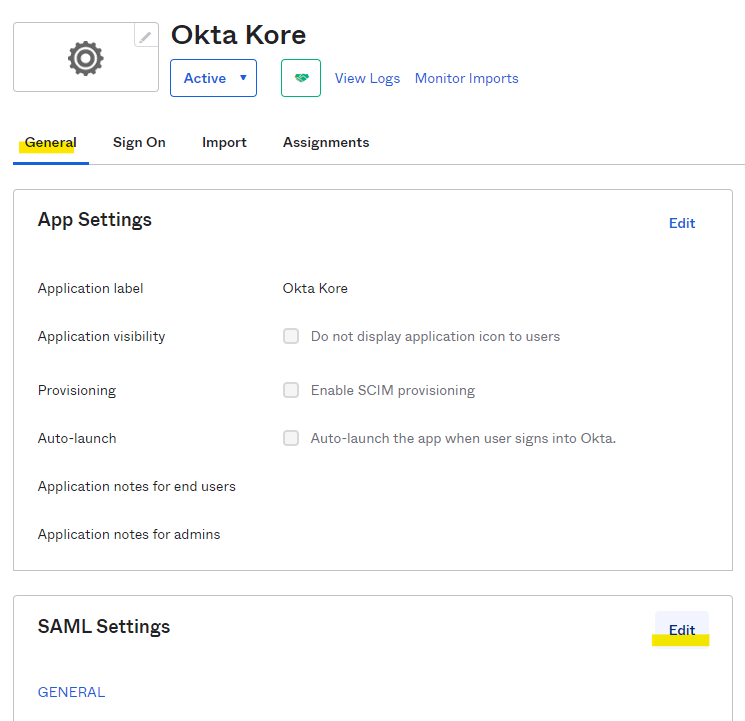
- Go back to the app you created (under the side menu Applications > Applications). Go to the general tab, and edit the SAML settings
- Under the Configure SAML section, edit and replace the ‘Audience URI (SP Entity ID)’ with the ‘Identity Provider Issuer’ value obtained on the ’ How to Configure SAML 2.0 for Okta Kore Application’ page.
- Click Next and Finish to save the changes to the Audience URI.
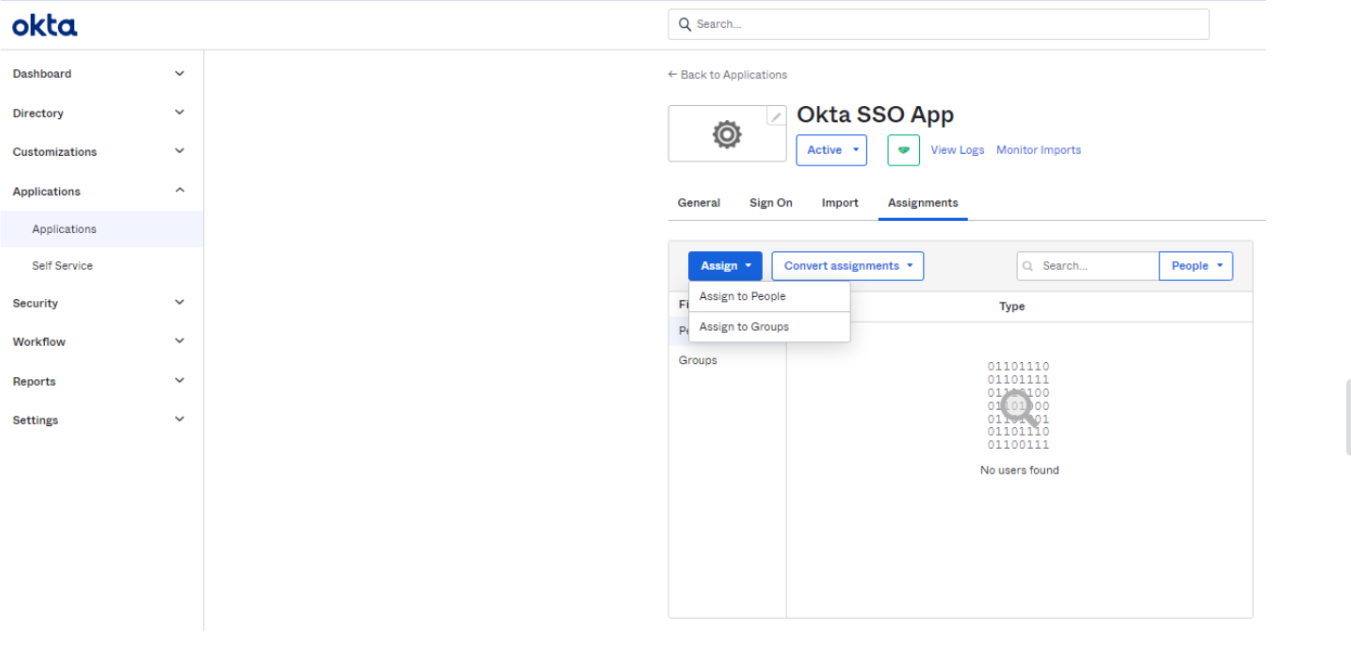
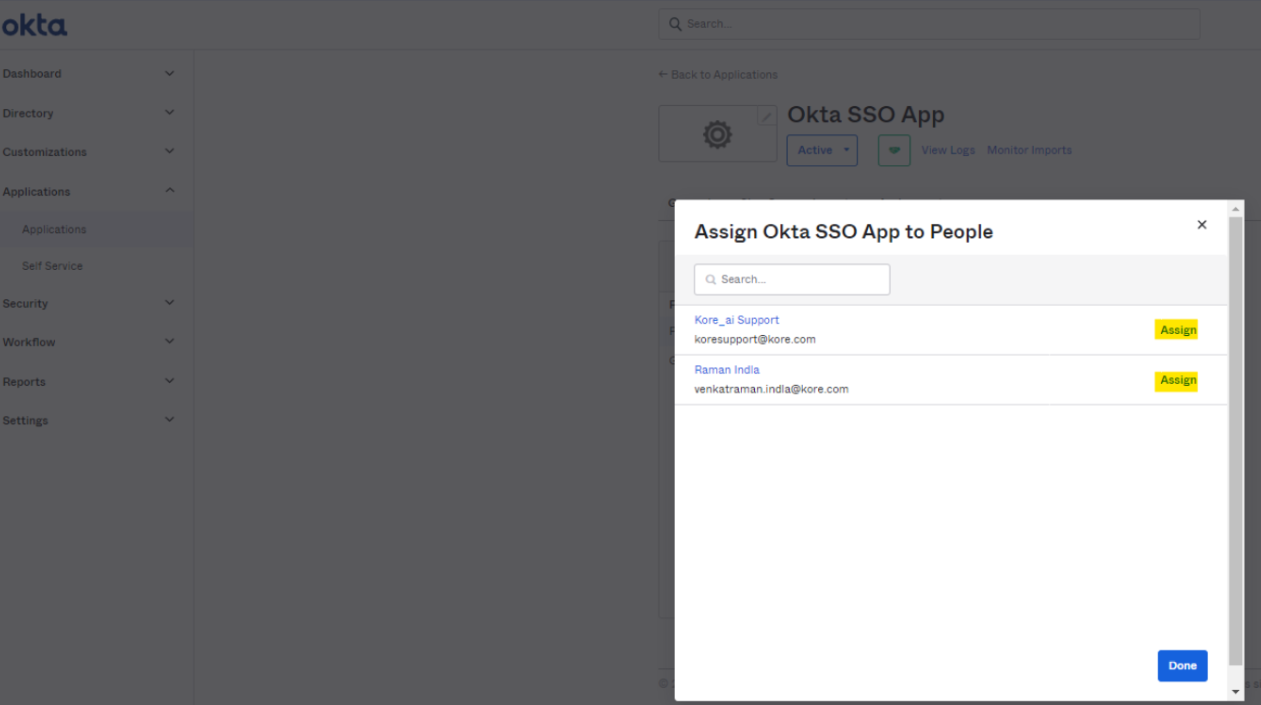
User/Group Assignment to Okta App
- Now go back to Applications and open the configured App and go to Assignment tab. It is important associate the user with same email id in Okta as well as Kore.ai XO Platform.
Assign People:
Assign Groups:
Save and Go Back > Done


Kore - Step 2
- Please refer to the details on ‘How to Configure SAML 2.0 for Okta Kore Application’ page. The details will need to be updated in the SSO Configuration of Bot Admin Console of Kore.ai platform.
- Single SignOn URL = ACS URL for IDP Initiated SAML Flow field from Platform Bot Admin Console.
- Kore.ai Identity provider issuer = Okta ‘Identity Provider Issuer’.
- In the Okta X.509 Certificate field, copy the certificate data, and then paste the data into the Kore.ai Certificate text box.
Note: Only data after the —–BEGIN CERTIFICATE—– header and before the —–END CERTIFICATE—- footer should be copied and pasted into Kore.ai.
- In Kore.ai, click Save. This will complete the integration of Okta login.
Try logging into Bot Builder, it should go via SSO and ask you for Domain Credentials for the first time.
Same with Bot Admin Console:
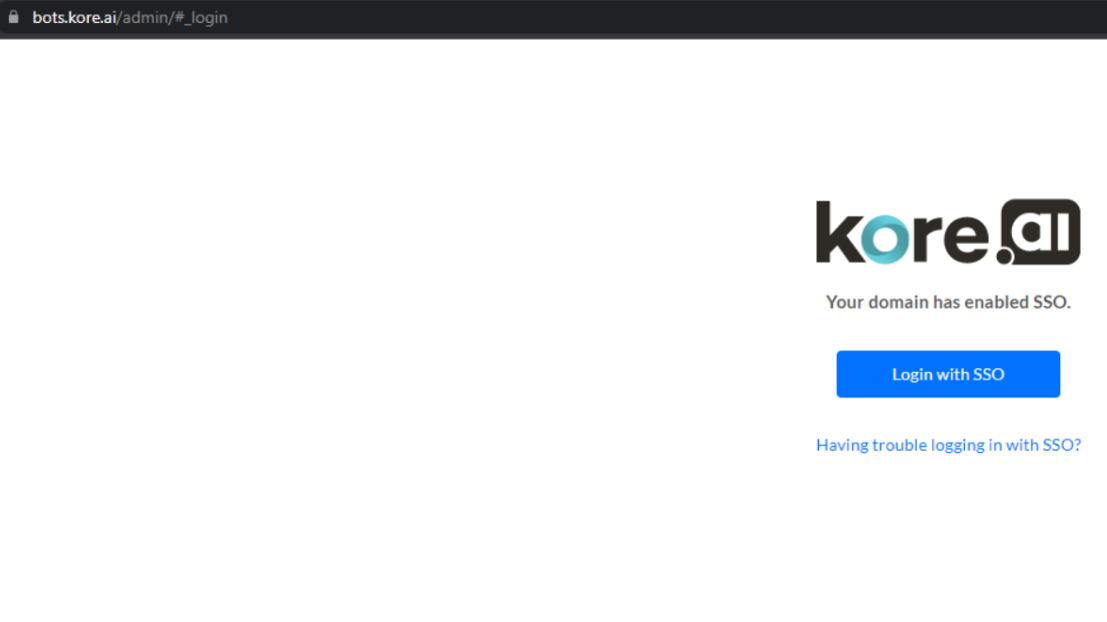
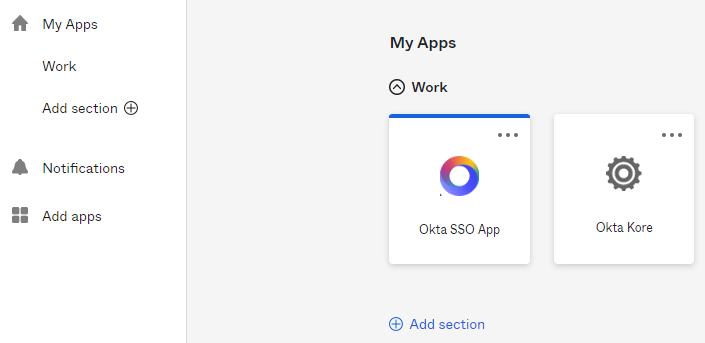
(Optional) You should also be able to click the app from Okta User Dashboard and Sign in to Kore.ai Botbuilder.
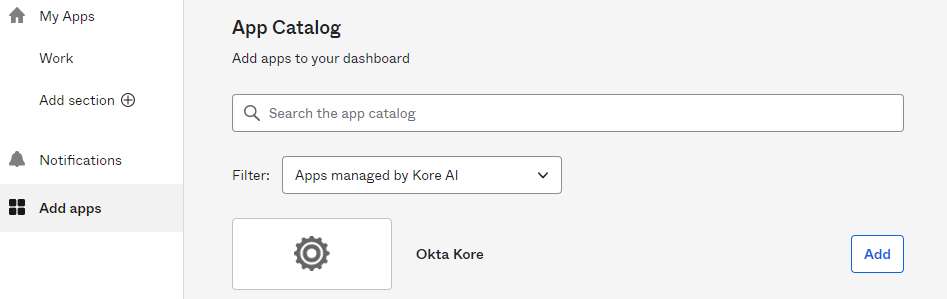
Note - To see the app in the dashboard, you (admin) will need to approve the app (Subject to your enterprise policy/administrative processes).
And then you need to add the app to the user dashboard.
Okta users see it in their apps dashboard.
Credits: @Raman