Problem statement
I want to use Kore.ai BotKit to test agent transfer but I do not have any third-party agent transfer software handy or available right now. How do I do it?
Solution
Kore.ai BotKit is a Node.js based middleware that can tap into the user-bot conversation and help with agent transfer for the third-party contact center/chat platforms that are not supported out of the box on the Kore.ai Platform. At times, when third-party software is not available BotKit can be used to simulate agent conversation and respond with some dummy text/messages. The following example will explain how to achieve this.
Note - This is just an example for development purposes and uses ngrok as a reverse proxy just to expose the BotKit service that is running on the developer’s local machine. We do not in any way endorse ngrok for any production purpose. It is just a tool to allow a local service (like BotKit) running on a given port to be exposed to the internet so that Platforms like Kore.ai can reach the service. The same can be achieved by using other means like deploying the service on AWS/IIS and allowing the service to be reachable from the internet.
Set up
Kore.ai Platform bot/VA
- Create a VA/bot on Kore.ai in your workspace.
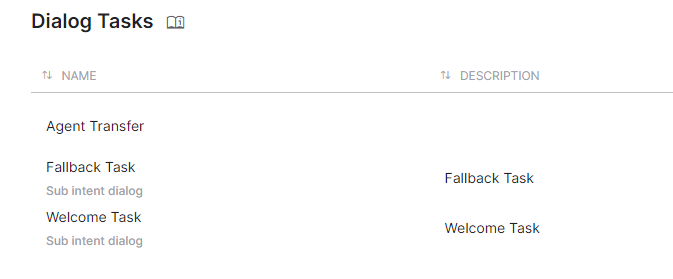
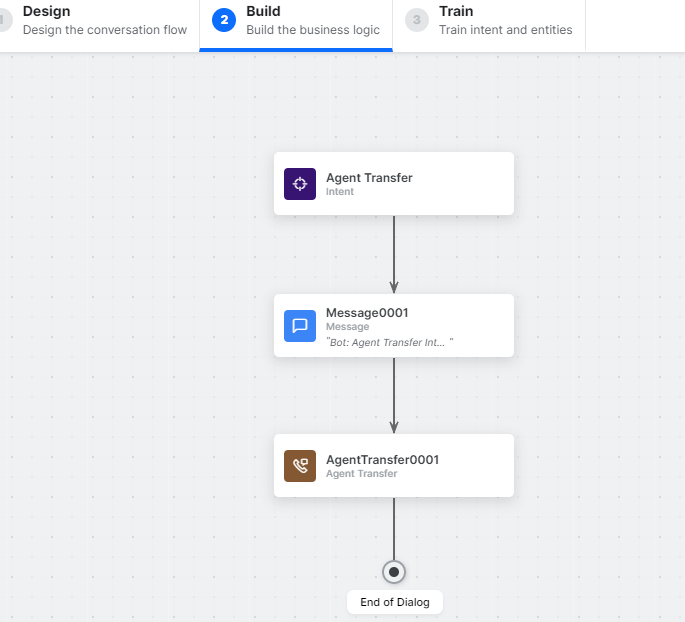
- Create a dialog task that will use an agent transfer node.
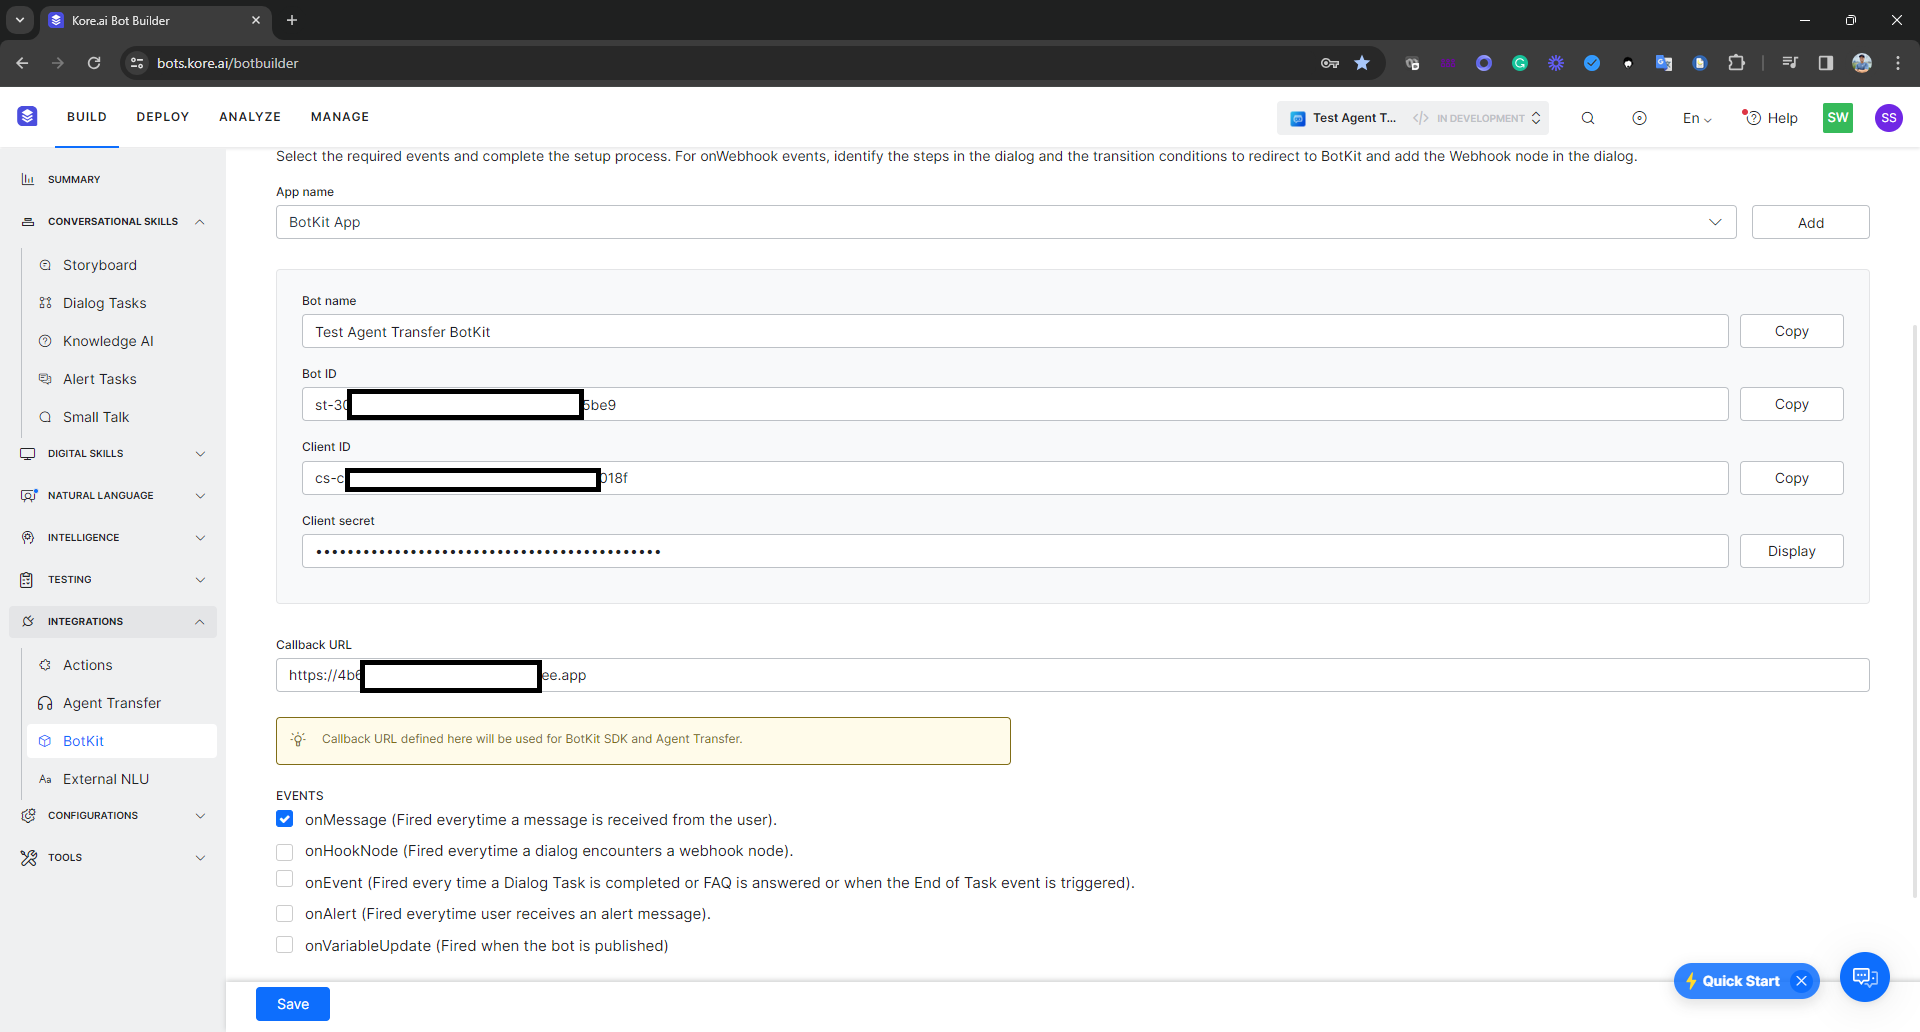
- Under Integrations → BotKit, create an app for BotKit. In this example, the HS256 JWT algorithm was used and JTI and JWE were not enforced.
- The callback URL is the ngrok URL. If you are already have BotKit configured, and running ngrok to expose the BotKit port, use the forwarding URL. For details see the below steps for ngrok under “BotKit ser-up on the local machine section”
- Enable onMessage event and Save.
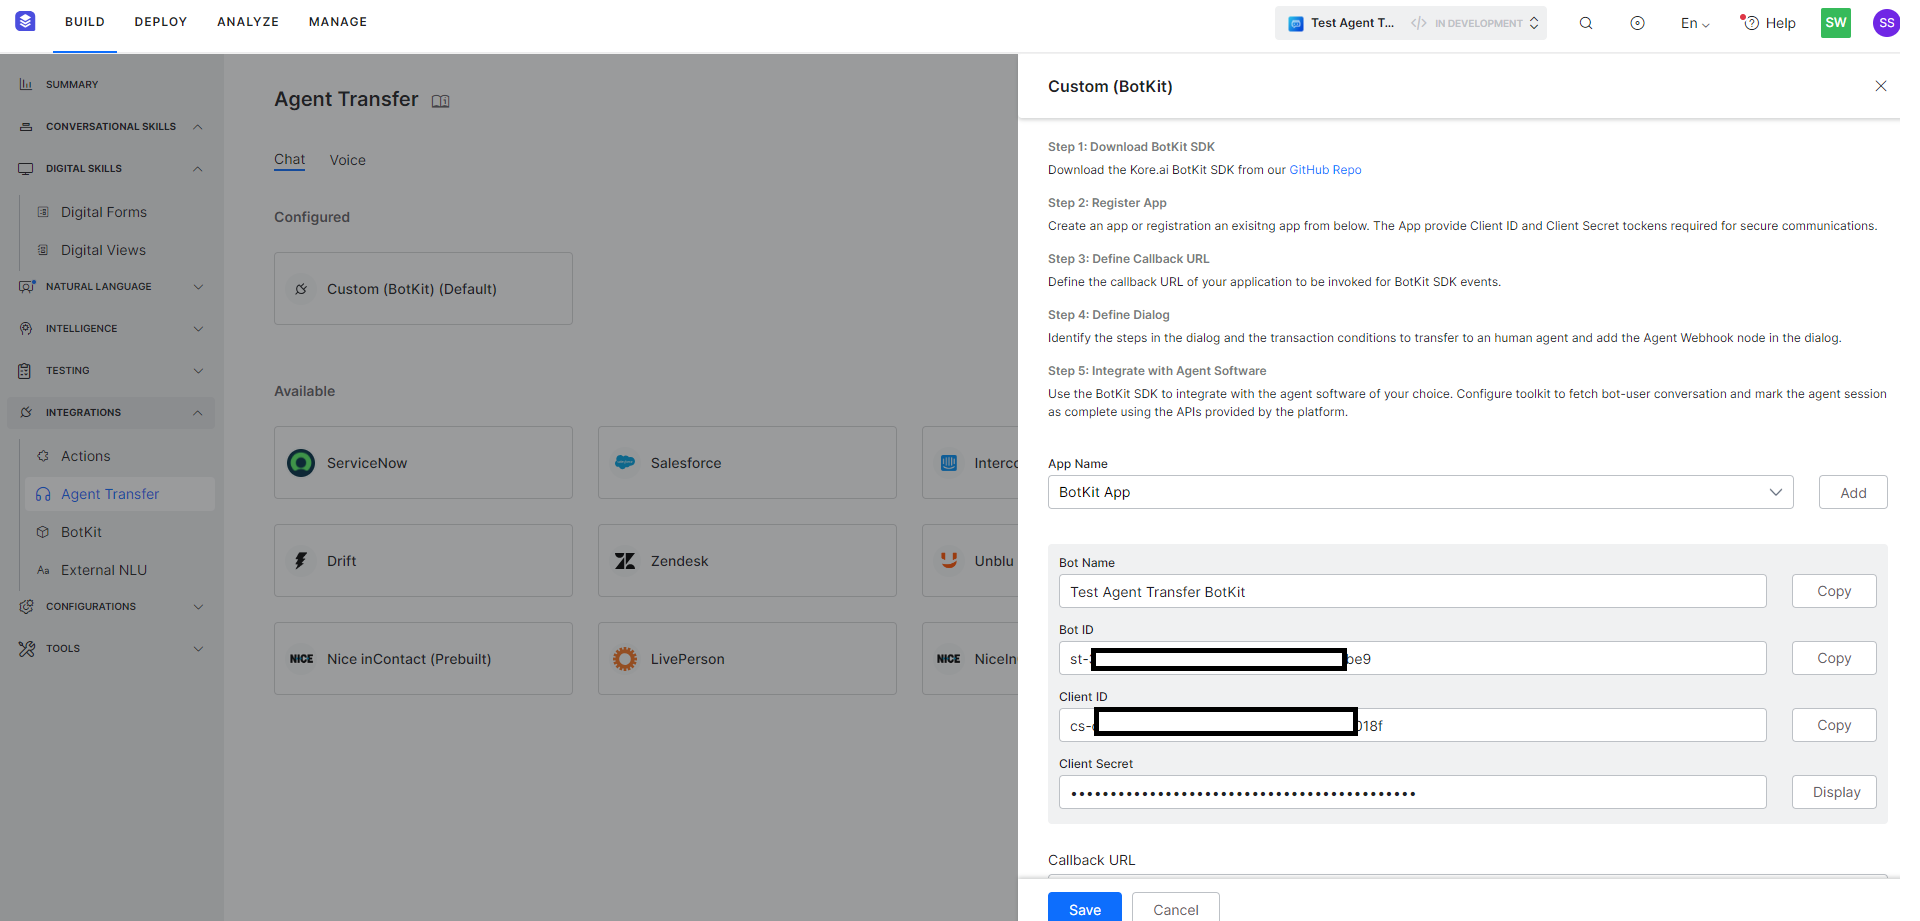
- Under Integrations → Agent Transfer configure Custom (BotKit) and select the same app. Let the callback URL be the same. It will be automatically picked up from the BotKit setup.

BotKit set-up on the local machine
- Proper Node.js (Minimum version is v10 but preferred is the latest) and npm installation is a pre-requisite. In this example, ngrok is also used. Please refer to ngrok’s documentation on how to set it up.
- Download the latest BotKit from GitHub - Koredotcom/BotKit
- Unzip the package into a directory of your choice.
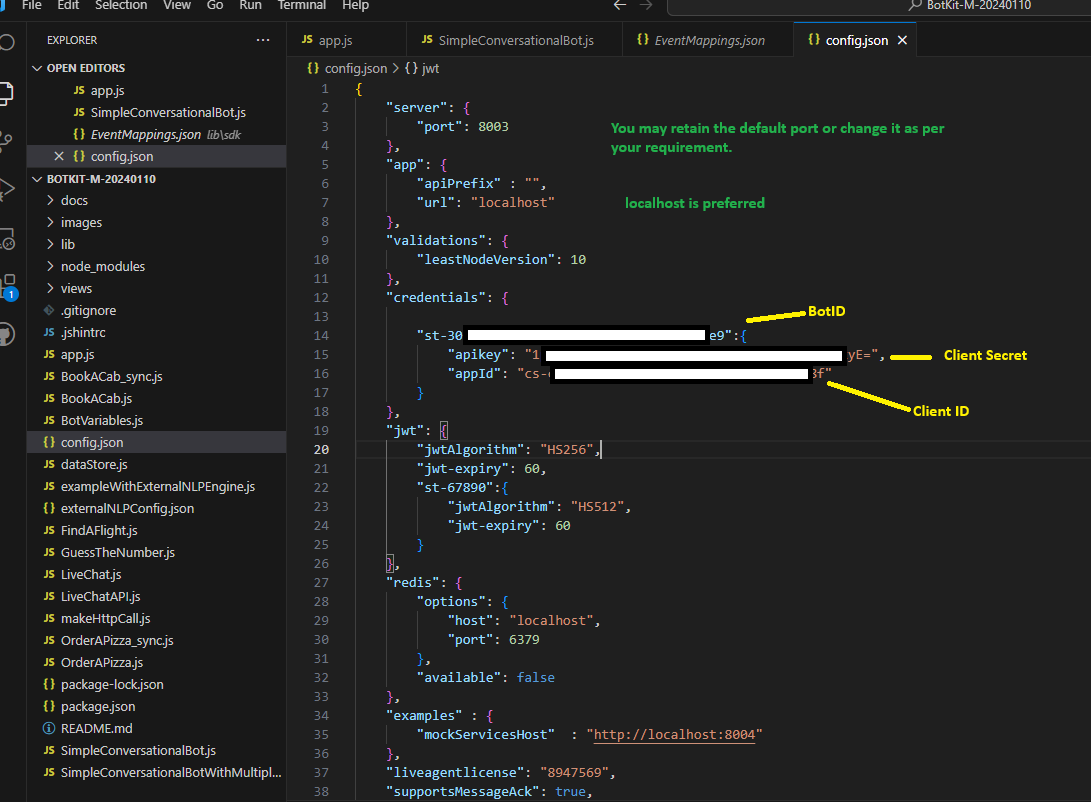
- Set up the config.json
- Configure the app.js. Comment out all the
sdk.registerBotstatements but one. You may have your own js file.
- Configure the file used in the
sdk.registerBotstatement in theapp.js. Use your bot ID and name.
var botId = "st-3XXXXXXXXXXXXXXXXX5be9";
var botName = "Test Agent Transfer BotKit";
var sdk = require("./lib/sdk");
module.exports = {
botId: botId,
botName: botName,
on_user_message: function (requestId, data, callback) {
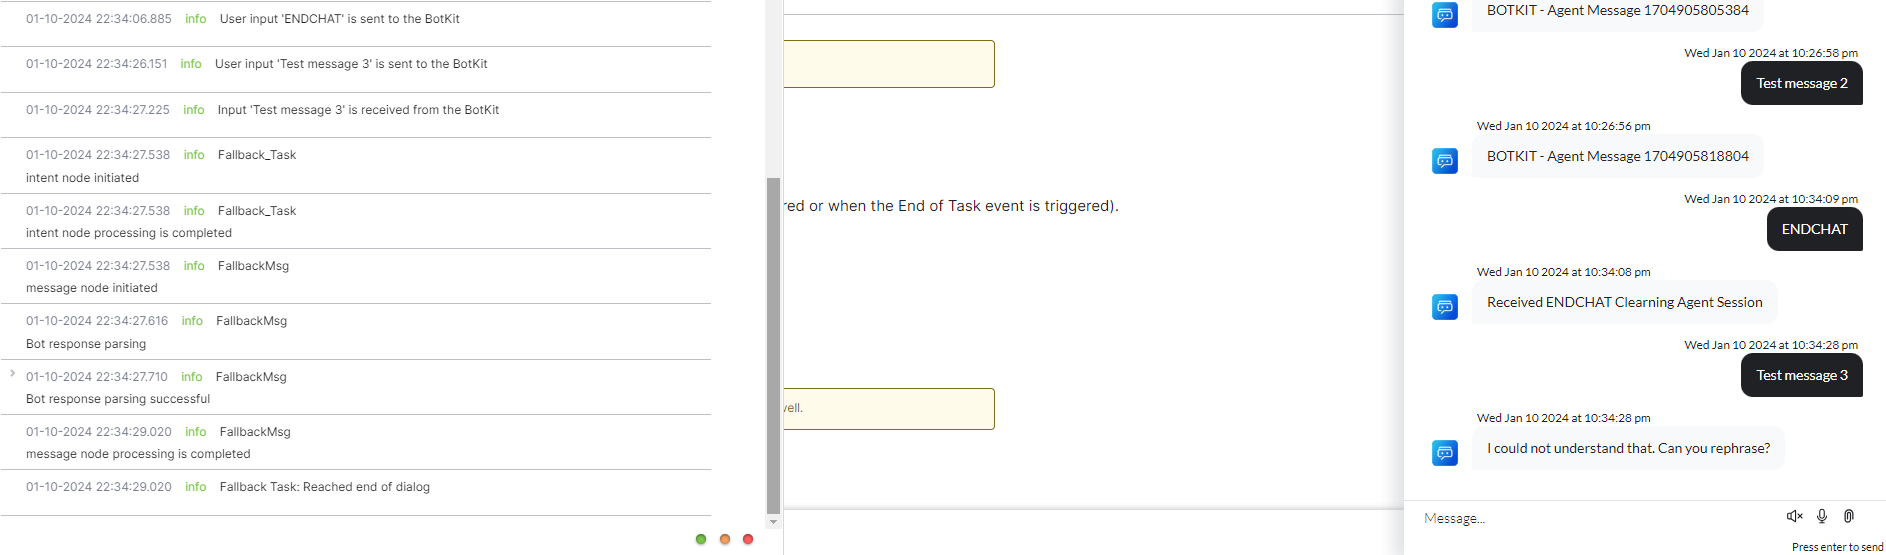
if (data.message === "ENDCHAT") {
sdk.clearAgentSession(data, callback);
data.message = "Received ENDCHAT Clearning Agent Session";
return sdk.sendUserMessage(data, callback);
} else if (!data.agent_transfer) {
//Forward the message to bot
return sdk.sendBotMessage(data, callback);
} else {
data.message = "BOTKIT - Agent Message " + Date.now();
return sdk.sendUserMessage(data, callback);
}
},
on_bot_message: function (requestId, data, callback) {
return sdk.sendUserMessage(data, callback);
},
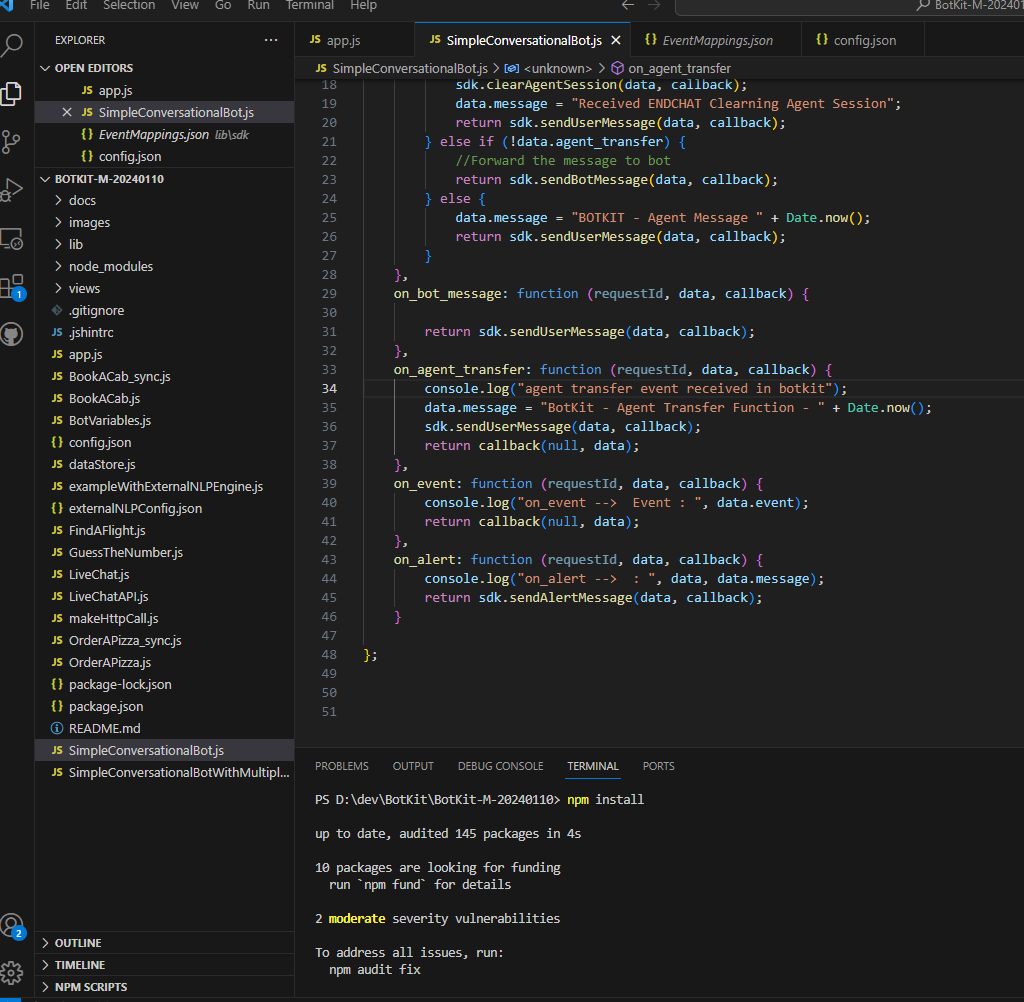
on_agent_transfer: function (requestId, data, callback) {
console.log("agent transfer event received in botkit");
data.message = "BotKit - Agent Transfer Function - " + Date.now();
sdk.sendUserMessage(data, callback);
return callback(null, data);
},
on_event: function (requestId, data, callback) {
console.log("on_event --> Event : ", data.event);
return callback(null, data);
},
on_alert: function (requestId, data, callback) {
console.log("on_alert --> : ", data, data.message);
return sdk.sendAlertMessage(data, callback);
}
};
- At the terminal, run
npm install
- At the terminal start the BotKit service →
node app.js

- On another terminal instance, start ngrok to expose the port that the BotKit service is running on. In this case, it is 8003, so the command should be
ngrok http 8003
- Note the forwarding URL. This is the callback URL to be set up on Kore.ai Platform’s Integrations → BotKit configuration.

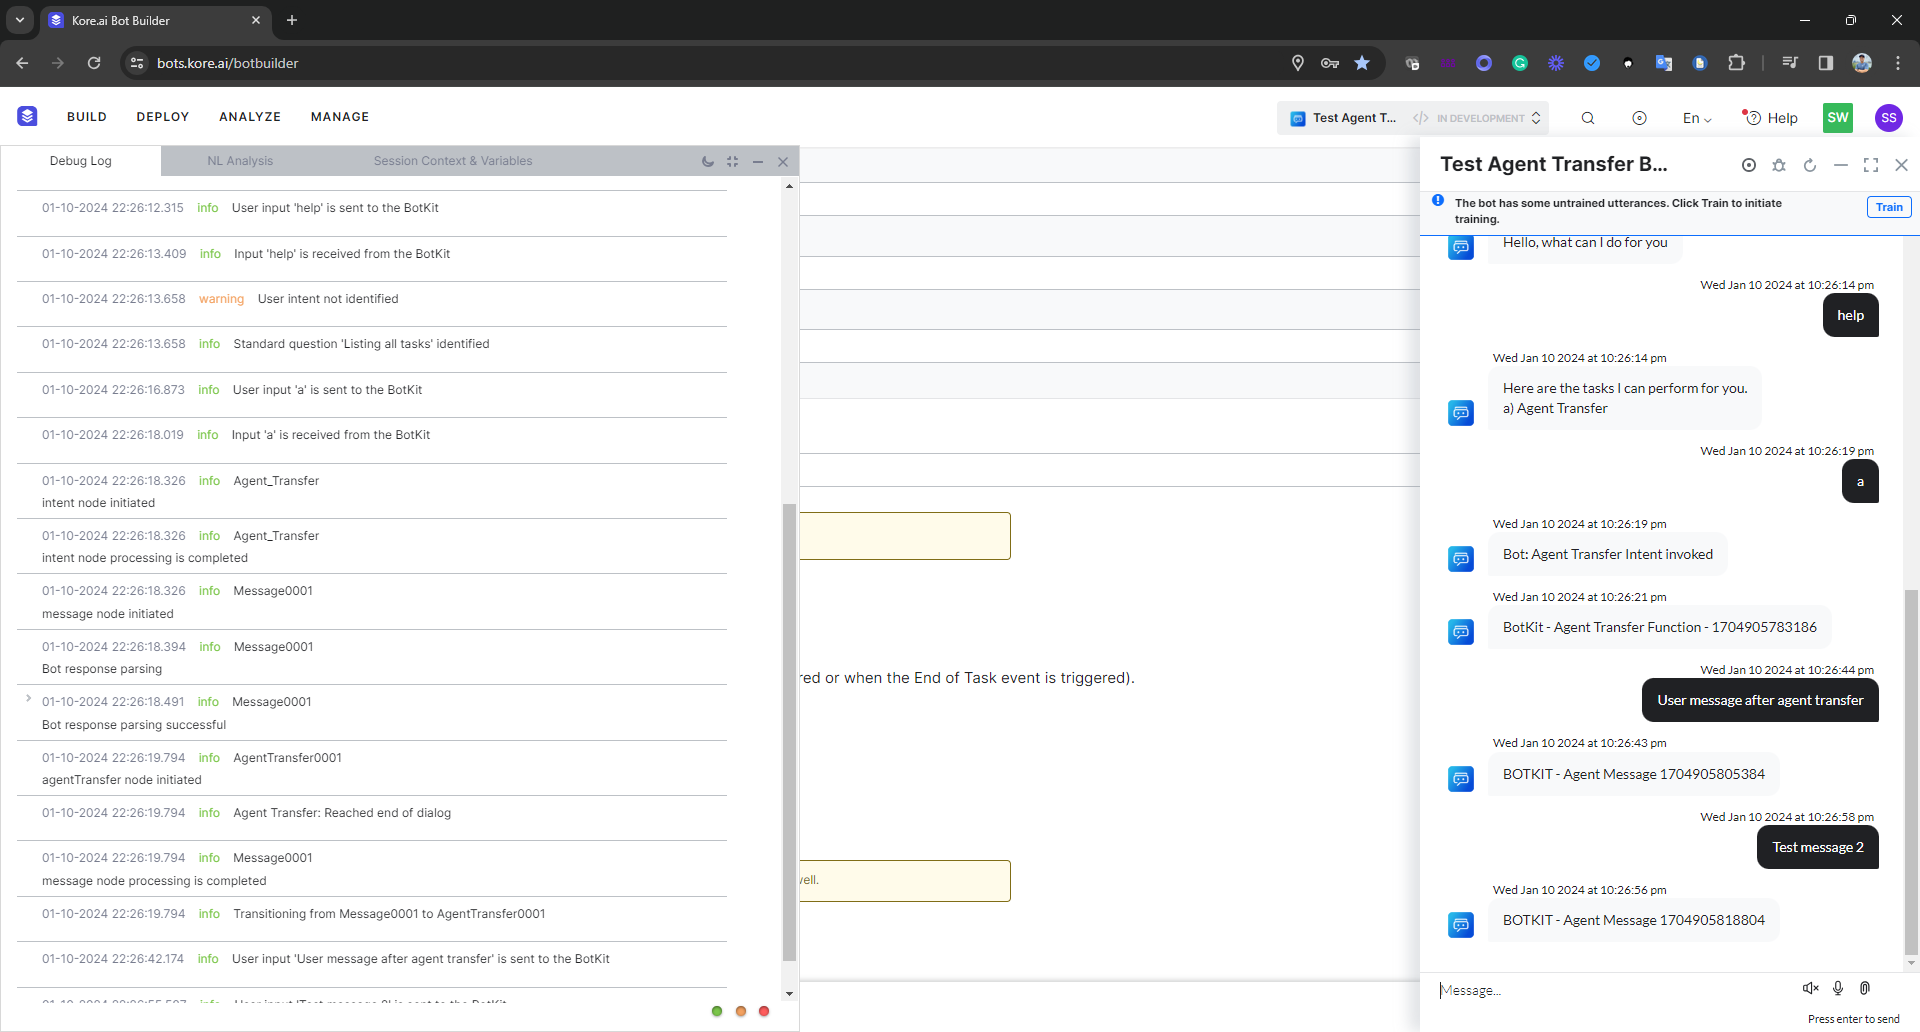
Testing the solution
- After ensuring all the above steps are correctly done, ngrok is running and its forwarding URL has been set up as the callback URL under Kore.ai → Integrations → BotKit configuration and it is saved, talk to the bot.
- Open the debug log to see the details of the Bot task execution.
- Type the utterance that will invoke the agent transfer task. Or else use “help” and choose the option for Agent Transfer. Note that after successful agent transfer, the BotKit will act as a pseudo agent and mimic agent response almost immediately after any user utterance.
- In the above code example, a kill-switch utterance “ENDCHAT” is being used. Use it to clear the agent session and return to the Bot (next user utterances will be handled by the Bot until the next agent transfer event).
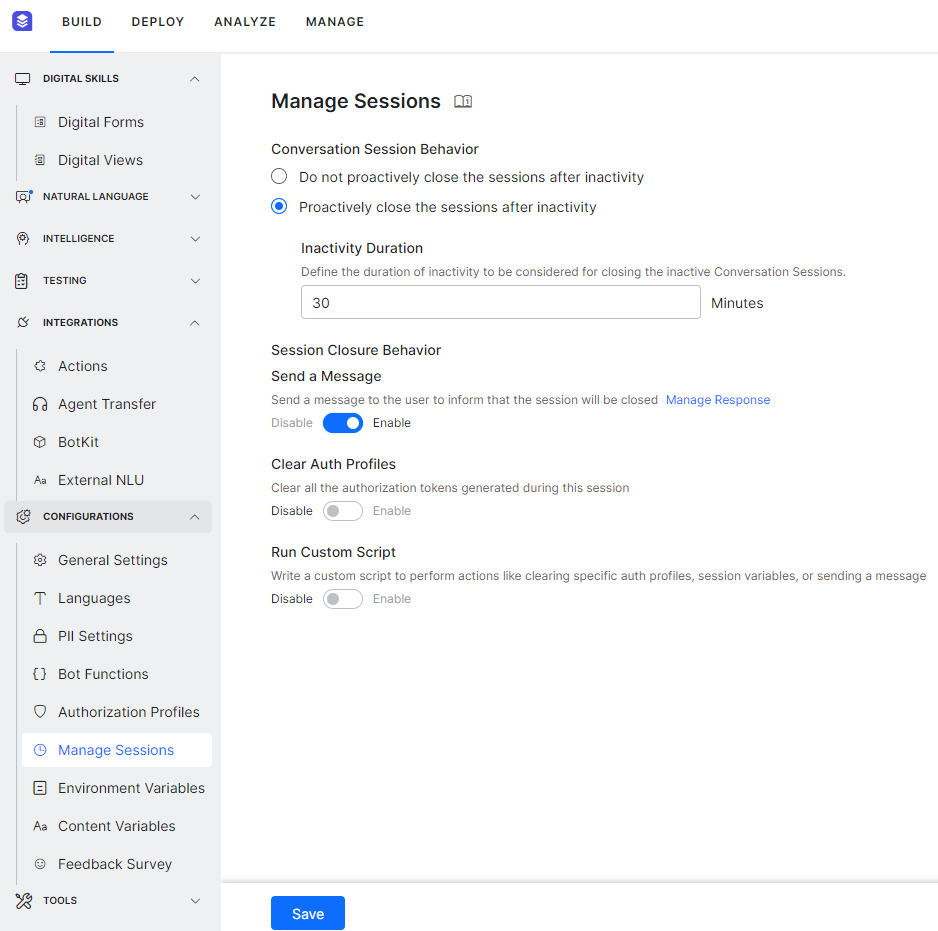
- Note
The user → agent session has an inactivity timeout of 15 minutes. This means if there is no message from the user or the agent for 15 minutes, the agent session will be cleared by default and the next message from the user will be answered by the bot. This is at a server/Platform instance level and cannot be changed at the moment (For an on-premise installation, this can be changed). This is different from the Manage Session Timeout option in the bot. It is for user → Bot conversation inactivity timeout and can be set as per the requirement. The default setting for this too is 15 minutes so it is easy to get confused. You may increase this to 30 minutes for testing purposes.